Create Perfect Keyword Ranking Reports with Rank Tracker
Meet SEO reports that are all you wish they were!
Looking for a tool to create your perfect SEO reports with all the data you need? With SEO PowerSuite's new reports, you have the final say. The tools' reporting functionality lets you take full charge of the data you're reporting on and the way it's presented. The brand new drag-and-drop reports are out today in Rank Tracker, and we can't wait for you to test-drive these customizables!
Build your SEO reports with all the keyword data you need...
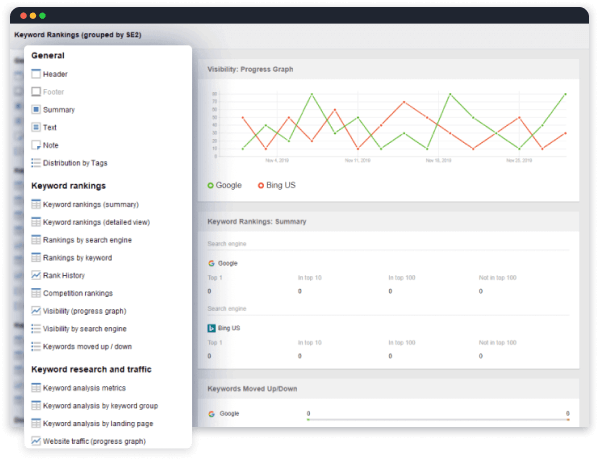
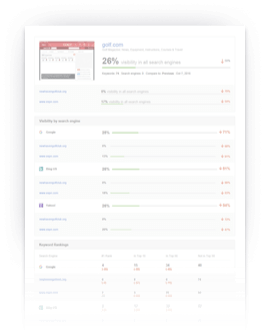
Now you have full control over the data to be presented in your keyword ranking reports. While creating your search engine rankings report, decide exactly which modules, ranking stats, and SEO metrics you'll be including in it! Use our ready-made templates with your rankings data already loaded in, edit them, or create an entirely new report from scratch, adding and modifying widgets — and deliver SEO ranking reports your clients will love.
And customize your reports to give them a branded look!
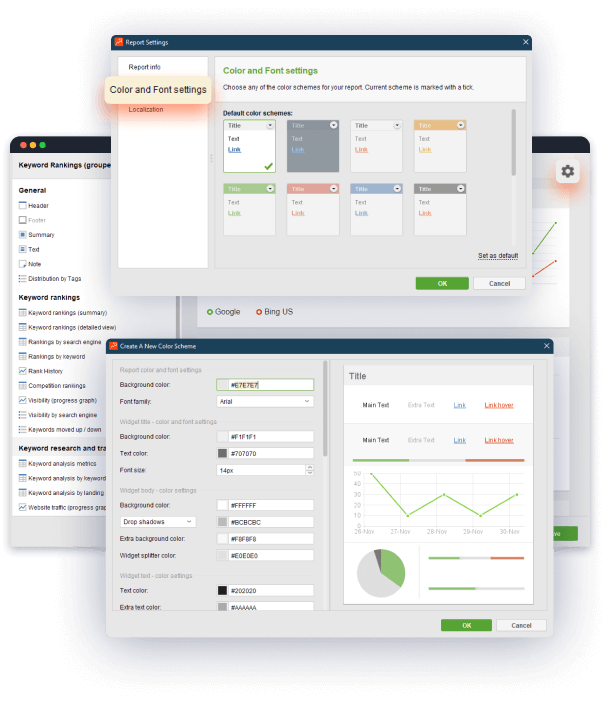
With the customization module offered, you can adjust the look and feel of your keyword ranking report in any way you want. Select whatever elements you feel best to create a form appropriate for your work, adjust color schemes, and move the structural elements around freely.
At any point, if you feel like you aren't loving the look of your report, you can just edit them and make them into a bona fide piece of informational art!
To make your keyword ranking report an even more informative read, you can add notes and comments to go along with any ranking report, explaining certain statistics.
Don't forget to turn to our HTML markup available for notes and comments to enhance your writing with boldings, cursives, lists, etc. Add explanations and clarifications next to certain statistics, spikes, and drops.
Keyword ranking reports for over 550 local search engines.
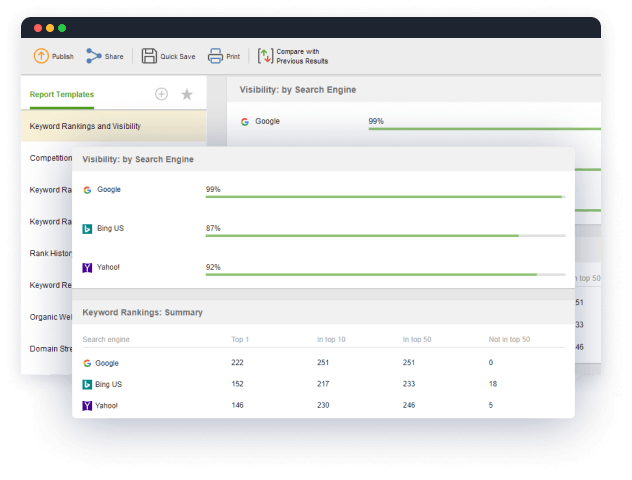
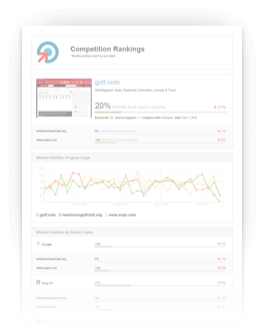
Besides the default Google SEO ranking tool, you can build your position report to check out how your SEO stats are doing in any other search engine or platform (Bing, Yahoo, YouTube, Amazon, etc.) and any of its local varieties. Get the top rankings report and visibility of the website and all its keywords for each search engine. Use it to create a comprehensive analysis of how well you're doing in search engine rankings.
Tap into mobile SERP rankings.
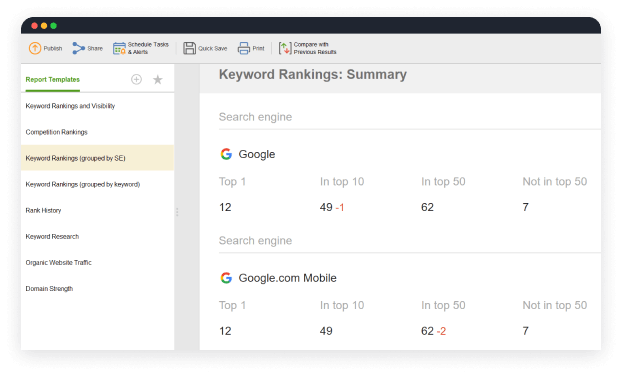
Compare your mobile and desktop ranking results and get reports of your successes in each type of search. Since Google keyword ranking has switched to the mobile-first indexing, your priorities should definitely include mobile versions of your web pages. With our SEO reporting tool, you'll be able to craft reports specifically about your stats in mobile vs desktop search.
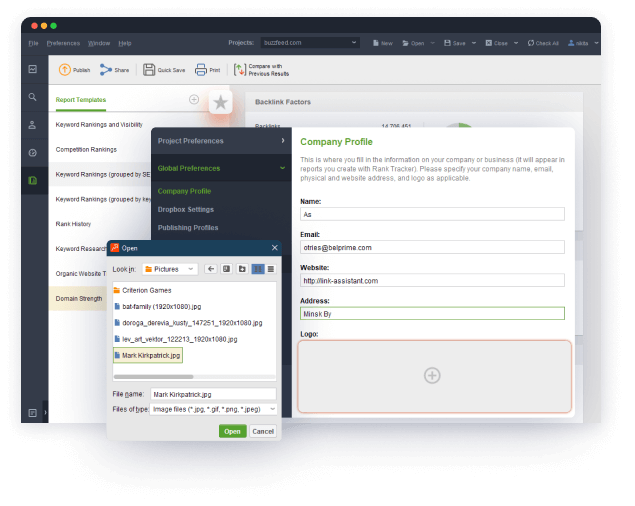
Use White Label feature for SEO reporting.
Rank Tracker gives you an opportunity to make white-label reports! Any company or SEO agency can now add their logo to reports to make them look really professional. Add your logo and company information, apply unique color schemes to give a branded look to the ranking reports. The feature is supported to back your enterprise with SEO outsource or private label services.

Deliver ranking reports the way you prefer!
You can save your beautiful white label reports in PDF as well as in HTML. Also, you can immediately print them out with a single click, publish them to a website, or send them via email.
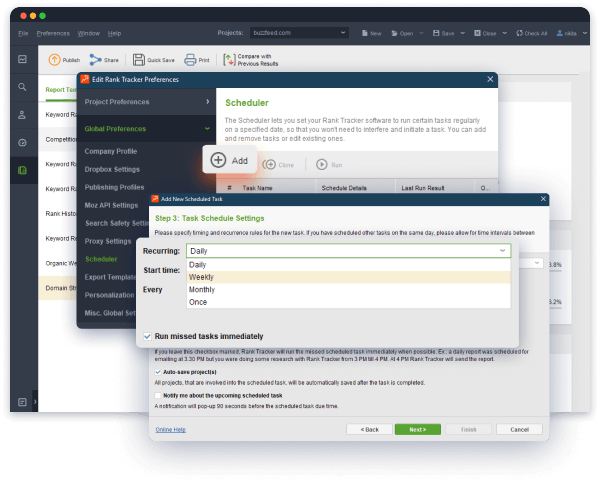
Schedule your reports for automated delivery to SEO clients!
Schedule reporting and get an update on your vital SEO stats every day, week or month! You can also set up reporting so that your clients/marketing team members receive their scheduled rankings reports on time, without having to worry about it!
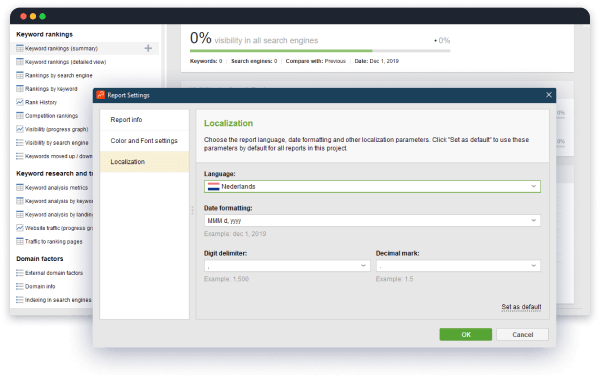
Localize your keyword reports immediately.
Instantly translate your SEO reports into other languages (English, French, German, Russian, and Spanish supported already — and more coming!) — or create custom localizations yourself for the ones that aren't supported yet.
Create an unlimited number of SEO reports!
The most salient feature of our SEO tools is that we impose no limits on our clients! So we offer an unlimited number of reports for you to craft. You can create any number of keyword reports to keep your affiliates, team members, and potential clients always up to date.
Enjoy your SEO with custom automated keyword ranking reports!
SEO PowerSuite's reports are
responsively designed — so they are equally good-looking and easy to
navigate for anybody, from a small business owner, to professionals working at SEO agencies.
Your rankings reports will be fun and easy to read on any device, including
desktops, laptops, tablets, and smartphones!

Stop wishing for the perfect SEO reports.
Get 'em in SEO PowerSuite.
FAQ
Can I make my own branded report?
Yes, you can! Using an Enterprise plan you can create your own White Label without a hitch!
What SEO metrics should be included in my
keywords ranking report?
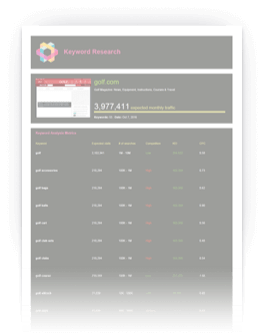
The SEO reporting software contains movable widgets to report on all the most important keyword data you might need: keywords ranking position and visibility, organic traffic, rank history, competitors’ ranking, website strength, etc.
How many reports can I make for each project per
month?
There are no limits on the number of reports you create for your projects, at all.
Can I customize my reports?
Customize away! You can add any of the ranking information you want, in any configuration you might need.
Is SEO Ranking Reports a free feature?
You can use 6 in-built report templates and customize an SEO report in the free version of the software.
Is your Rank Tracker free?
The keywords ranking tracker comes in three editions — the Free, Professional, and Enterprise versions. You can pick the license depending on the features you need. But the most important SEO features are available completely for free.