 Rank Tracker User Manual
 WebSite Auditor User Manual
 SEO SpyGlass User Manual
 LinkAssistant User Manual
- Rank Tracker User Manual
- WebSite Auditor User Manual
- SEO SpyGlass User Manual
- LinkAssistant User Manual
Scheduling Checks
RankTracker lets you update projects, publish reports, or export data even when you are not at your desk. All you need to do is create tasks for jobs you would like to automate.
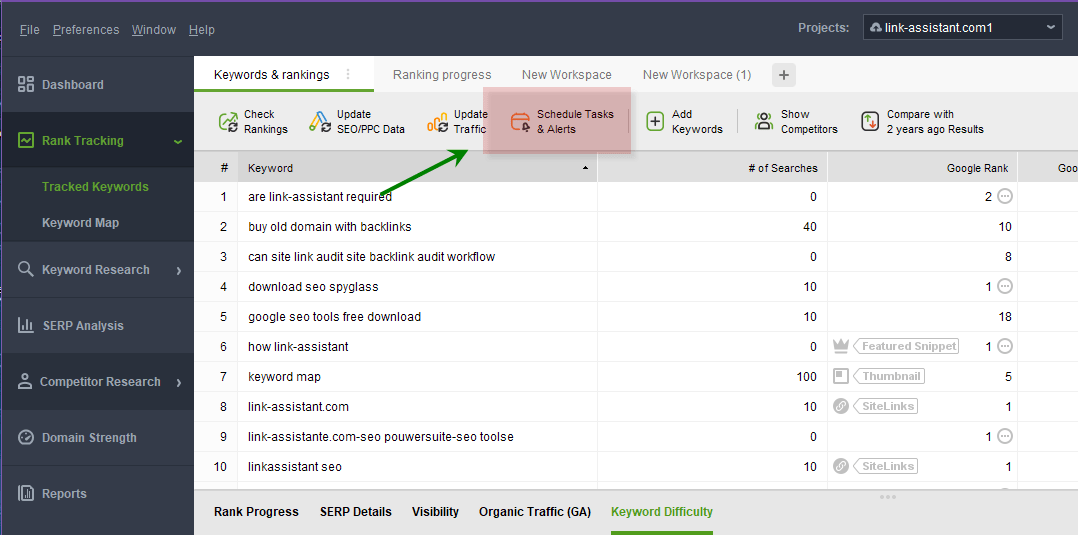
You can manage existing tasks or create new ones under Preferences > Scheduled Tasks & Alerts, or jump to the menu by clicking the corresponding button in the top toolbar:

Creating scheduled tasks
To create a new task, click the Add button and follow the setup wizard. Hover over any existing task to Edit it.

Step 1: Choose task type
Select the type of the task you'd like to automate: updating stats, exporting results, or publishing reports.
![]()
![]()
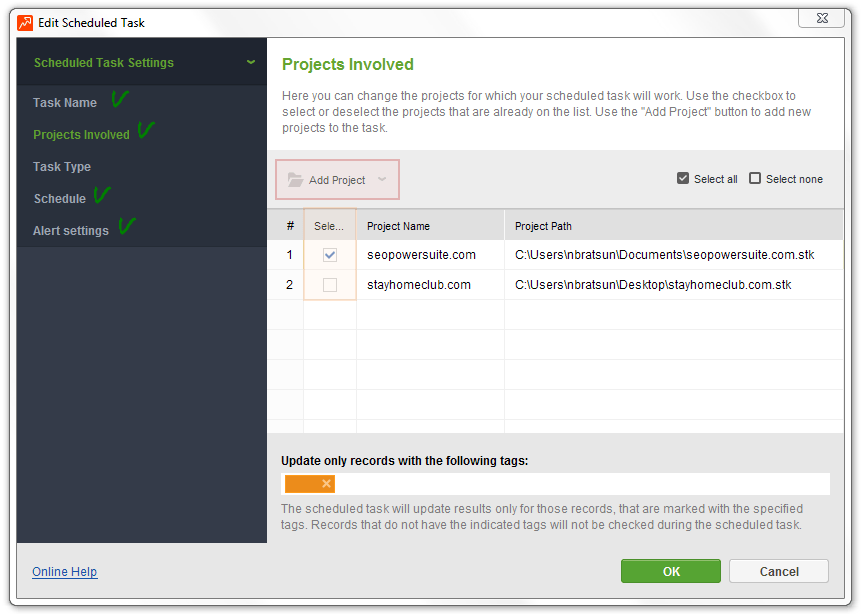
Step 2: Choose projects
Choose a project (or a group of 3-5 projects) to include in the task. If a project you need does not appear on the list, please click to Add Project and specify a path to the file on your hard drive or in your cloud storage. Only saved projects can be selected.
![]()
![]()
Step 3: Task schedule settings
Set the recurrence rules for your task: how frequently it should be performed, on which day/time. You can also indicate whether missed/delayed tasks should be automatically re-run (in case you may be working in the program during the start time of the task, or your computer may be turned off accidentally).
![]()
![]()
Step 4: Set up Alerts
To get notified in case of any unexpected or drastic changes after the task is complete, set up email Alerts: choose the conditions which trigger email notifications, and specify the email address (or multiple emails, hitting Enter after each).
Jump to this article to learn more about Alerts.
![]()
![]()
Step 5: Set scheduled task name
To make the task management convenient in future, assign a descriptive name to your new task (indicating task type and frequency).
![]()
![]()
Data Export and Report Publishing tasks
For the Data Export task, you'll have to select an export template additionally - select/edit an existing one, or click to Add a new one on-the-go.
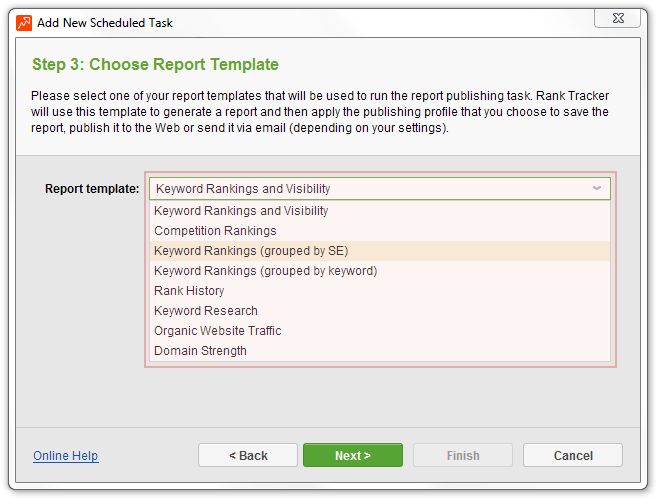
To automate reporting, you'll have to assign a report template and a publishing profile to be used for a scheduled task. You can select any of the default templates, or go to the Reports module to customize them or create a new one from scratch.

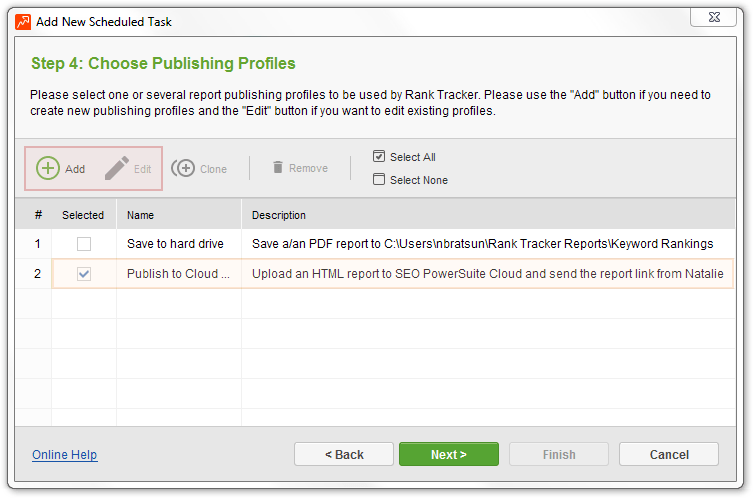
To specify the way your report will be delivered (saved to hard drive, emailed or published), select an existing publishing profile or create a new one. The list of all publishing profiles can be found under Preferences > Publishing Profiles.

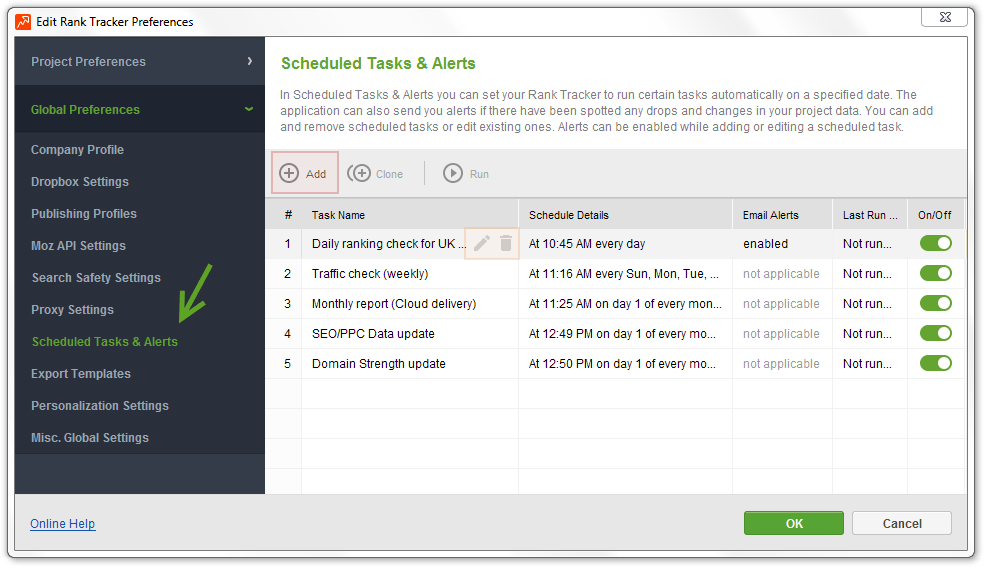
Managing Scheduled Tasks
Once you finish setting up your scheduled tasks, make sure to click OK to save the changes in Preferences. In the Scheduler menu, you'll have the list of your tasks along with their recurrence rules and the Last Run Result. You can Add a new task any time, as well as Edit or Clone an existing one.
Any task can be Removed (completely) or Disabled (temporarily, without being removed), and then Enabled back. To launch a task manually, select it, and hit Run.
![]()
![]()
If you click to Edit a task, you can rename it, manage the list of projects involved (add new ones or uncheck any), adjust the Schedule, and Alert rules anew.

Please note that the software is desktop and therefore cannot start on its own. For RankTracker to perform the scheduled tasks, make sure to leave it running / minimized to Tray, and prevent your PC from Hibernating or going to Sleep mode.
You can go to Preferences > Misc Global Settings to choose what should be done by default upon closing the app that has active or scheduled tasks:
![]()
![]()
Please also ensure access to project files: all of the projects involved should be accessible through the paths you specified when creating your scheduled tasks. If a project has been moved to a different folder, please update its location in the scheduled task (edit it, uncheck the project in question, and Add it anew).