10623
•
20-minute read


Wix is the third most popular CMS after WordPress and Shopify. The platform successfully serves many small-scale websites of different types (ecommerce, blogs, local businesses, etc.).
Wix is pretty easy to use — the drag-and-drop editor lets you build an appealing website without any special coding skills. The admin interface is quite simple, too, and Wix’s in-built SEO wizard easily covers the basics of search optimization.
Still, all comes with a price. Many SEOs and site owners criticize Wix when it comes to advanced search optimization and technical SEO. Users complain about the PageSpeed issues with Wix websites, and limited scalability is also not the aspect to be happy with.
In today’s post, I’m going to find out if it’s all true about Wix’s shortcomings and show you how to SEO a Wix website to make it near-to-perfect for Google and users.
Once you create a Wix account and start working on your brand new website, you first need to choose what it’s going to look like.
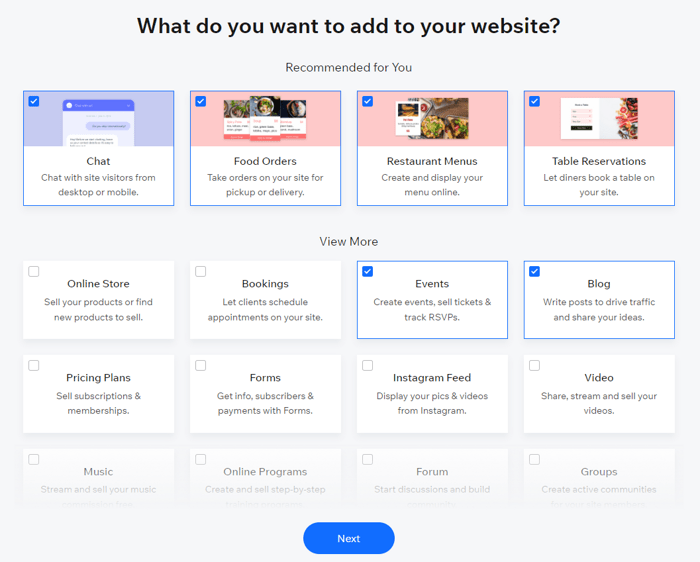
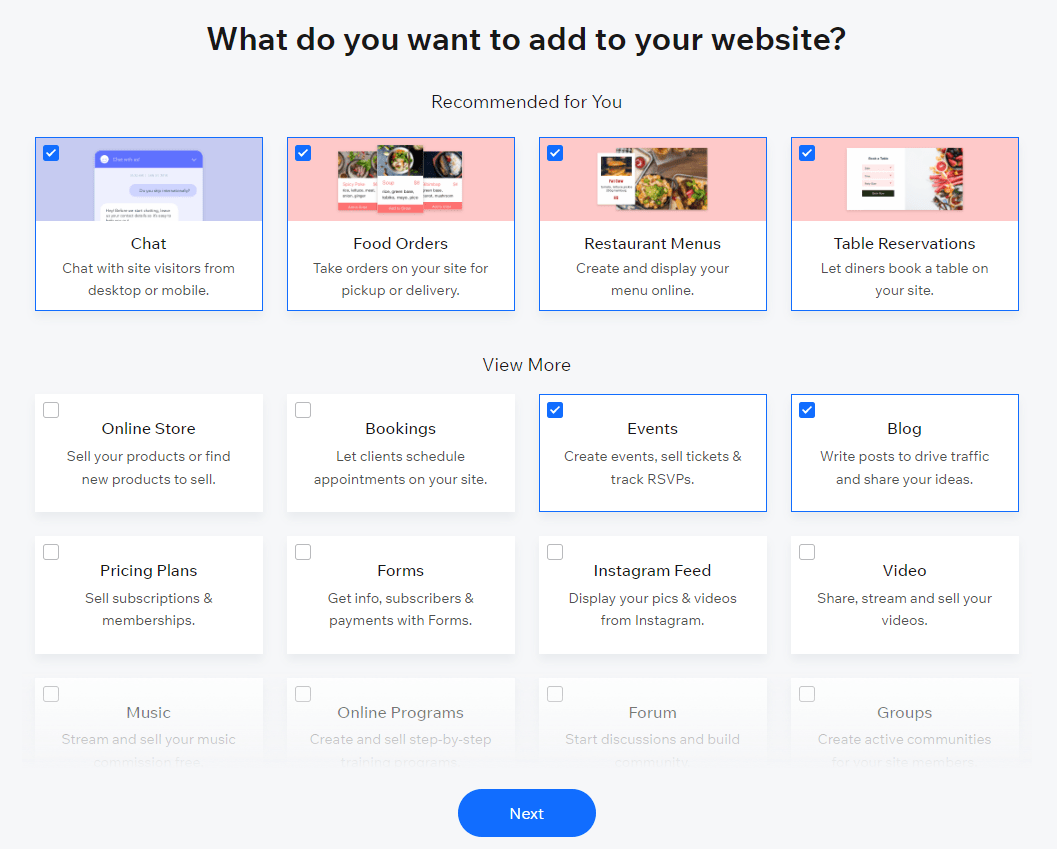
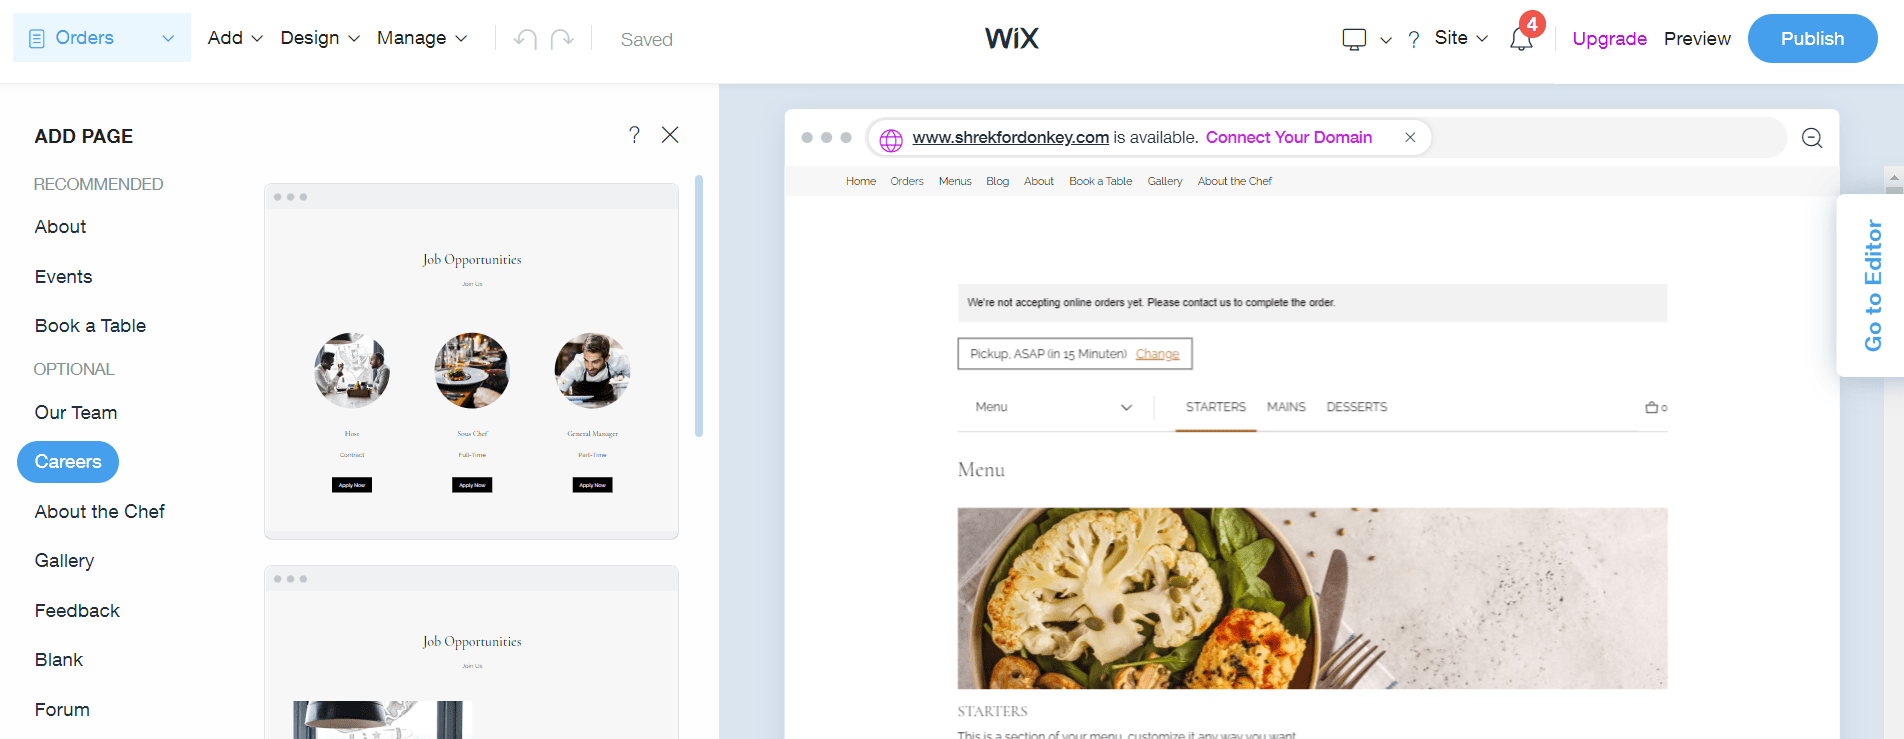
Start off with choosing the template according to your business type, be that a store, a cafe, a blog, etc.


Say you’re going to create a website for a restaurant. As you state the business type, Wix offers the sections worth adding to your website:
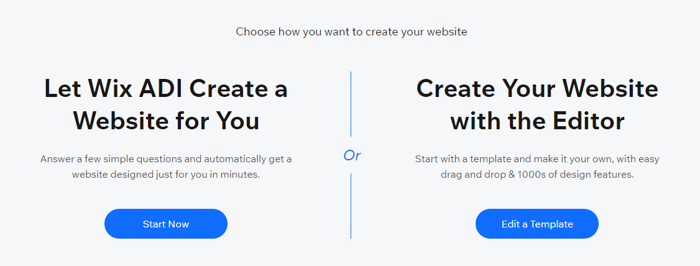
Then you can choose a template yourself, or you can try the Wix ADI (Artificial Design Intelligence) builder. It’s the AI technology that will offer you some design ideas after you answer a couple of questions about your business.

Here’s how Wix ADI works. As you click Start Now, the ADI asks for the name of your business. The following steps will let you specify if you already have a website or have your business listed on Google Business Profile (ex-GMB). You can also state some more details of your business — logo, physical address if you have one, social links, etc.
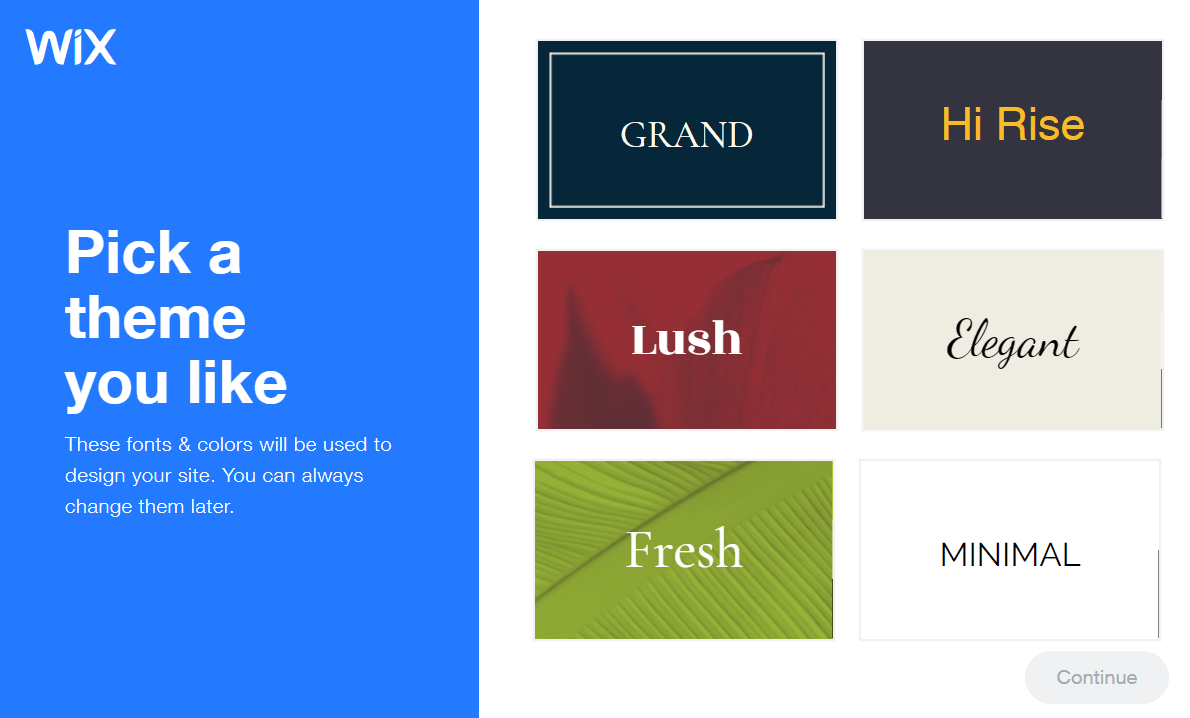
As you’re done with settings, Wix ADI will offer you a theme style and a color palette based on the colors of your logo if you add one.

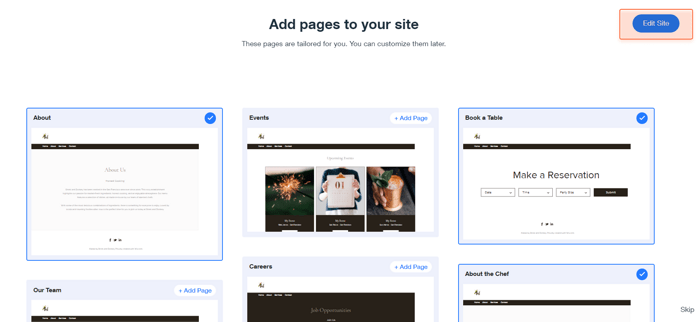
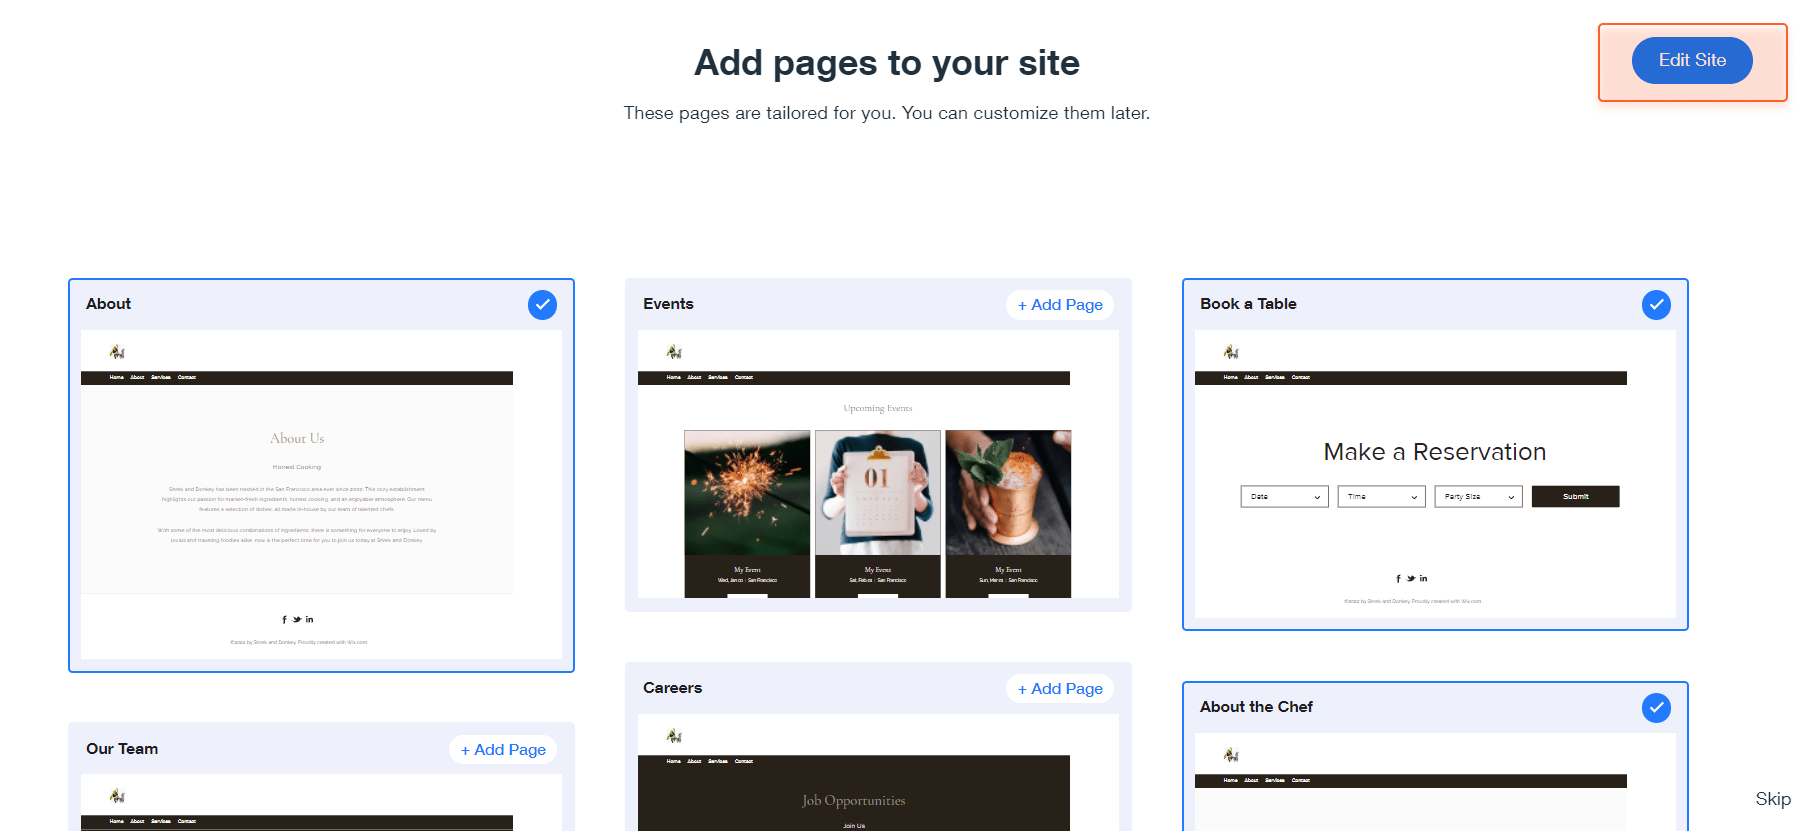
Then you can choose your homepage layout and equip your website with some pre-made pages (you can further customize fonts and colors if you need to).
Once you have chosen the pages, you can move to the Wix ADI Editor. Click the blue Edit Site button on the upper right.
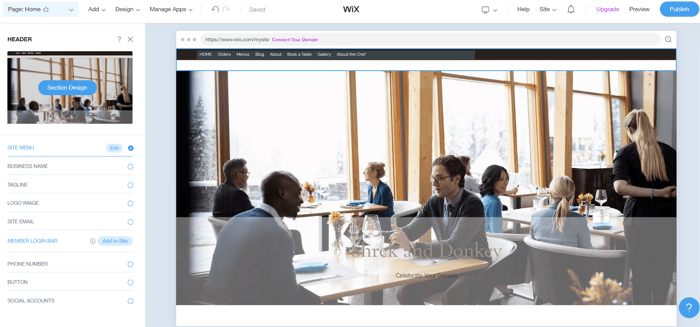
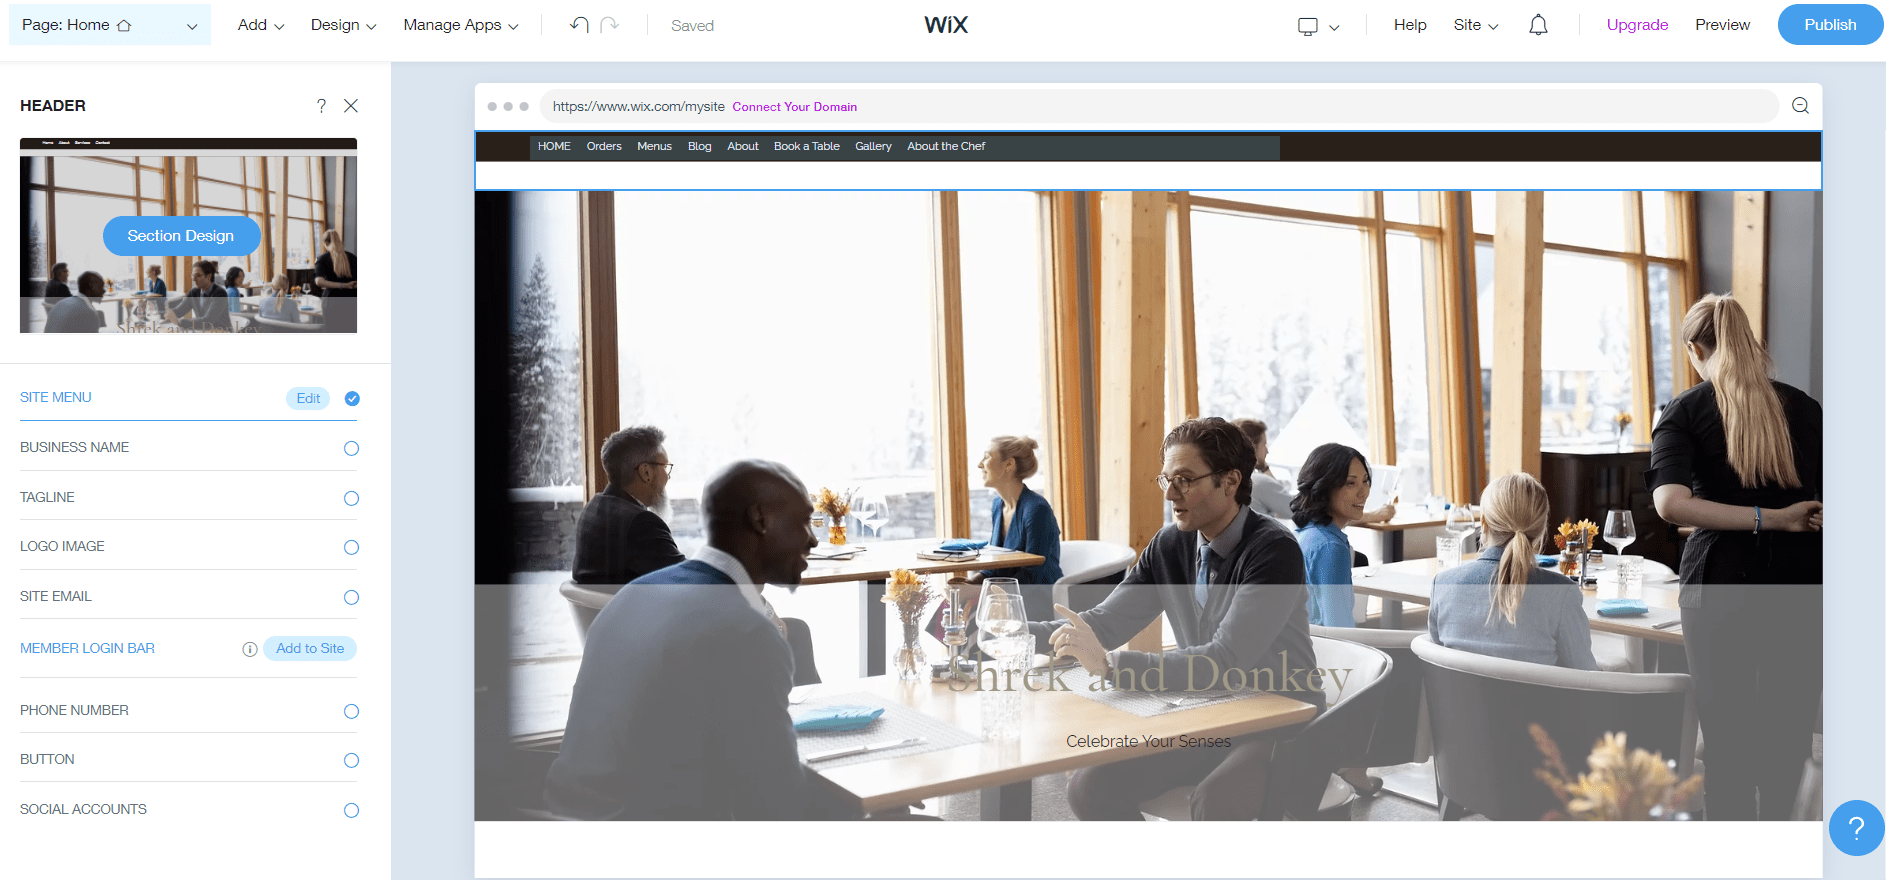
The ADI Editor lets you customize fonts, colors, section layout designs, add new pages, etc.
To edit a mobile version of your website, switch the ADI Editor to the Mobile mode:


Still, if the ADI Editor doesn’t give you enough freedom, you can always switch to the Wix Editor to create a custom layout of your dream. Keep in mind that you will not be able to switch between the ADI Editor and Editor modes. The changes made through the Wix Editor will not be shown in the ADI Editor and thus will not be reflected on your website.
Keyword research is a basic thing for SEOing any website, so let’s start with this aspect. Moreover, further optimization of your Wix website will require keywords, so you need to be guns blazing right now.
There are many ways to find keywords. Some of them may come to your mind when you simply describe your business. This takes us back to our cafe example. Say, you own a cafe that offers coffee and donuts in Munich. In this case, your seed keywords might be as follows: cafe, cafe Munich, coffee and donuts Munich, etc.
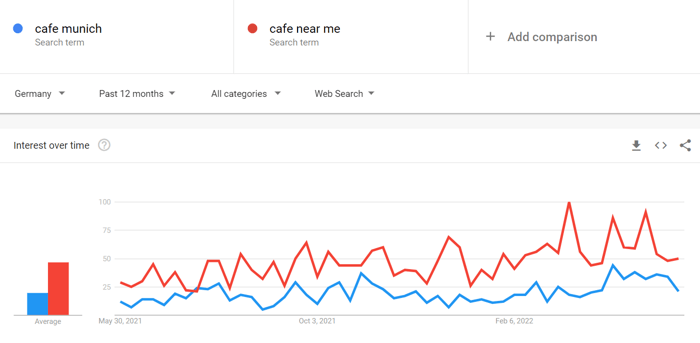
You can also turn to Google Trends to identify keywords that are more likely to bring you visitors. Enter two or more search terms to compare, specify the location if it’s relevant to your business, and let Google do the check.

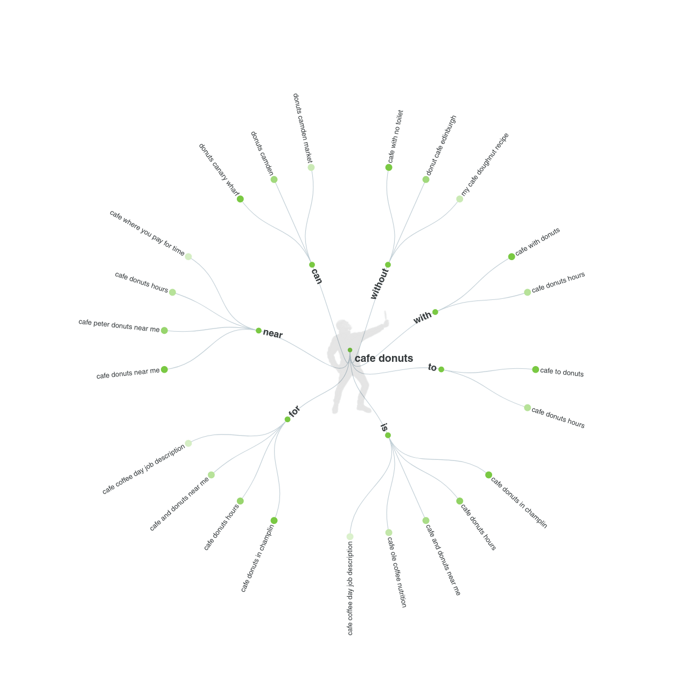
One more tool I personally like when picking long-tail keywords and content ideas is Answer the Public. It lets you discover how people formulate search queries on the given topic most often. All you need is to enter a keyword and wait a sec — the tool will generate and visualize a nice set of questions, queries, and comparisons.

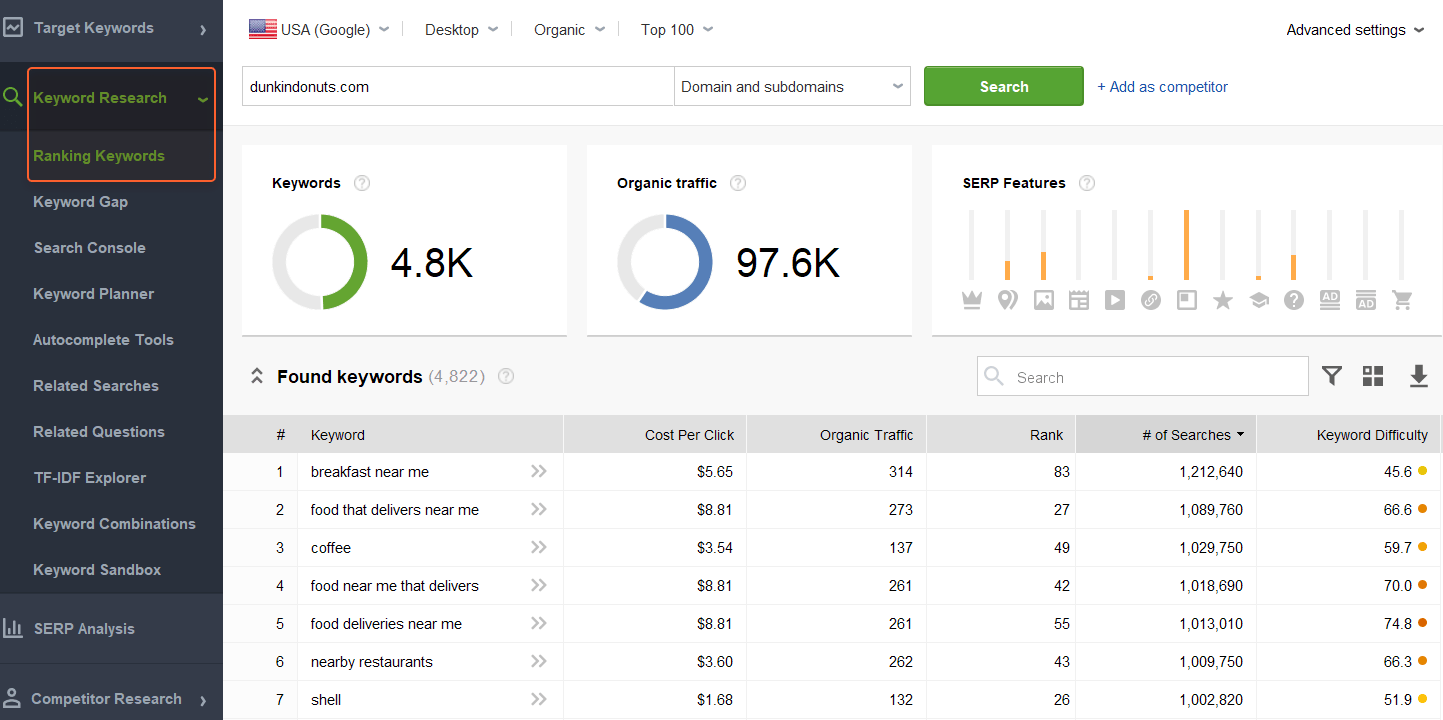
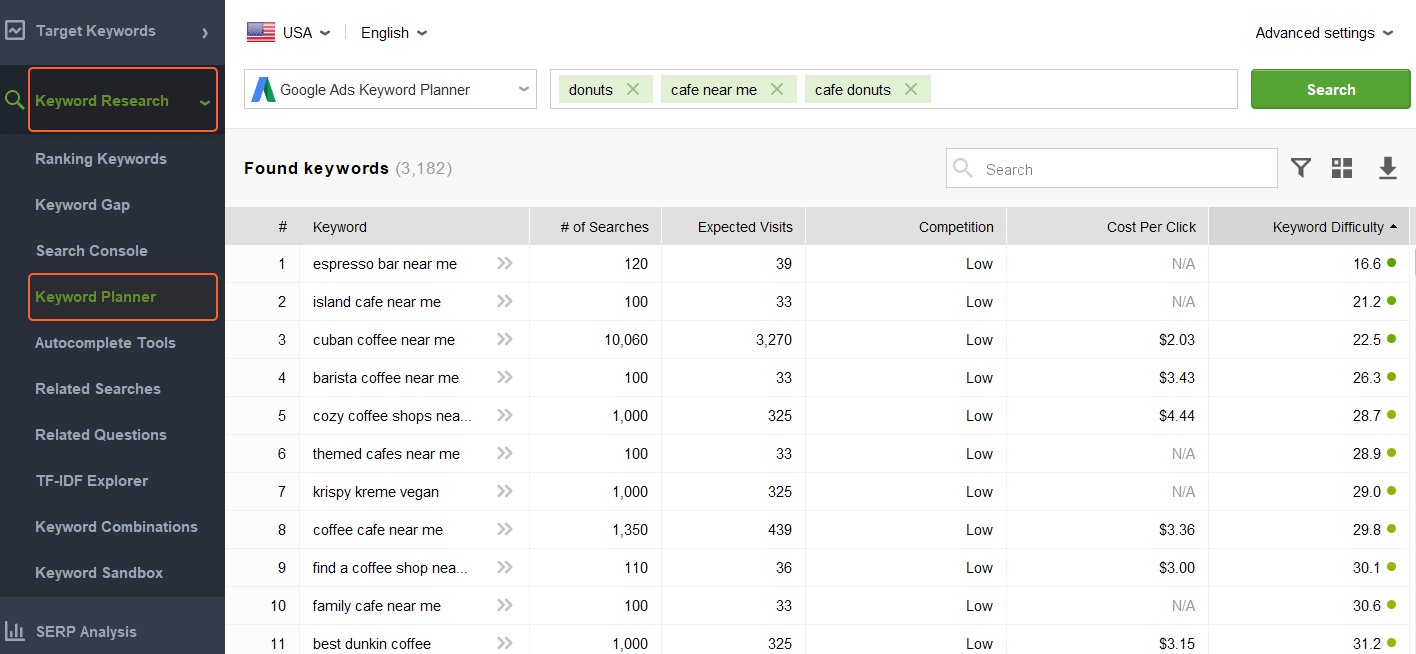
If you don’t feel happy about switching between many keyword research tools, you can try Rank Tracker. With 20+ tools under the hood, it will save you a lot of time plus all the keywords found there come with many useful metrics. So you’ll have a clearer picture of what keywords are easier to succeed with.
Let’s have a look at a couple of Rank Tracker’s keyword research methods.
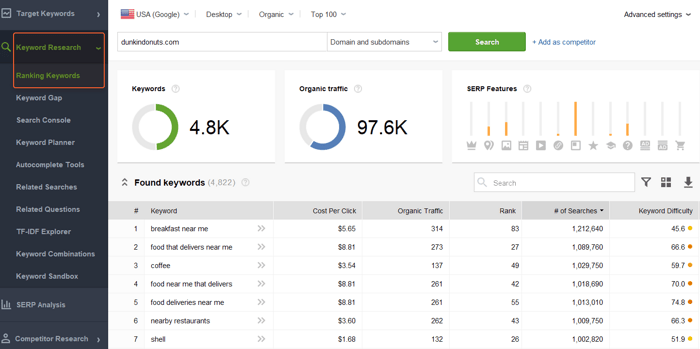


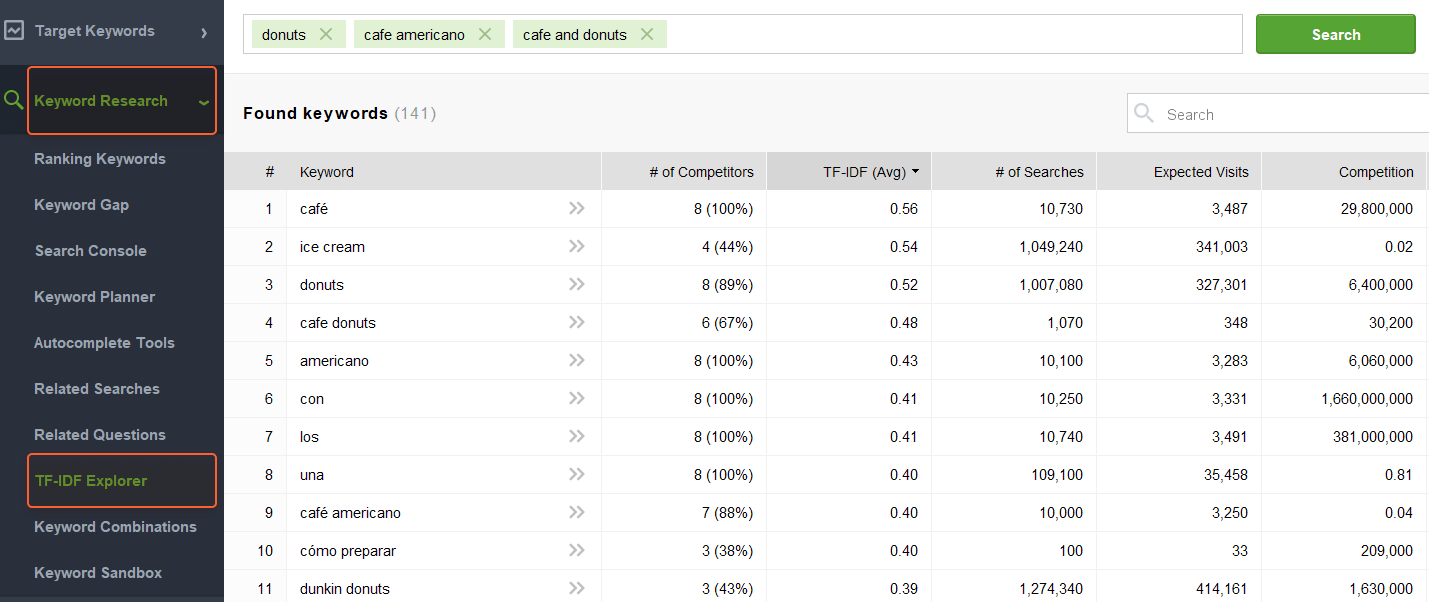
All the keywords you’ve collected are stored in the Keyword Sandbox module. There, you can filter your findings to exclude potentially irrelevant, too difficult, and unpopular keywords.
Check our super-detailed keyword research guide if you need the process explained in more detail, and let’s get back to SEOing our Wix website.
Wix is a pretty newbie-friendly platform. Once you fill out the information about your business, Wix SEO Wiz will generate you an SEO checklist to start with. Thus some basic SEO aspects will be covered right from the start.
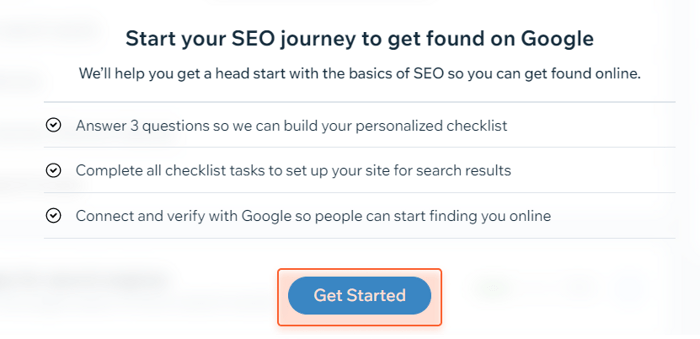
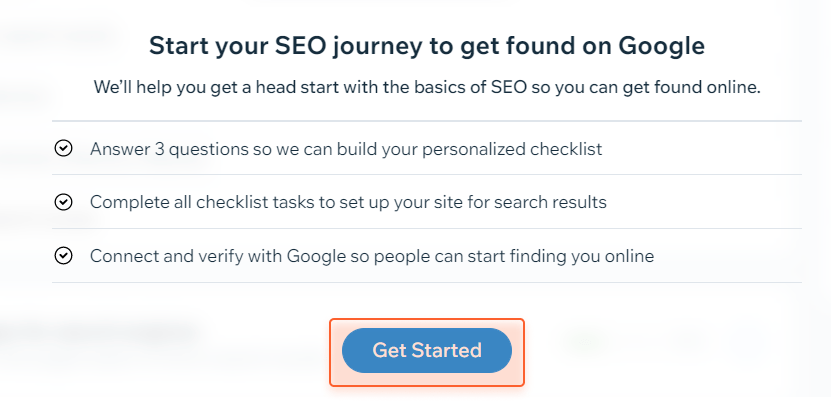
Once you’ve done editing your website template, save it and click Site > Get Found on Google to proceed with SEO settings.


To make Wix SEO Wizard generate you a personal checklist, click the Get Started button.
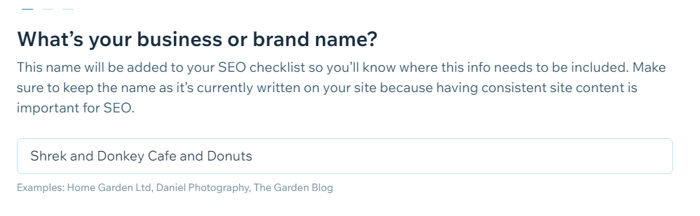
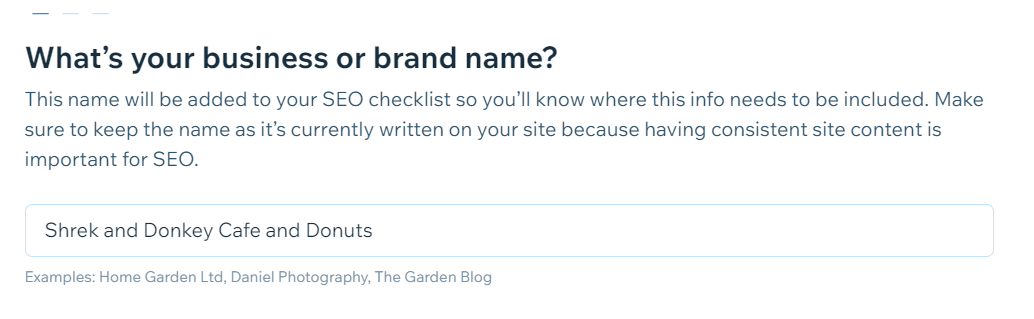
First, add your business name. Make sure the name you enter here is just the same as your legal one (this especially matters for local SEO).
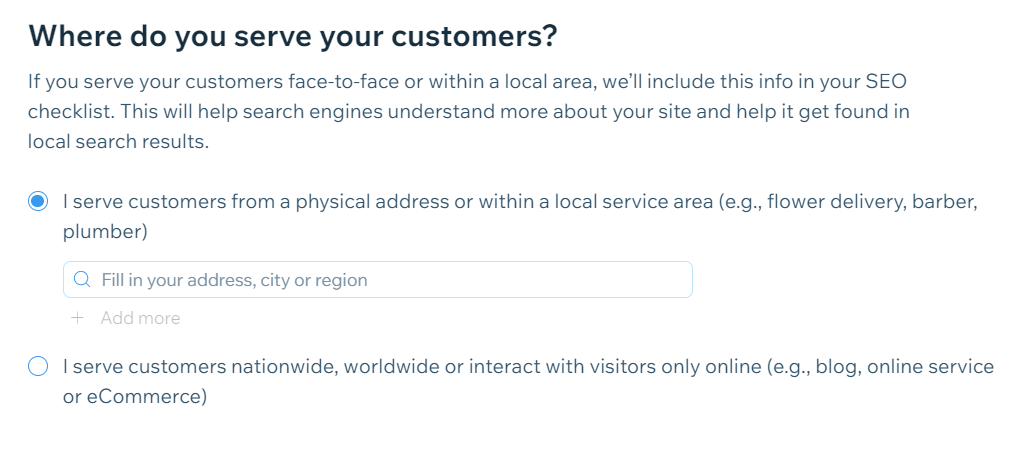
Then, state if your business has a physical location that belongs to a certain area or if you operate worldwide. If you have a location, then provide the address.

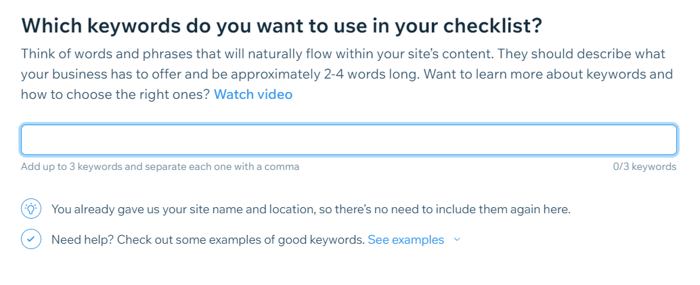
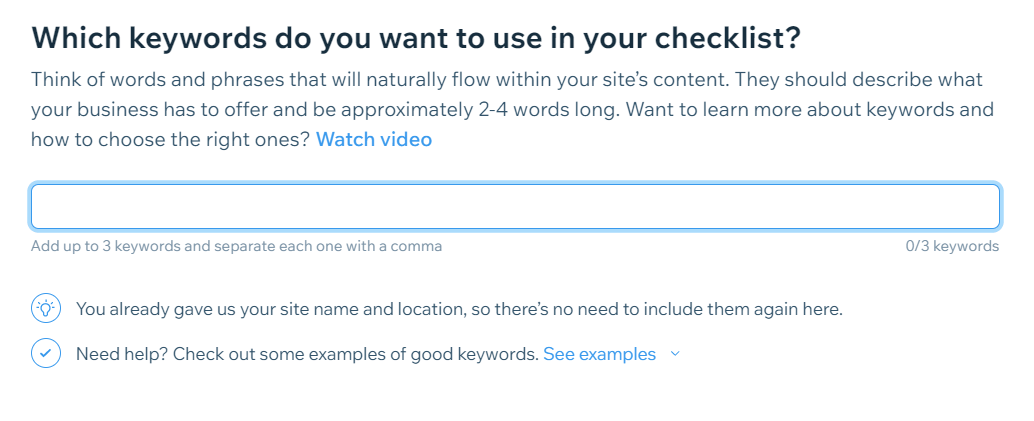
Now, add three keywords that describe your business best. These keywords should not be too short to contain the core business information. Say, our example is the cafe selling donuts that operates in London, Canada. In this case, the keywords may be: donuts London Ontario, coffee and donuts Ontario, and cafe donuts.
Profit! Let’s move further.
As Wix now knows more about your business, it comes up with a personalized SEO checklist for your website.
In your Wix dashboard, go to Marketing & SEO > Get Found on Google to see all the SEO-related issues detected on your new website. All the aspects that are marked with the red ! sign need your attention.
To start optimizing anything that has that red ! sign on the left, click the blue Go for It button.
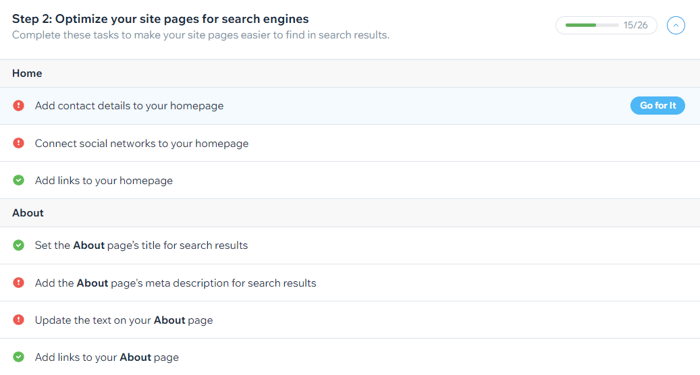
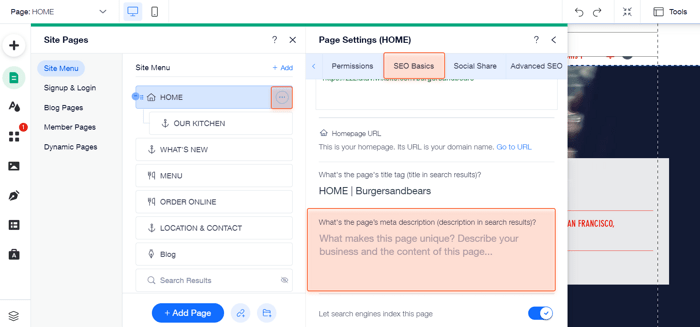
The first section of the Wix SEO Checklist deals with the homepage of your website.
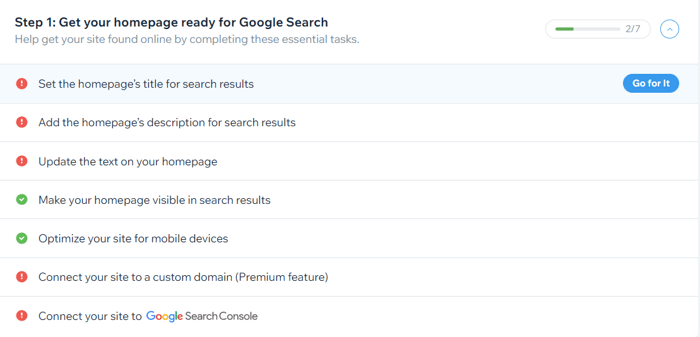
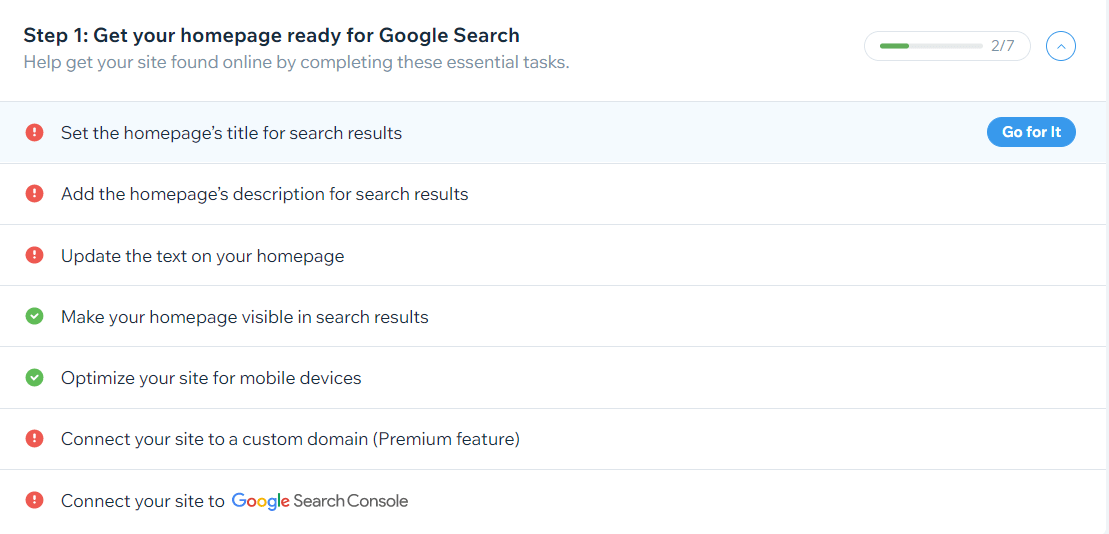
Let’s take a closer look at each point.
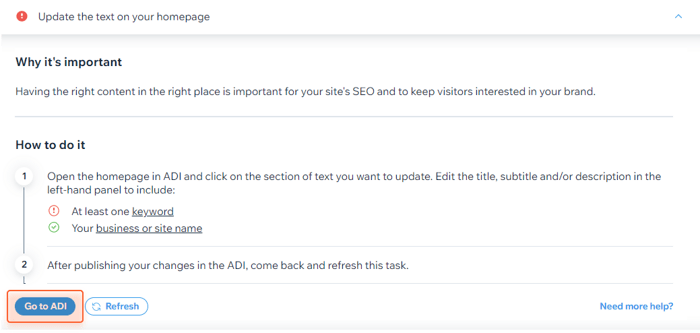
The homepage title will be shown in your search snippet, thus it should clearly describe your business to Google and users. You can choose one of the variants generated by Wix, or you can come up with your own one. Remember that a title should clearly describe what your business is and be enticing enough to be clicked on.

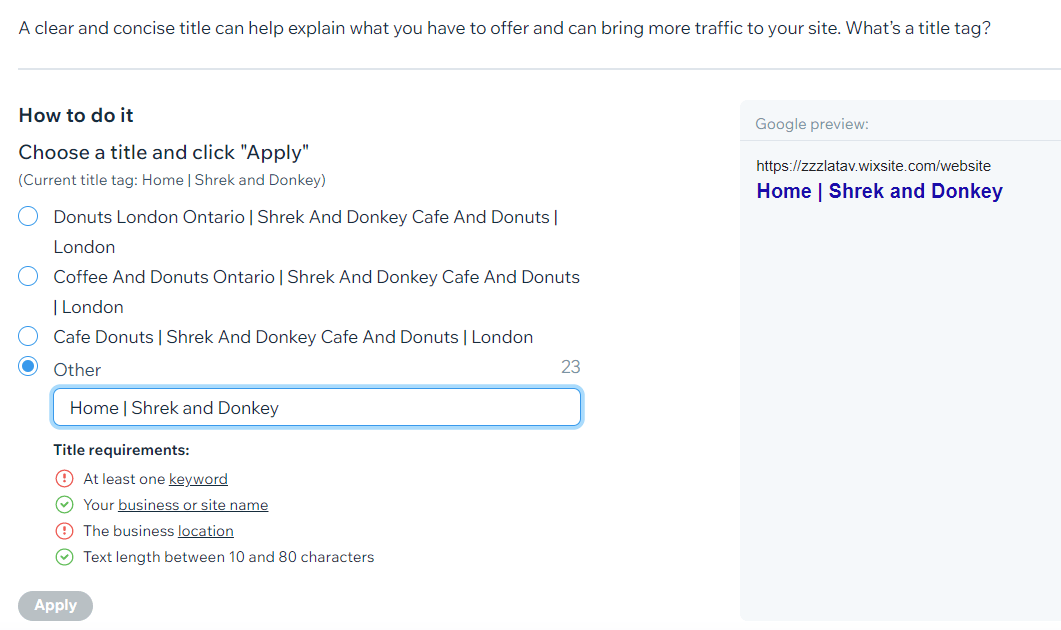
Consider title requirements, and mind that a title should not be longer than 60 characters so that Google will display it correctly. You can always check what your search snippet looks like in the Google preview section on the right. Once you create a perfect title, click Apply.
Meta description of your homepage will also be present in your search snippet, so make sure users (and Google, of course) will see enough information there. Although attractive and informative meta descriptions will not make Google rank you better, they are very likely to lure more users i.e. bring you more clicks.
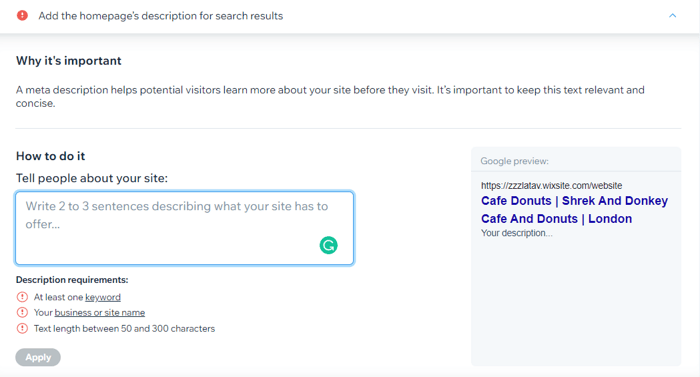
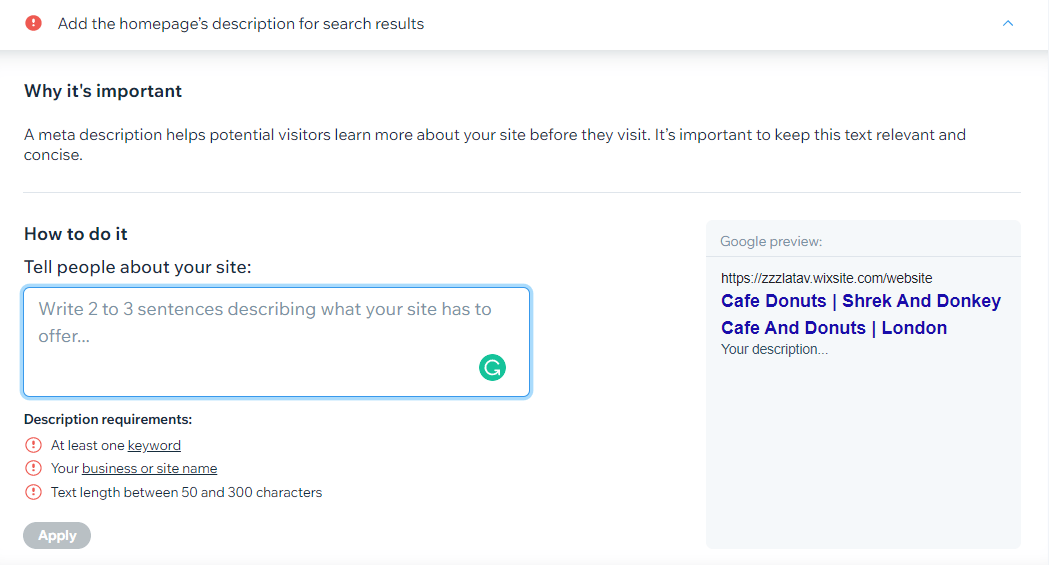
Remember to include your business name and a couple of keywords in your meta description, but don’t overdo keywords to avoid keyword stuffing.
Another thing to consider here is the length of the meta description. While Wix says your meta description can be up to 300 characters long, it’s better to keep it under 160 characters according to best practices. As this is the length that Google is unlikely to cut or rewrite when forming your search snippet.
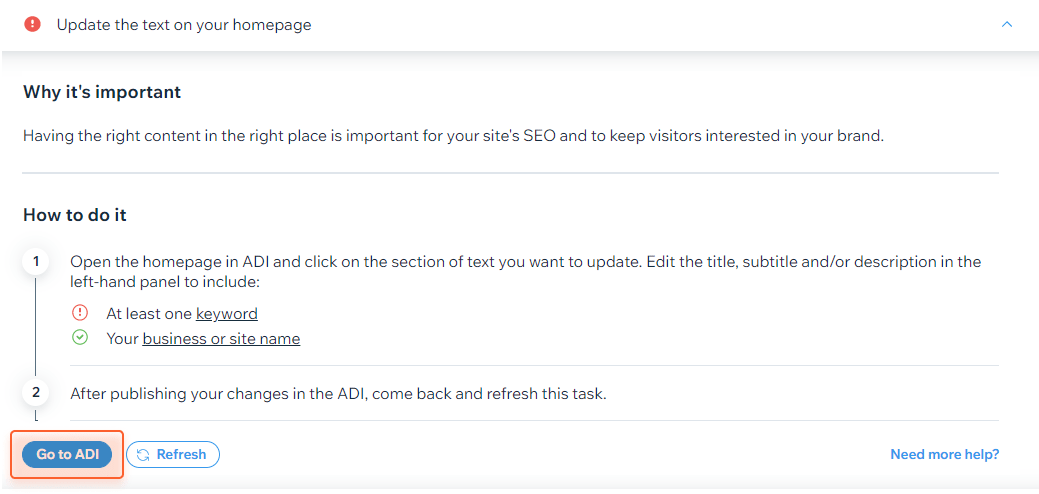
Make sure the content on your homepage is well-written and has enough keywords (those you’ve found in Step 2 of this very guide) so that search engines could easily understand what the page is about.
To create or edit the content of your homepage, click Go to ADI.
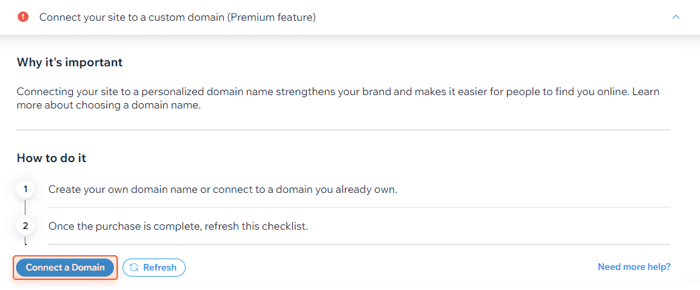
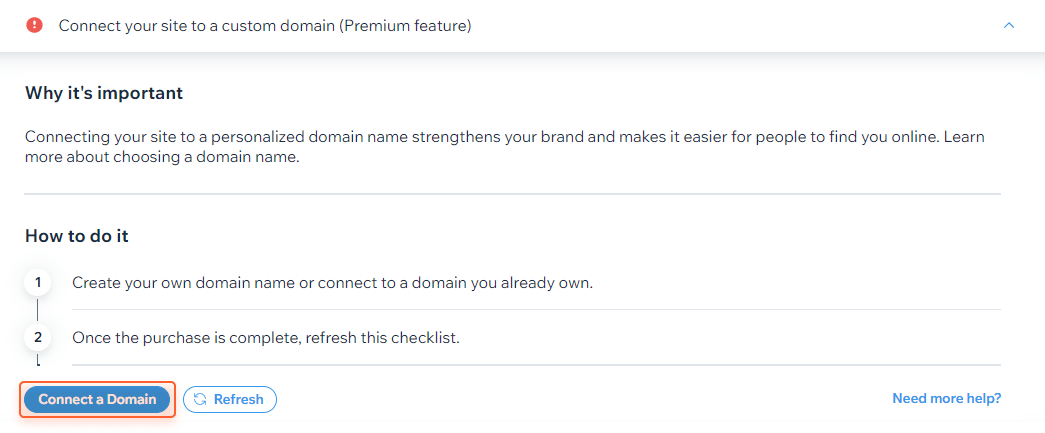
Having a custom domain is a must for any business that needs to look credible and professional.
When it comes to the domain name as an SEO factor, John Mueller of Google said the following in 2020:

Just because a website has a keyword in its domain name doesn’t mean that it’s more relevant than others for that keyword. In short, you don’t need to put keywords in the domain name.
Nevertheless, domain names were a ranking factor earlier, so I wouldn’t recommend neglecting this aspect at all. A good idea (and a common practice) is to make your brand name a domain one, too.
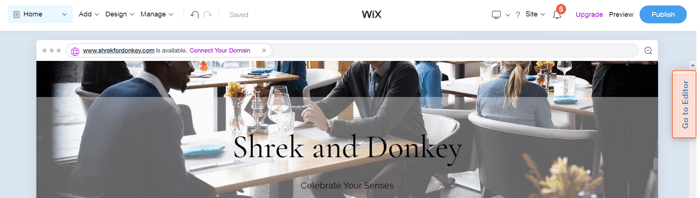
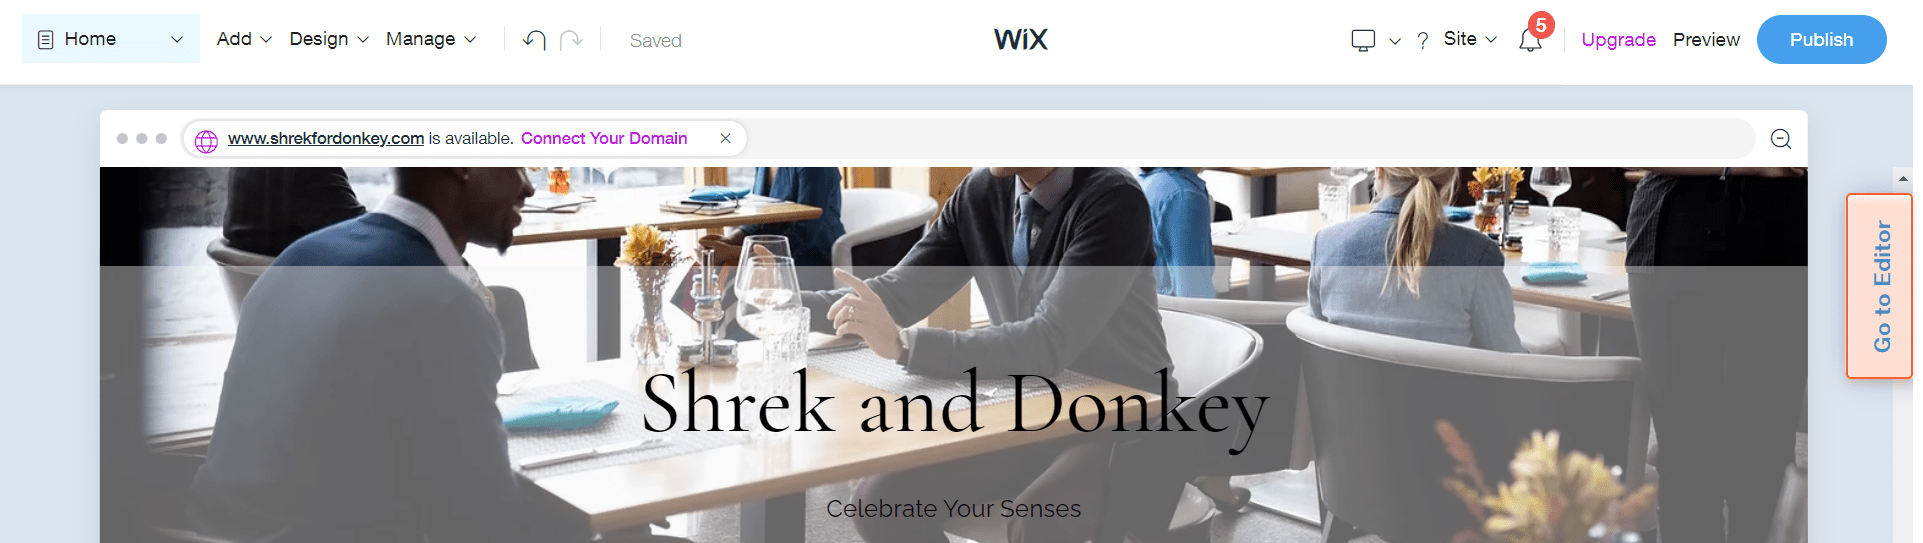
To connect a custom domain (buy a new one or connect one you already own), click the Connect a Domain button.
Depending on the type of your website and the sections you have added, the checklist for your site pages’ optimization will consist of different sections:

The workflow is pretty much the same for every section: you need to update (or create) titles, meta descriptions, content, links, social pages, and contact info. Click Go for It near the relevant line to edit what’s needed.
All the edits are to be made in the ADI Editor (or in the ordinary Editor, depending on what you have chosen). Once you open the editor, go to the relevant section and add the information you need, be that contact details, social links, or any other type of content.
A good website structure is simple and scalable. This means that you can add as many new pages as needed but this should not affect the simplicity of navigation for both search engines and users.
On Wix, website structure is both a blessing and a curse. It’s a blessing because it’s really simple and easy to set up by default. Once you pack your website with a new section, be that a blog or gallery or menu, Wix automatically adds a relevant page that is linked to from the homepage. What’s more, Wix also automatically ads the pages such as Add to Cart and Order and links them to from relevant product pages, in most cases via buttons.
This way, as you open the ADI Editor and add a new page, all you need is to choose a page type and layout.

Once you’re done, Wix will equip your website with a new, well-structured section. The overall website structure will look like this:
Homepage > Section page > Product (dish / blog post / etc.) page
So what is the curse of this, you may ask? The curse is that the above-mentioned structure has limited scalability. This three-level structure is actually the only possible one at all — you cannot add additional categories, subpages, etc.
Note: if you edit your website in the Wix Editor, not the ADI Editor, you may see that you can move newly-added pages to subpages:
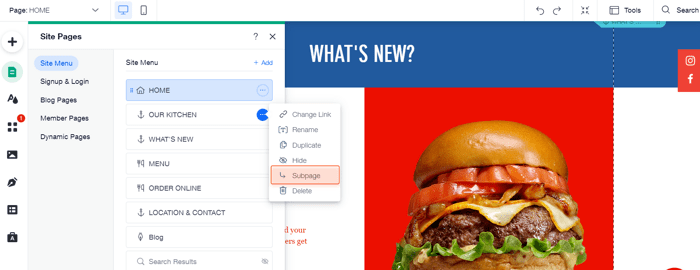
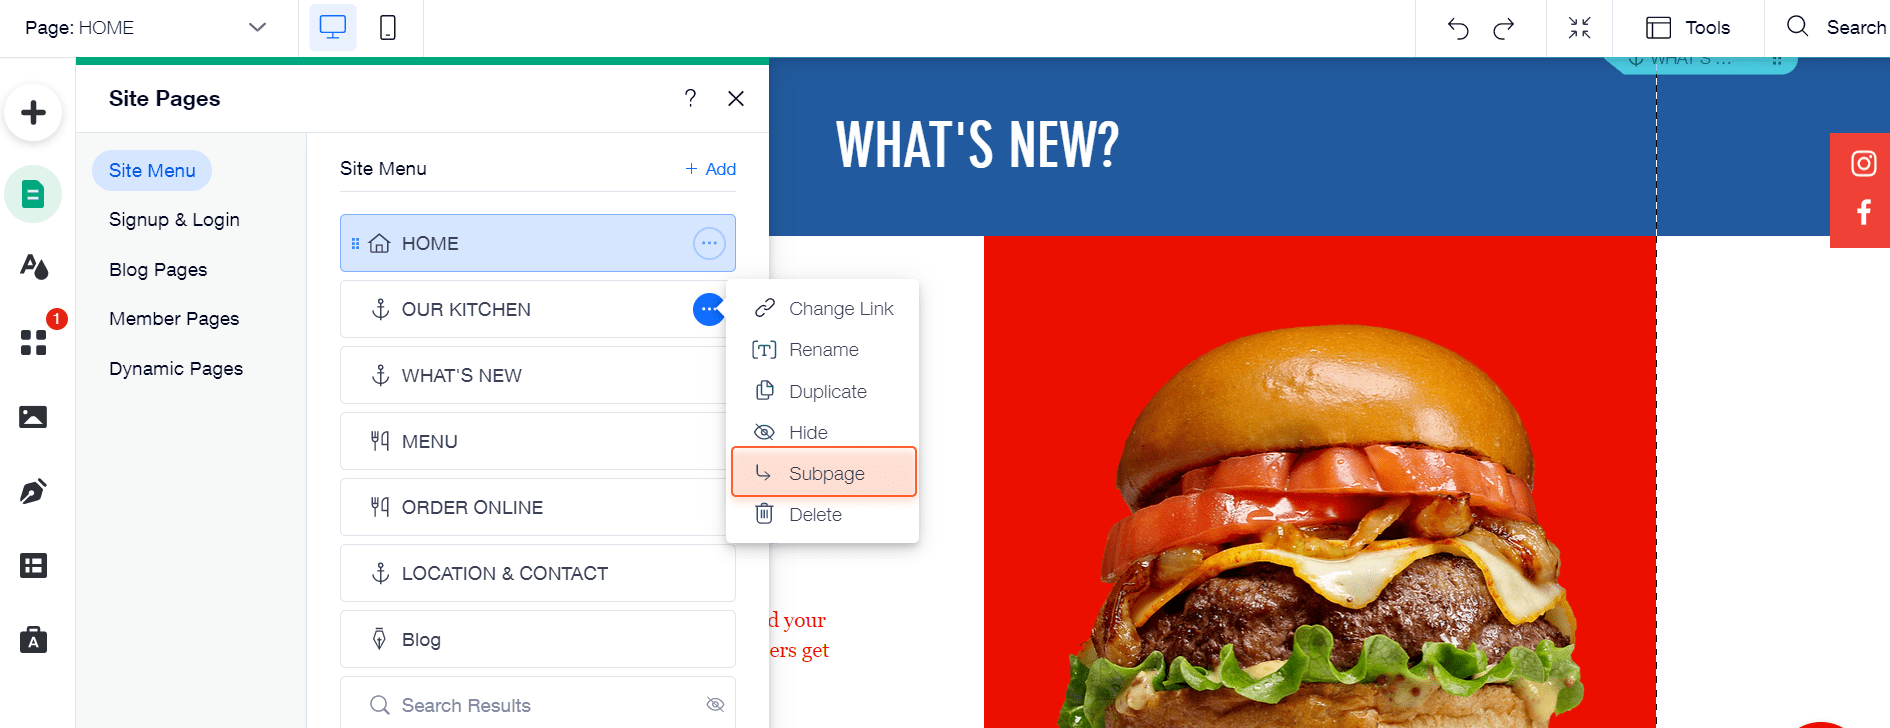
The truth is that the only thing this setting affects is where the link to the page is located – simply on the homepage or in its drop-down menu. The website structure remains the same.
Can you benefit from these structure peculiarities? You should remember that Wix is for small websites. If you’re planning to create an e-store with 10k+ pages, consider some other platform. If you decide that Wix is perfect for your business needs, then carefully create the content on your newly-added pages, and don’t forget to link them well so as not to end up with orphan pages all over the website.
On-page SEO goes far beyond just adding keywords to your content. It is the process of optimizing all the HTML elements, URLs, redirects, etc. to make the performance of your website flawless.
Some of the on-page SEO aspects have already been covered by Wix SEO Wizard, but some still require your attention.
Wix lets you set up rules to automatically create your page titles and meta descriptions with variables. Variables are the pieces of text that serve as a placeholder for specific values. In our case, a variable may represent the name of a page, website, or location.
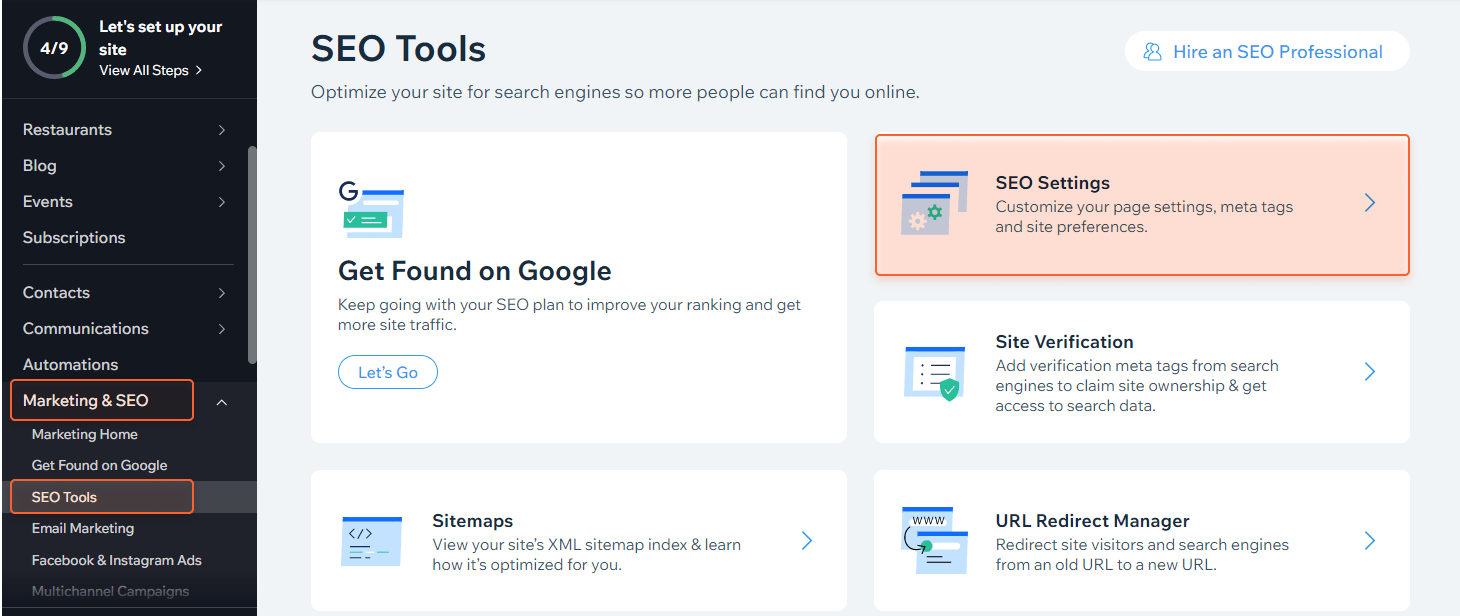
You can assign variables to form titles for different page types, so you will not need to manually write a title every time you create a new page. To do this, go to your Wix dashboard and click Marketing & SEO > SEO Tools > SEO Settings:

Then choose a page type you need to create a title tag for, and click SEO basics & social share:
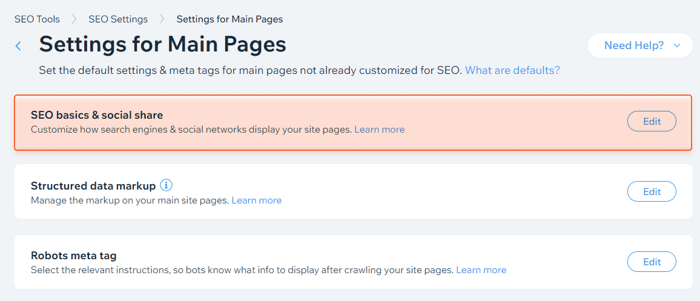

In SEO Basics, you can see the default title settings Wix offers for your pages. You can leave it as it is, or you can change variables to form some other title pattern.

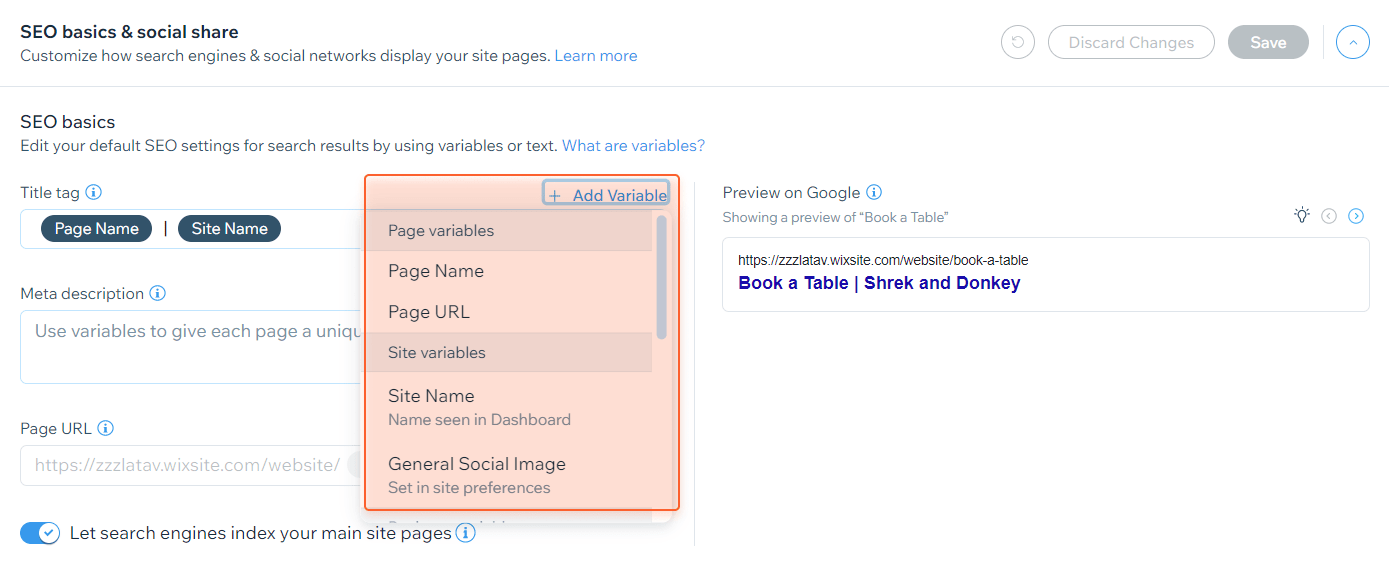
As for meta descriptions, I do not recommend using variables. First, it’s impossible to compose some meaningful description with variables only. Second, if you add a manually written part there, then the added text will spread on all the pages of the given type. Meta descriptions are unique descriptions of pages, and neither your users nor Google will be happy to see the same description for a set of pages.
To create a unique description for a page, you need to go to the editor. If you use the Wix ADI Editor, expand the drop-down menu of your pages, click Settings (the gear icon) > SEO Basics, and write a meta description you like in the relevant section.

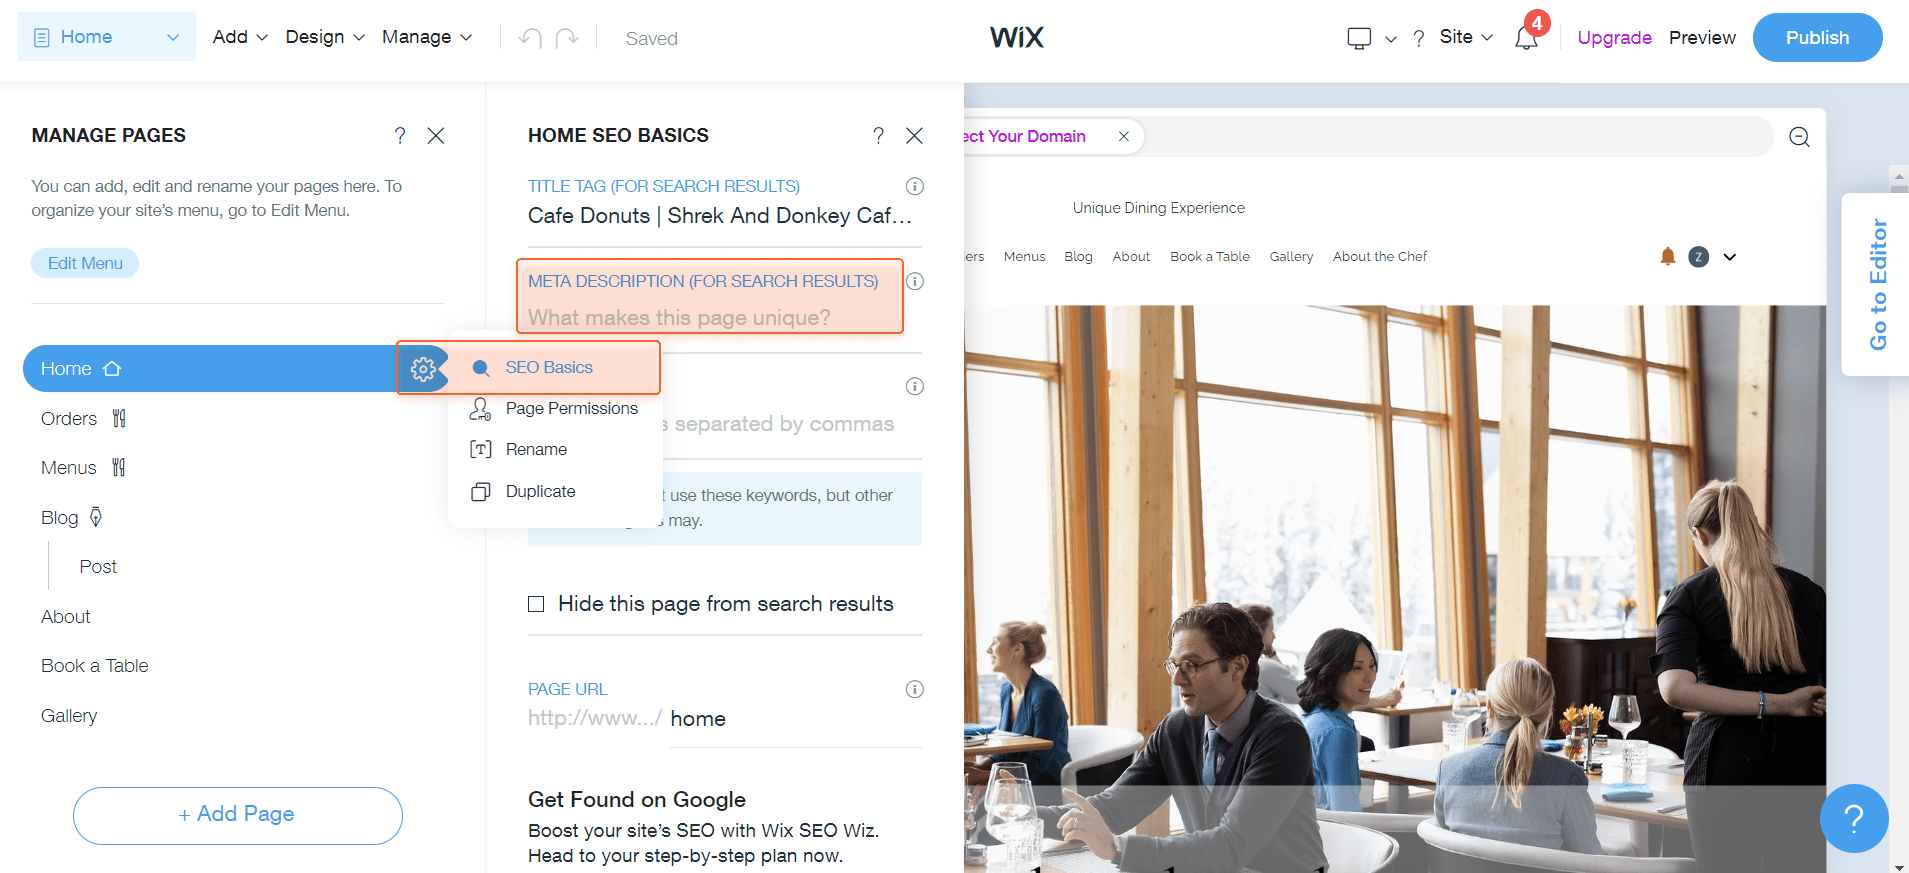
If you use the Wix Editor, click the Pages icon on the left, then click the … sign near the page you need, select SEO Basics, and enter your description:

Wix only lets you edit URL slug — the last part of a URL. So there’s nothing you can change much. Still, the URL structure in most cases is pretty SEO-friendly by default, that’s why this should not be a problem.
To edit the URL slugs of your main pages, go to the editor, choose a page and click Settings > SEO Basics.

The process is the same in both ADI Editor and Wix Editor.
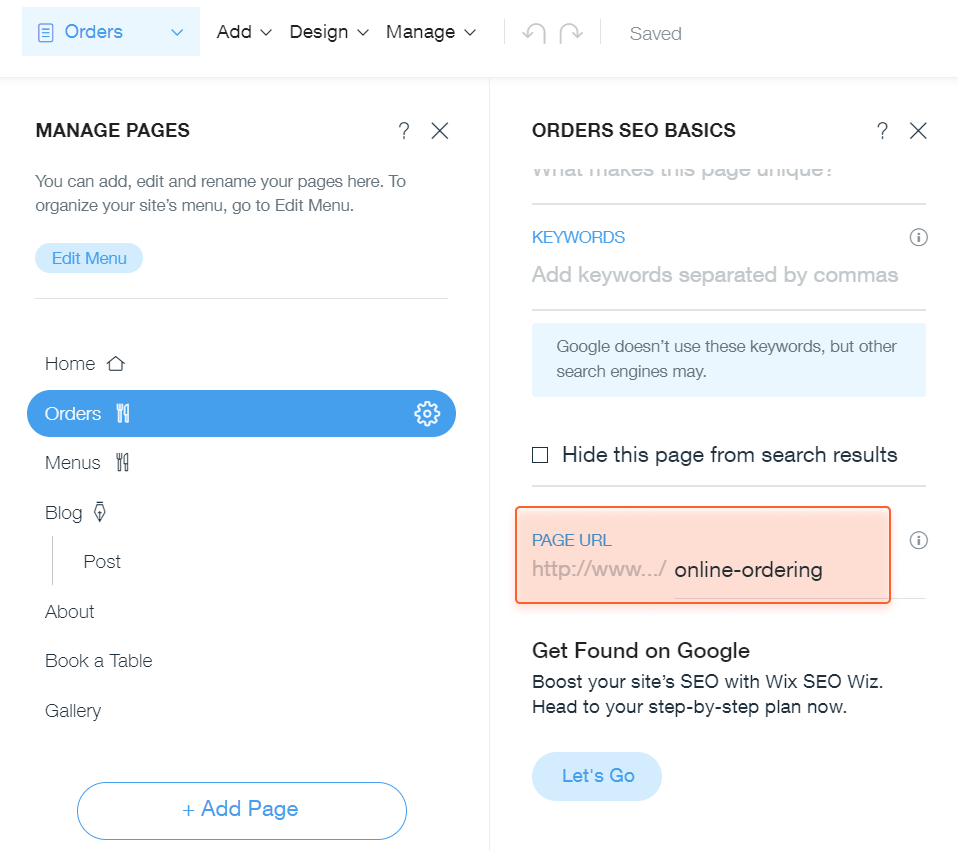
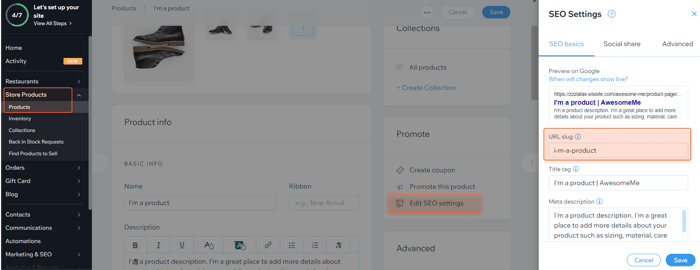
The URL slugs of product / blog post / etc. pages are edited through the Wix dashboard. Let’s take the Products section as an example. Go to Store Products > Products and click on the item you’re going to edit. In the Promote section, click Edit SEO Settings to create a URL you need.

Still, in some cases, you will not be able to change URLs at all, and, to be honest, these standard URLs are pretty ugly. For example, this is the case with online orders in restaurants. You just do not have an option to change/create URLs for dishes, not even slugs. As a result, your URLs will look like this (an example from a real website):
https://order.saltydonut.com/location/6022-s-dixie/pickup/615e802a3d3c4000133e7454/61a8f89dfdedbd2552fe508c
The only thing that’s left for you is to put up with this and carry on.
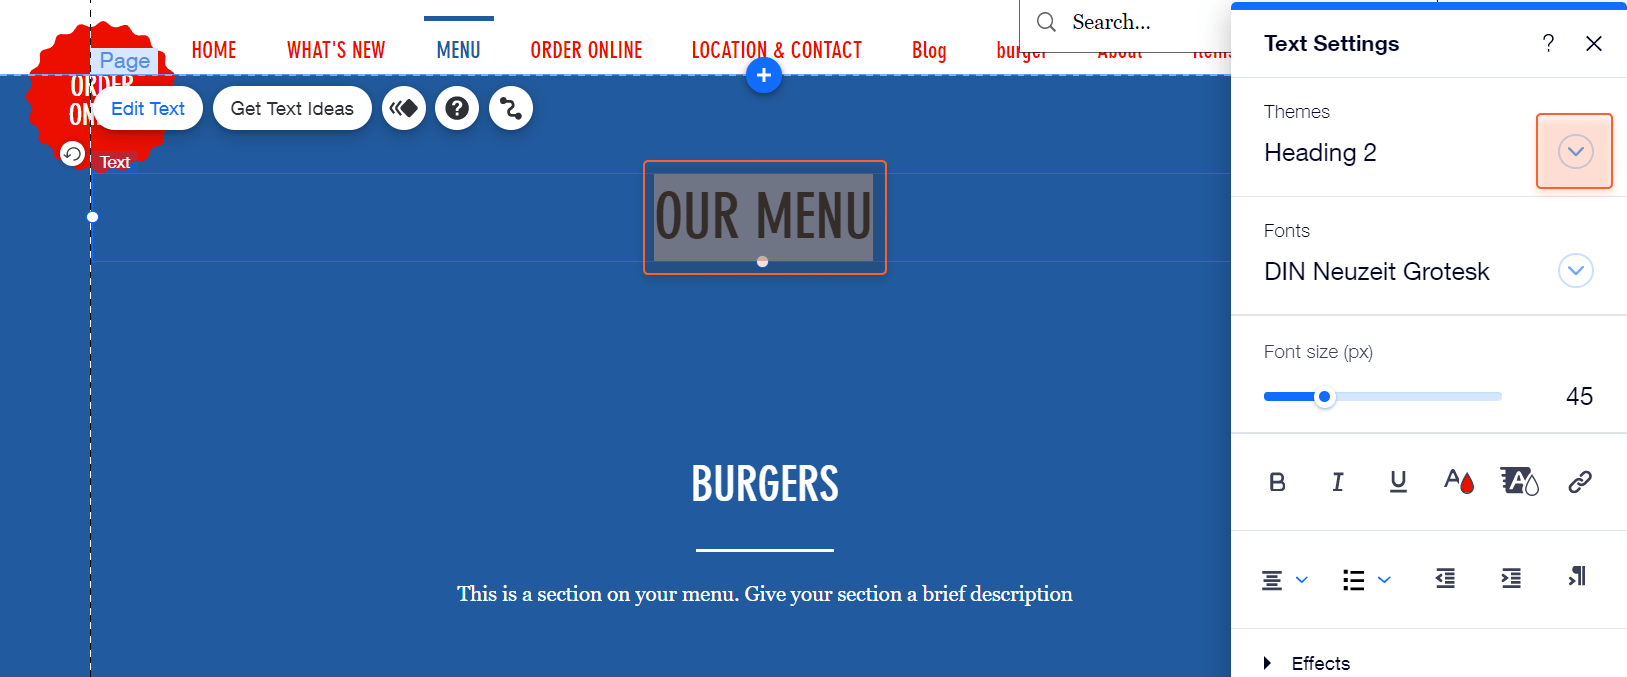
H1 headings tell search engines what the page is about, so you should write them carefully and add relevant keywords to make your pages rank better.
The problem with editing H1 headings in Wix is that you can only do it in the standard Wix Editor. So, if you previously worked in the ADI Editor, you’ll have to move to the standard one.
Remember that you cannot go back to the ADI Editor, as the changes you introduce in the standard Wix Editor will not be saved.
To assign an H1 tag to a title, double-click on the text you’re planning to make an H1, and choose the relevant option:

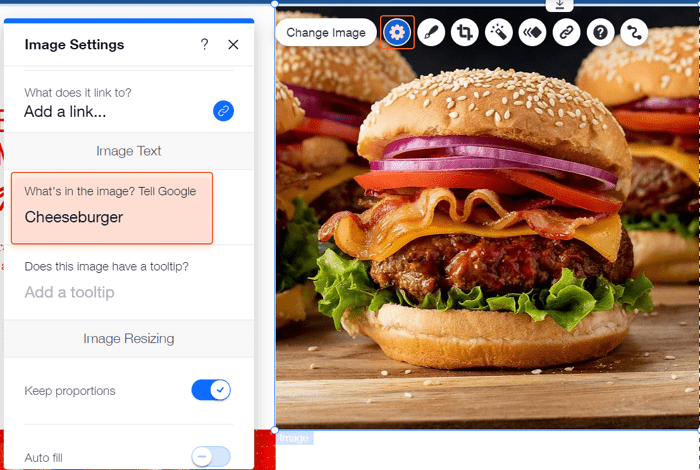
Alt texts let search engines better understand what’s on the image.
As for Wix websites, alt tags are probably more important than for any other websites. The reason for this is that Wix renames all the images you download on your website into something cryptic, so Google has no chance to understand the image reading its name. That said, alt texts are the only way to succeed with image SEO when it comes to Wix websites.
To add an alt text to an image, open the standard Wix Editor, click on the image, then click Settings (the gear icon), and enter the alt text.
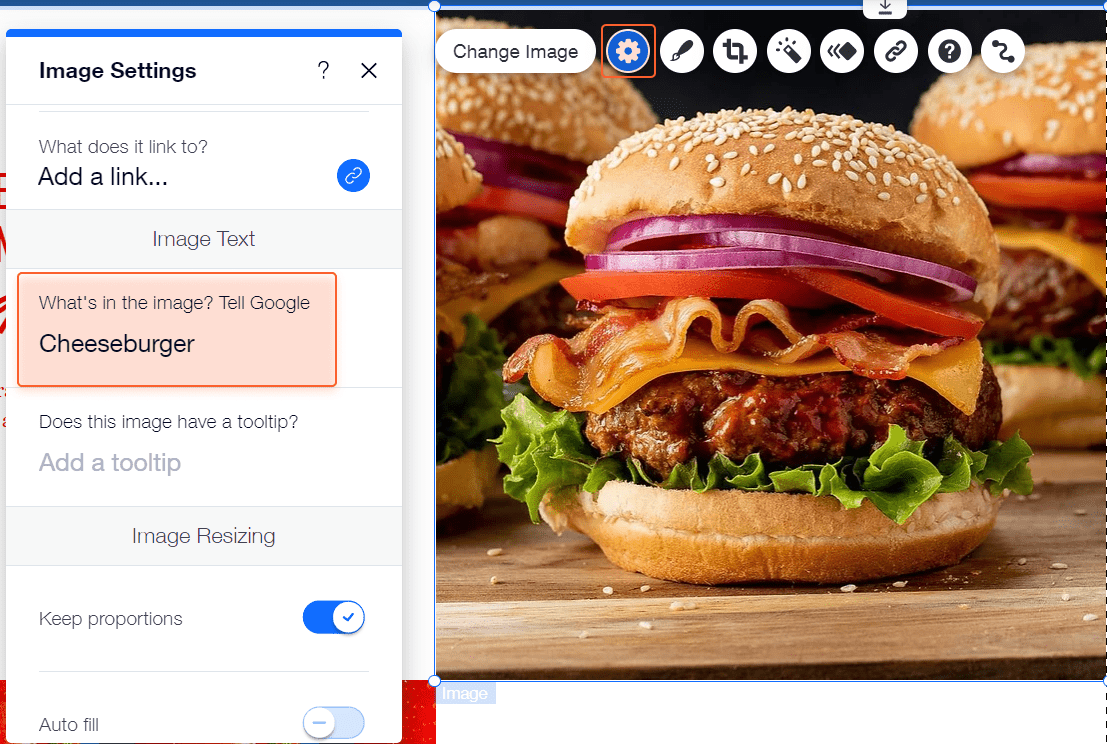
Remember that alt texts should be descriptive, not too general or long at the same time.
There’s one more way to improve image SEO with Wix — you can add a tooltip to the image. This is the text that appears once you hover over the image, so you can use this opportunity in different ways. Such as, you can add a more detailed description of an image, or write any hint for your visitors, etc.
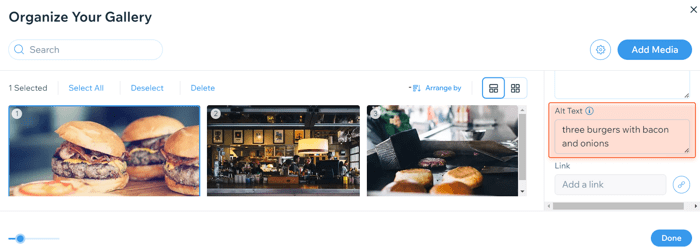
If you need to add alt texts to the images arranged in a gallery, click on the gallery and choose Manage Media.

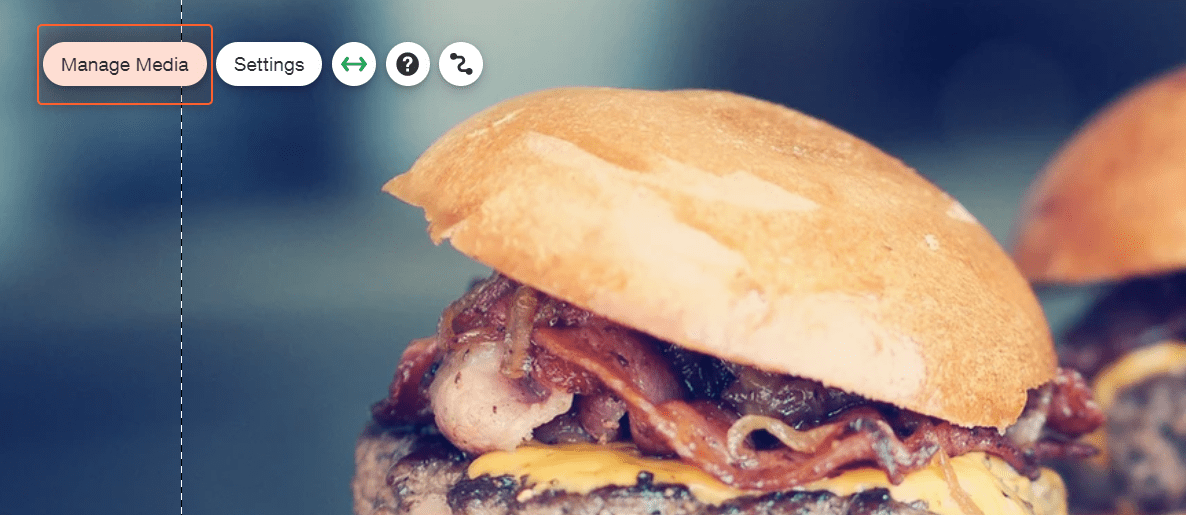
Then choose the image you want to write an alt text for and scroll the right-side panel down to the Alt Text section.

To add alt texts to product images, in your Wix dashboard go to Store Products and select the item. In the Images and videos section, click More options (... icon) > Edit alt text for image.

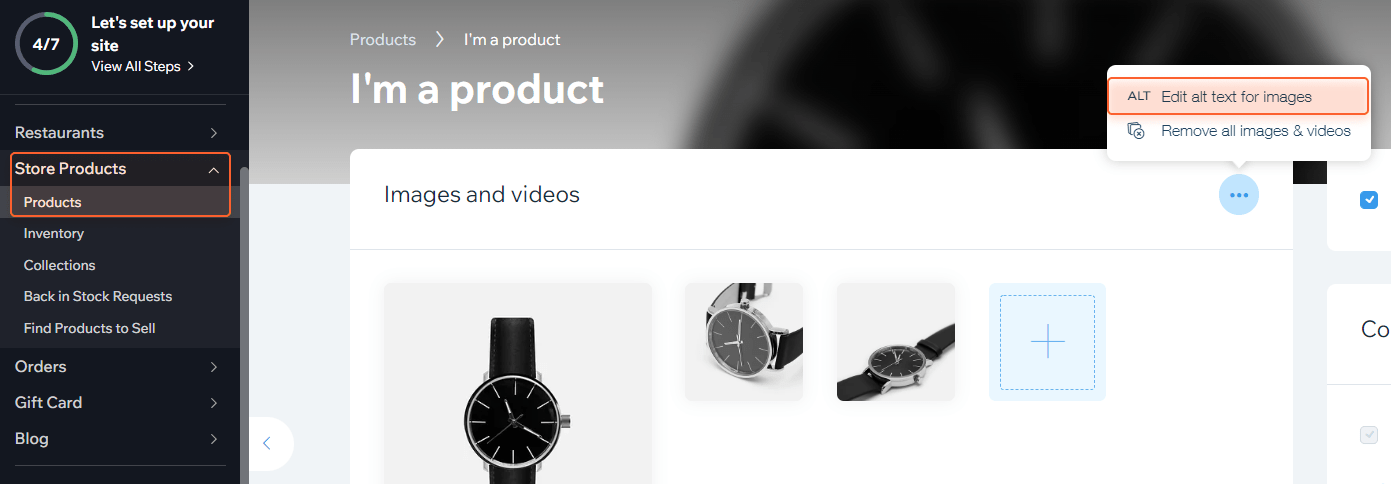
Write alt texts for all the images assigned to a certain product.


As for the Menu section (if you run a cafe), you should only name your dishes. These names will automatically become alt texts.
301 redirects (moved permanently) let you avoid leading users and Google to empty or irrelevant pages. Also, you need to set redirects if you change the URLs of already existing pages to save traffic and PageRank from the old URL.
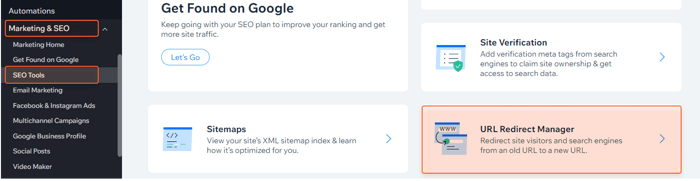
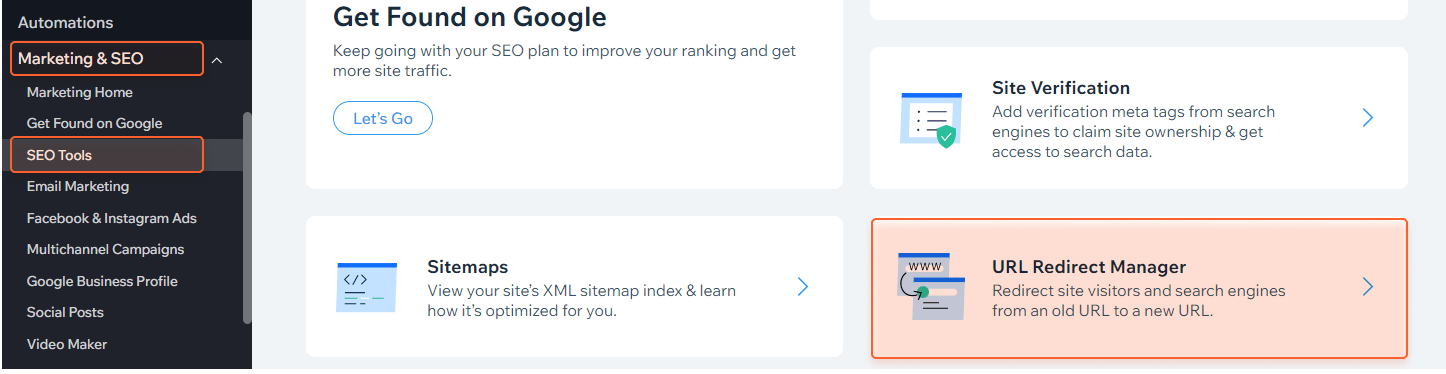
To set up 301 redirects, in your Wix dashboard go to Marketing & SEO > SEO Tools > URL Redirect Manager:
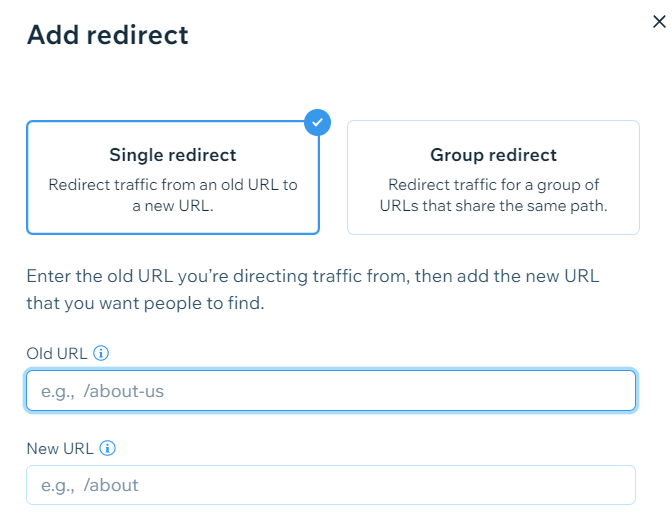
Then click Create New Redirect, choose whether you need to set up a single URL redirect or a group one, and enter the old and the new links:
If you have many different URLs pointing to a single page with the same contents, you need to tell Google which URL out of many it should index. To do this, set up canonical tags — they will let you avoid duplicate content issues that may result in Google penalties.
Actually, Wix creates default canonical URLs for all of your pages (they are the common URLs of your pages). Still, you may need to make some changes.
To change canonical tags, go to the standard Wix Editor, and click Pages. Near the relevant page, click More Actions (... icon) > SEO Basics, and go to the Advanced SEO tab. In this tab, expand the Additional Tags menu and click More Actions (... icon) > Edit near the canonical tag option.

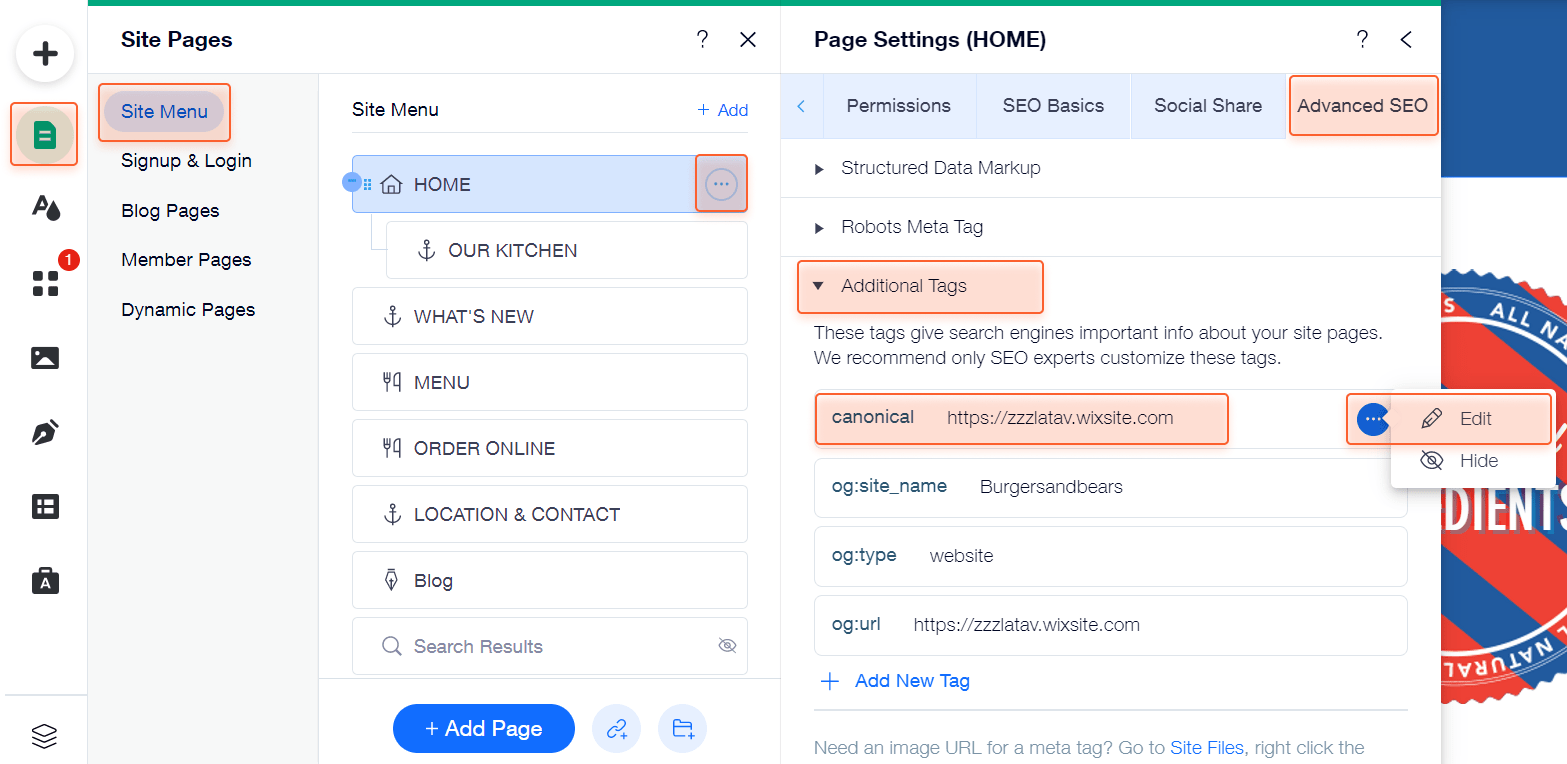
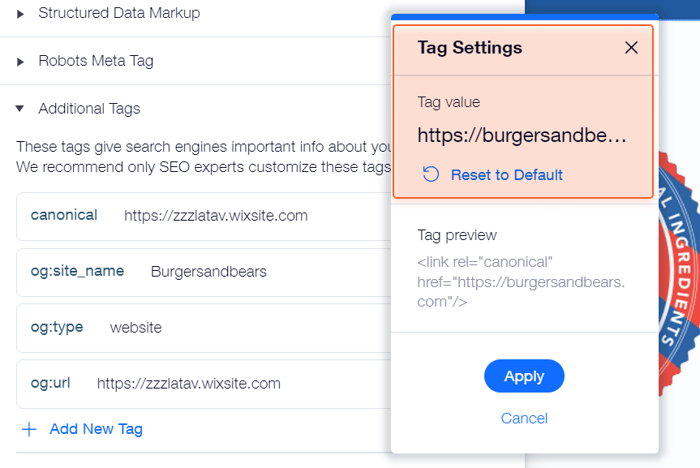
Then write the URL you want to set up as canonical for the current page:

Well-done internal linking lets Google crawl your website more efficiently. What’s more, it helps you boost your pages by allocating PageRank wisely, as you can link stronger pages to weaker ones thus making the latter more valuable.
In Wix, most of your pages will be well-linked by default. Say if you add a Store section, the link to it will appear right on your homepage. As you add product pages to your store, the links to them will be automatically placed on the Store page.
Still, if you’re creating a custom page from scratch, you need to set up links manually. The process is easy: open the Wix Editor and select a page you’re going to work with. Then click on the element (or add a new one) you want to use to link to any other page and click the link icon:
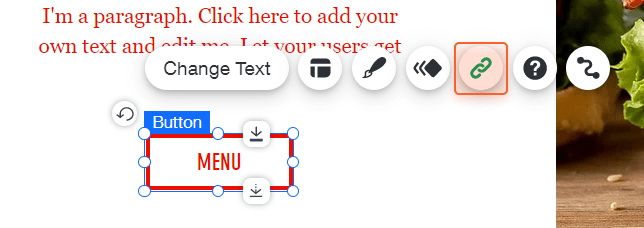
Then you can set up linking options: a destination page, the exact place on a destination page, and if it should open on a new page or not.
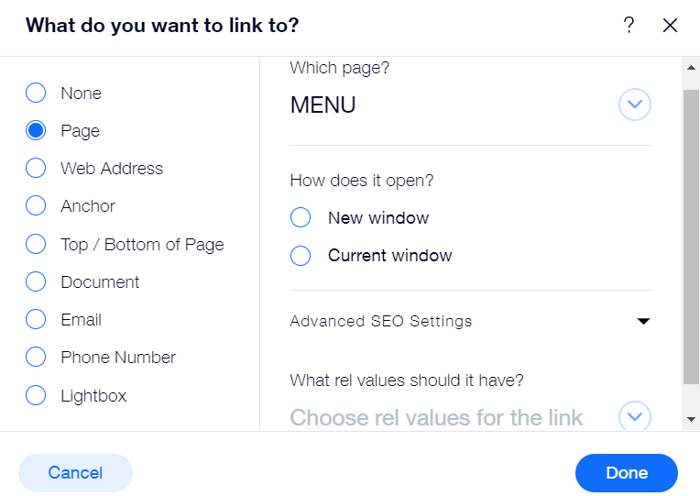

Let’s take a closer look at the Advanced SEO Settings menu. Here you can add rel values to control Google crawlers’ behavior.

If you want your link to be a dofollow, leave this option empty.
A blog is a great way to enrich your website with good, keyword-rich content. This will let your website appear in search for a wider range of keywords. What’s more, content is an important ranking factor, so having a blog will likely boost your positions thus you’ll be able to drive more traffic to your website.
To start a blog on Wix, you first need to add a blog section to your website via the editor. The mechanism is the same in both ADI Editor and standard Editor: you need to click Pages > Add Page and choose Blog. All the further settings are done in your Wix dashboard.
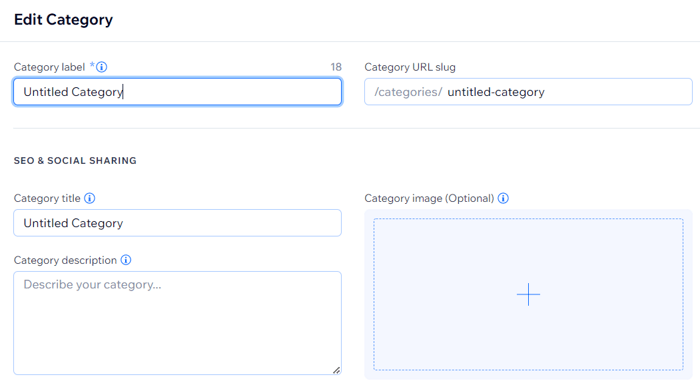
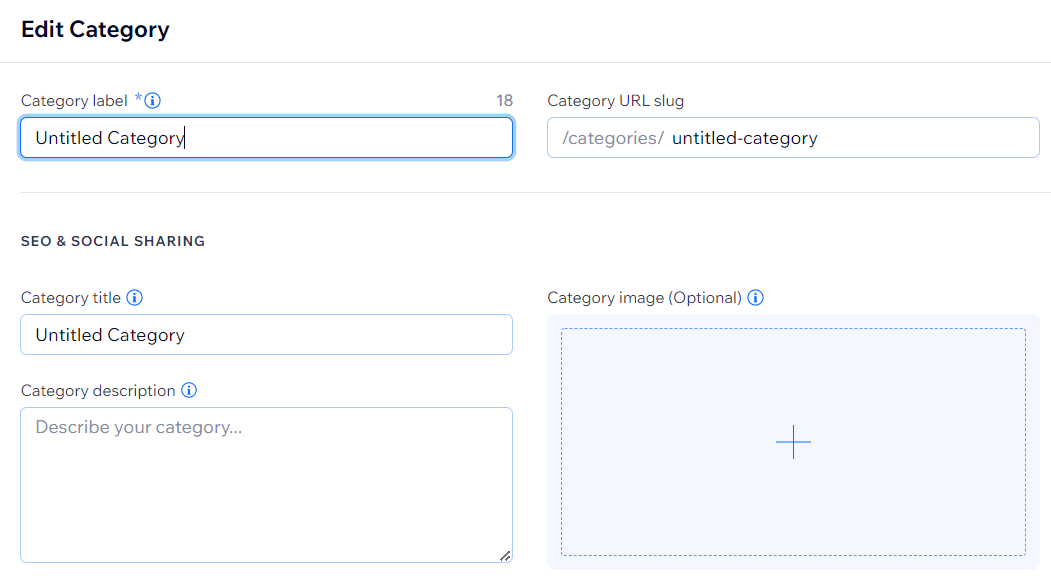
Wix lets you set up categories for your blog posts. In your Wix dashboard, go to Blog > Categories and click New Category:


Then you need to name your category, come up with a URL slug, write a title and meta description, and upload a category image.
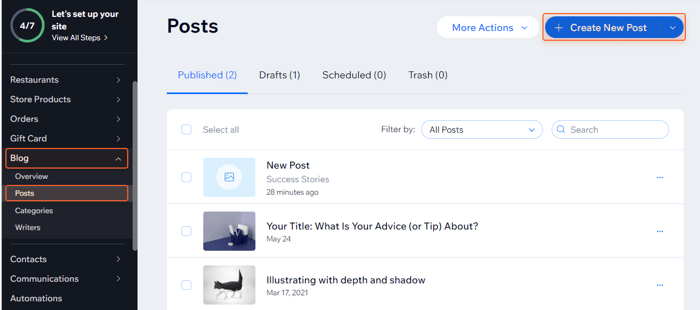
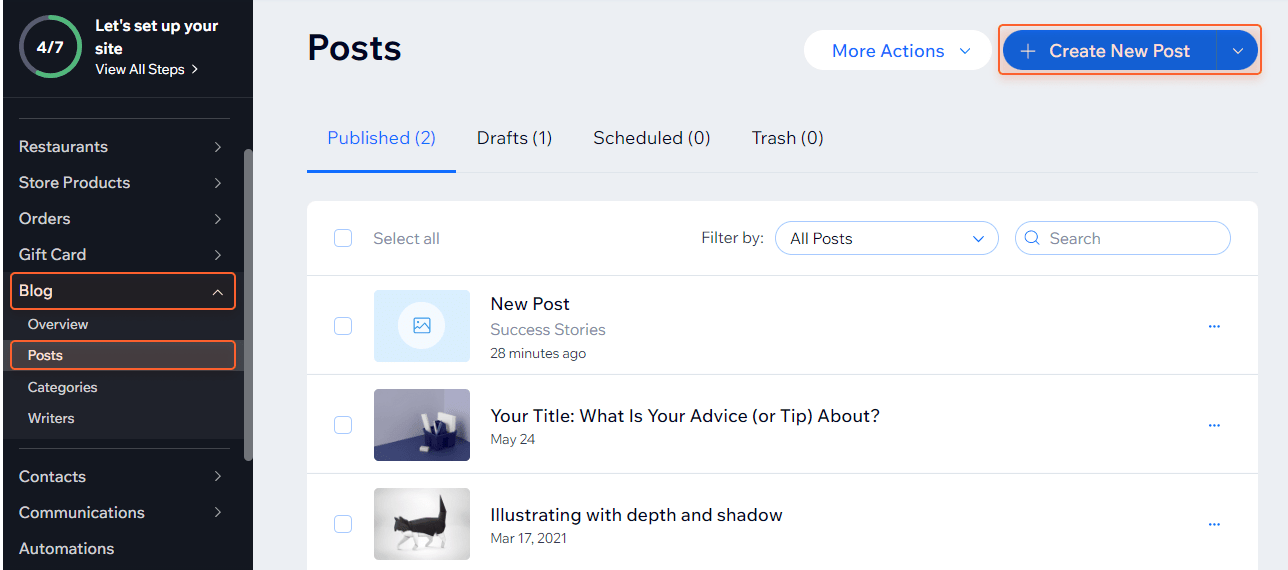
To write a new post, go to Blog > Posts and click Create New Post.
As you switch to the post editor, you can start writing your post right away. Don’t forget proper formatting (H2 — H6 headings, highlights, quotes, links, etc.) to make your post readable and easily perceived by visitors.
You can also add media, buttons, tables, code snippets, and even products to your blog post to make it more engaging (Add button on the left panel).

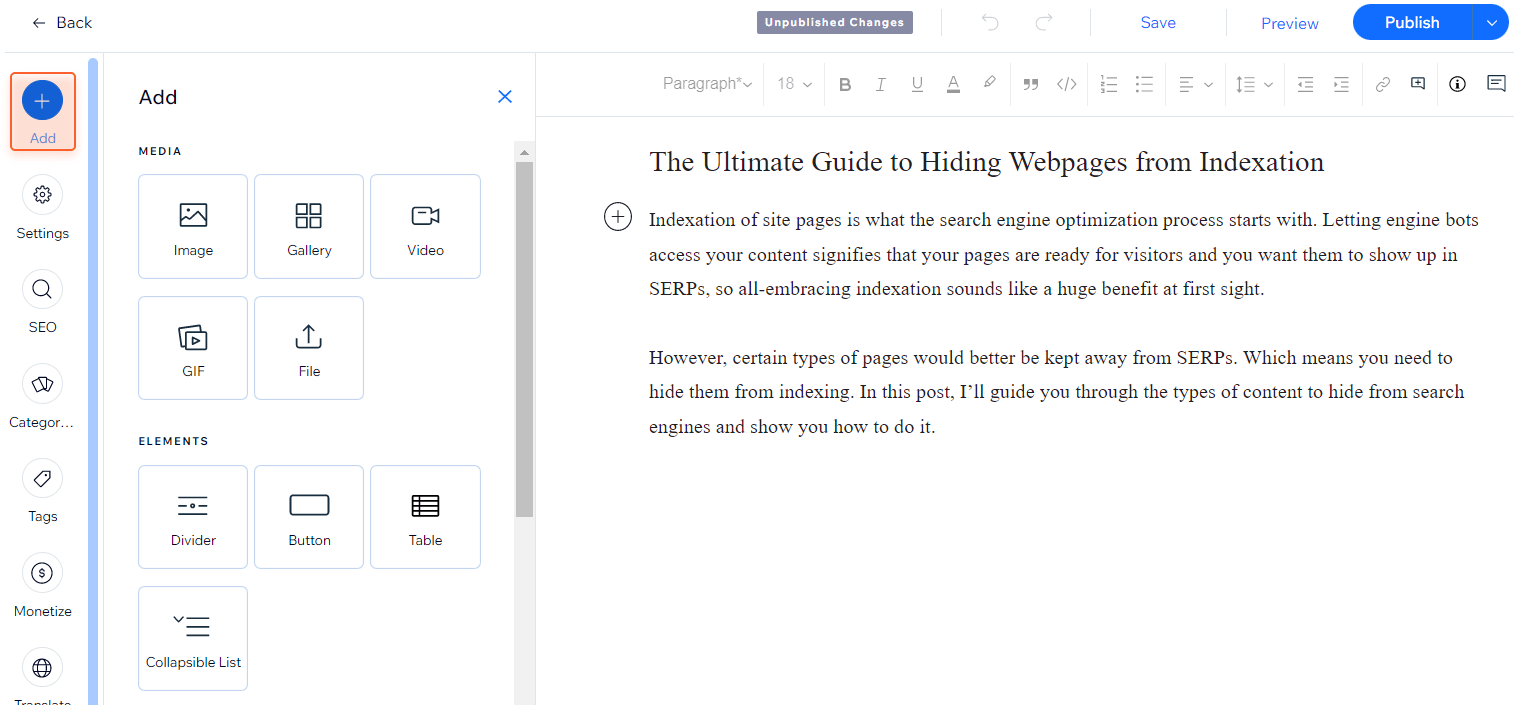
Still, don’t overdo with heavy videos and GIFs — although they are attractive, they will slow your page down.
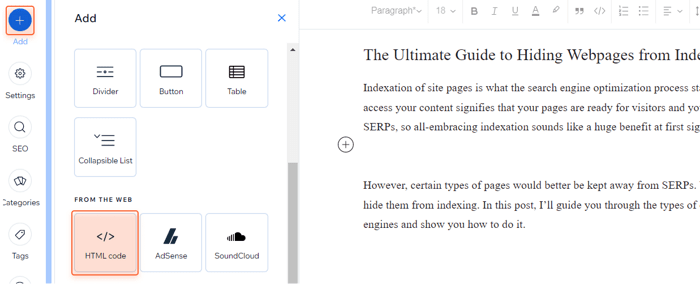
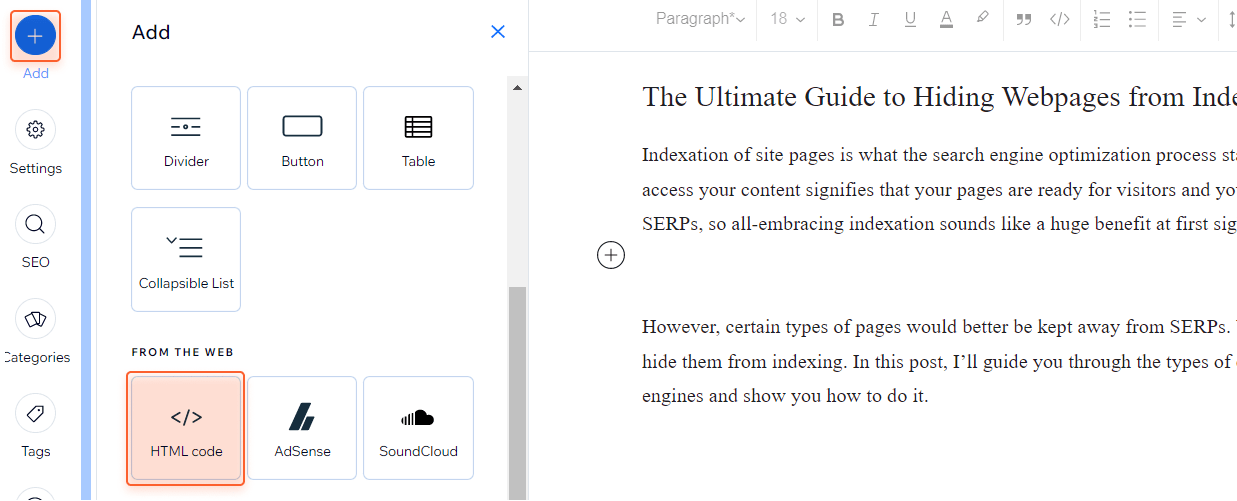
Pro Tip. I suggest embedding videos on your page instead of adding them directly. To do this, click Add and select HTML code:
Then enter a piece of code with the video you need, adjust the dimensions of the viewport, and click Save.
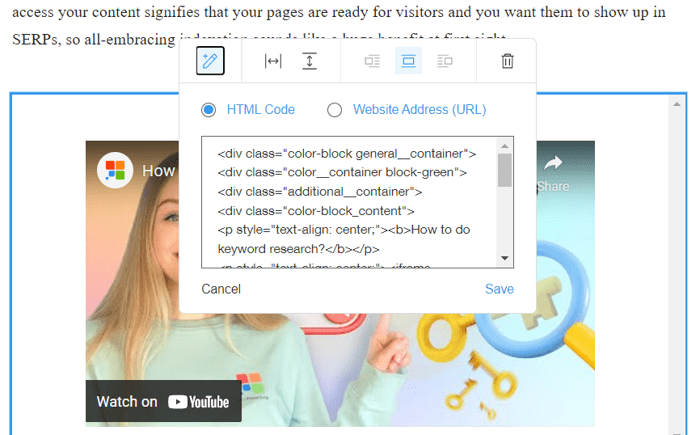

This is the code I used to add our video about keyword research. Replace the highlighted parts with your values to add the video you want.
<div class="color-block general__container">
<div class="color__container block-green">
<div class="additional__container">
<div class="color-block_content">
<p style="text-align: center;"><b>How to do keyword research?</b></p>
<p style="text-align: center;"><iframe width="560" height="315" src="https://www.youtube.com/embed/_VIv7DcwFbM" title="Keyword Research Video" frameborder="0" allow="accelerometer; autoplay; clipboard-write; encrypted-media; gyroscope; picture-in-picture" allowfullscreen></iframe></p>
</div>
</div>
</div>
</div>
The Settings button will let you add a cover image, state the publication date (General), create a post description, and select related posts (Advanced).
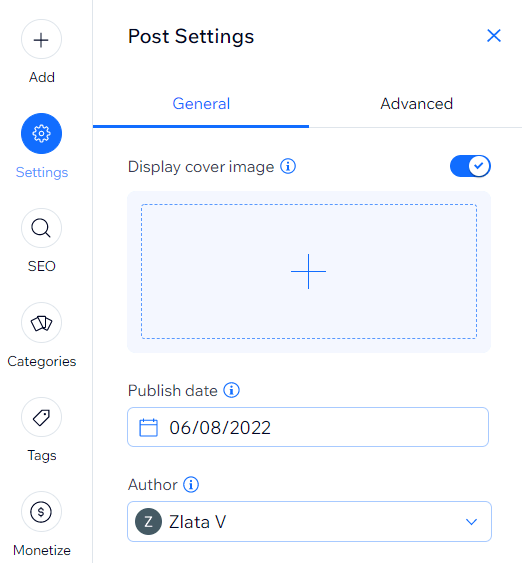
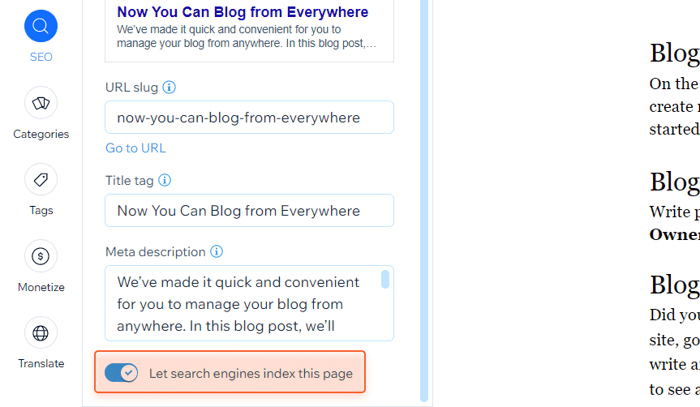
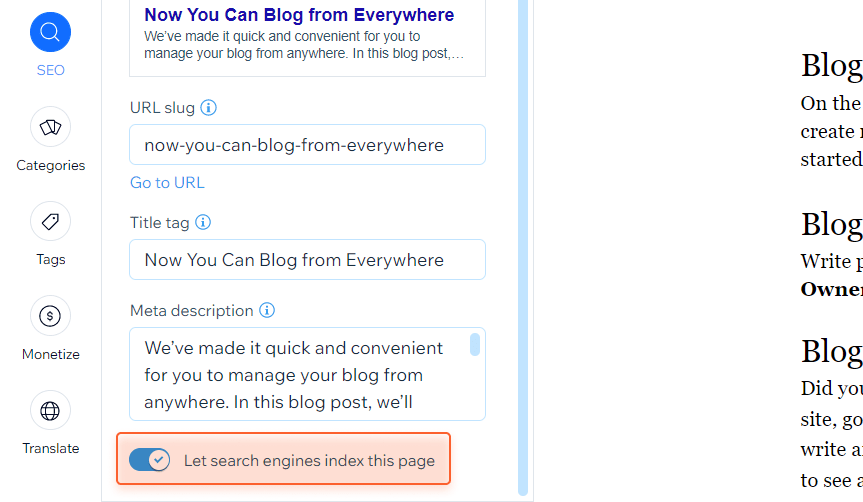
The SEO button lets you set up the title and meta description, edit a URL slug, and check how your post will look on social media.
Tip. Do not forget to switch the tumbler Let search engines index this page once you’re ready to publish your post. Otherwise, Google will not be able to see it.
To assign your newly created post to a certain category, click the Categories button.
Schema markup is a semantic vocabulary of standardized tags that are added to the page’s HTML. These tags help Google understand the content and context of your page and better represent it in search results.
Also, Schema markup is what actually stands behind rich snippets, so you need to add it to your pages to get more clicks from SERPs.
The good thing about Wix is that the platform has default Schema markup for most of the page types available — blog posts, products, courses, events, and forums. The only thing you need to do is to carefully fill out the page with content. Wix will handle the rest.
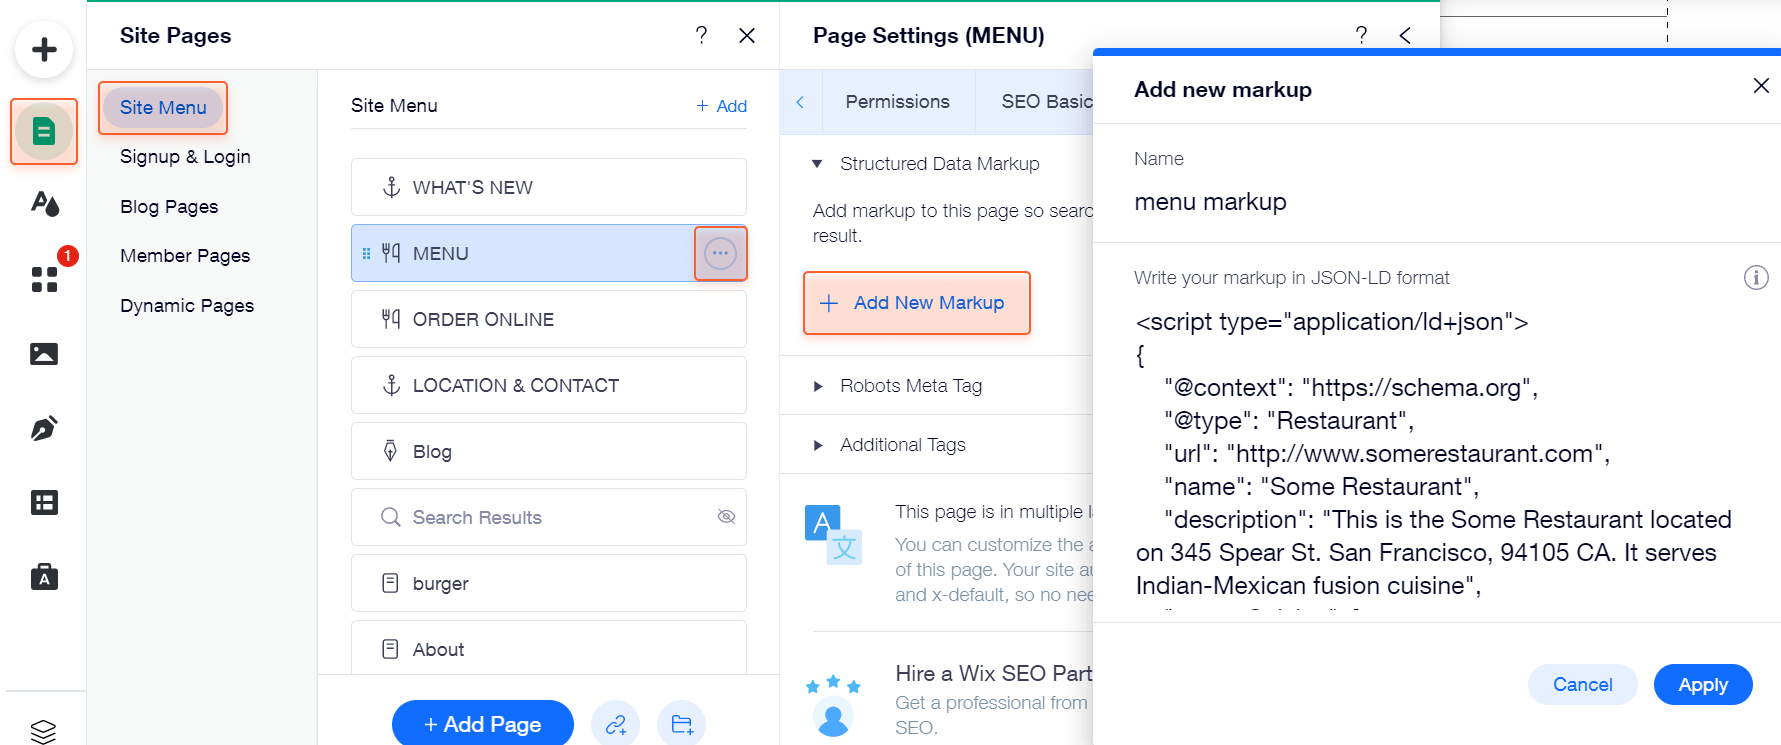
If you need to add a markup on other pages as well, you can do it in the Wix Editor.
Go to Site Pages > Site Menu and click More Actions near the page you need. Then go to SEO Basics > Advanced SEO > Structured Data Markup and click Add New Markup. Enter your markup in the JSON-LD format.

Once applied, don’t forget to test your markup on Google. Click Test on Google as it is shown on the screenshot:


Your Wix website may be optimized to the bone, but this will be of no use if Google cannot index it. That’s why you should always check the indexing instructions and edit anything if needed.
By default, most of your Wix website’s pages are visible to Google, so there’s nothing to worry about. Still, it may happen that you want to set up some specific indexing parameters to control Googlebot’s behavior or hide a page from Google for some reason. To do this, in the Wix Editor go to Site Pages > Site Menu and click More Actions near the page you need. Then go to SEO Basics > Advanced SEO > Robots Meta Tag.

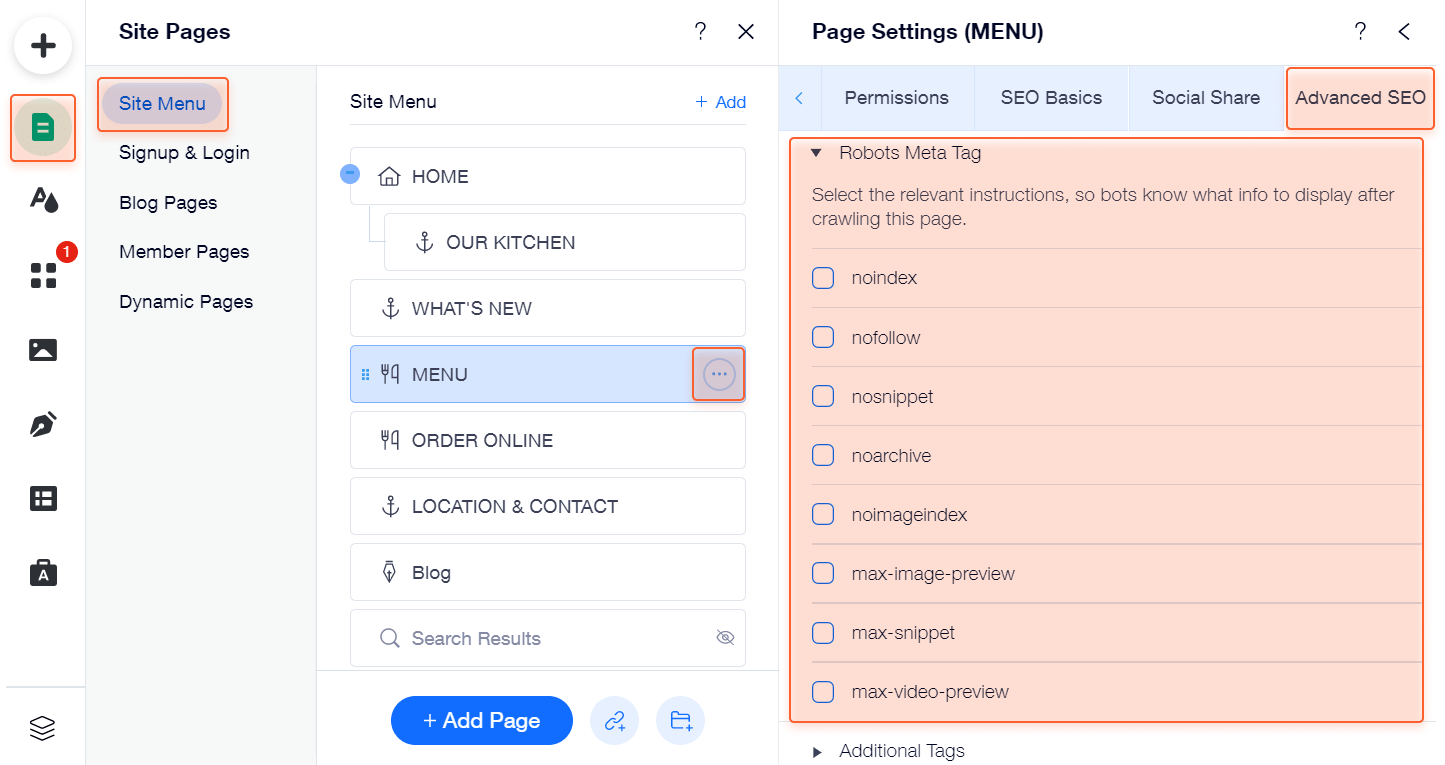
Here you can select one (or several) tags depending on how you want Google to index your page.
In addition to robots meta tags, you can use a robots.txt file to hide certain pages from search results. To view and edit your robots.txt file, go to your Wix dashboard > Marketing & SEO > SEO Tools > Robots.txt Editor.
Remember that you should only use one method per page — Google will not see robots meta tags if the page is hidden with a robots.txt file, so the page may still appear in search the way Google decides.
Finally, here we are. Your site is technically optimized and full of keyword-rich content. So it’s time to directly inform Google that your website is ready for SERPs, i.e. connect your website to Google Search Console.
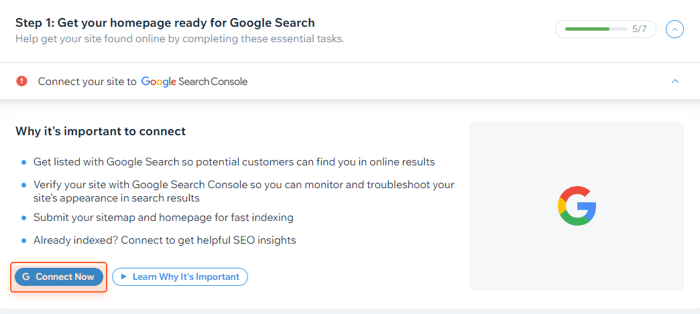
Connecting your site to GSC will automatically verify your website for Google and let Wix submit your sitemap for faster indexing. What’s more, GSC will give you a lot of useful insights into your website performance and even let you perform a comprehensive website audit.
Want to learn how to audit your website with GSC? Check out this video.
To connect your website, in your Wix dashboard go to Marketing & SEO > Get Found on Google > Connect Now.

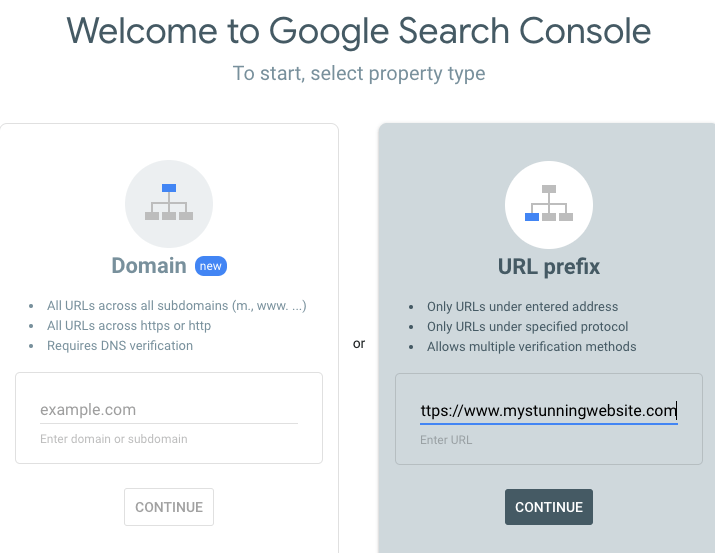
In Search Console, click Start now (or Add property if you’re already using GSC for some other websites) and enter your website address in the URL Prefix window.

Then choose the verification method. In the case of Wix, you should use the HTML tag. Expand the option and copy the verification meta tag.
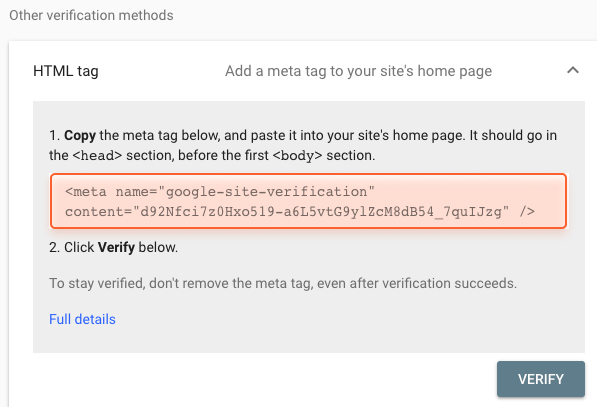
Now let’s go back to the Wix dashboard. In Marketing & SEO, go to SEO Tools > Site Verification > Google Search Console and enter the meta tag you have just copied from GSC.
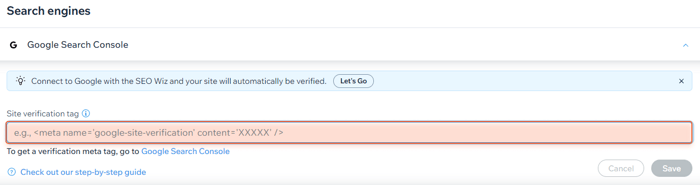

Click Save. Finally, go back to Search Console and click Verify.
Voila! Now your website is connected to Google Search Console. Track your performance, keep an eye on positions, and solve indexing issues if anything pops out all of a sudden.
Remember that Wix doesn’t resubmit a sitemap to GSC as you make any changes on your pages, you have to submit it manually to GSC if the changes you’ve made are worth it (say you’ve added new pages).
Backlinks are an important ranking factor, so you do need enough of them to rank high. In fact, pages that rank #1 on Google search have almost 4 times more backlinks than the other top 10 results. So, if you’re aiming for the first page, you have a lot of work ahead of you.
Of course, one of the easiest and time-tested strategies is to buy backlinks for your website. If you choose a trusted and experienced seller, it can save you much time and money. Besides, you can mix different link-building tactics to find an optimal solution. But to have sustainable results, you should create a solid strategy.
The non-negotiables are relevant links, high-quality websites, and consistency. Always check the page where you get your backlinks from. It should be appropriate for your niche and have high domain authority (DA) and page authority (PA). In link building, quality matters more than quantity.
Your backlink prospects may be closer than you think — these are your business partners, suppliers, loyal clients, and so on. If your business operates locally, then other businesses within your area may help you, no matter what niches they work in.
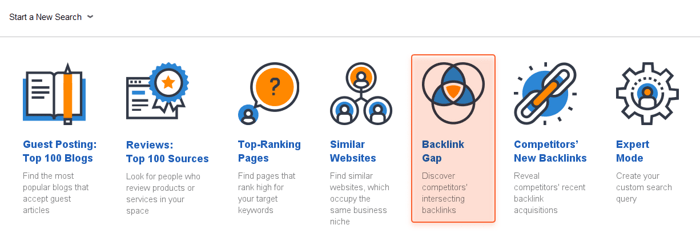
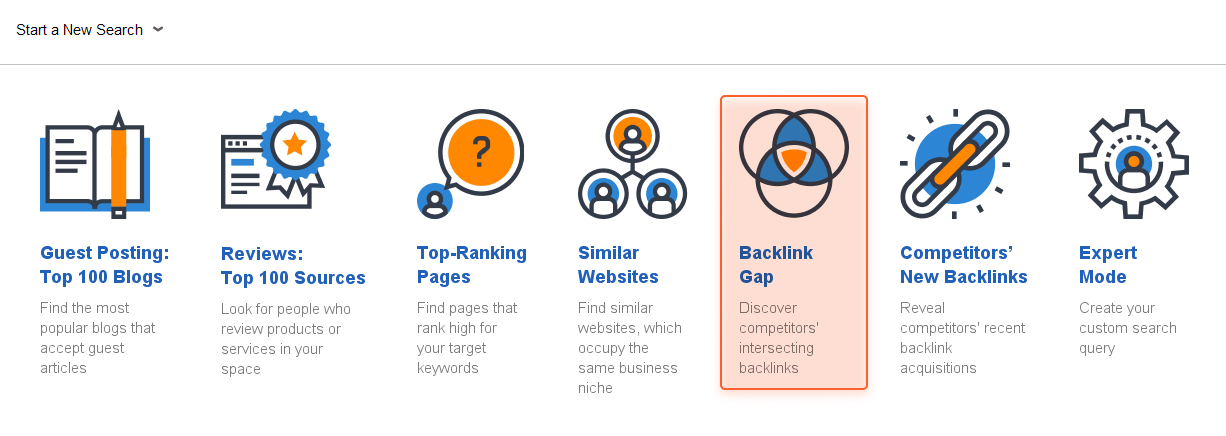
You can also use LinkAssistant to find the domains that link to your competitors but not yet to you. Launch the tool, click Start a New Search, and select Backlink Gap.
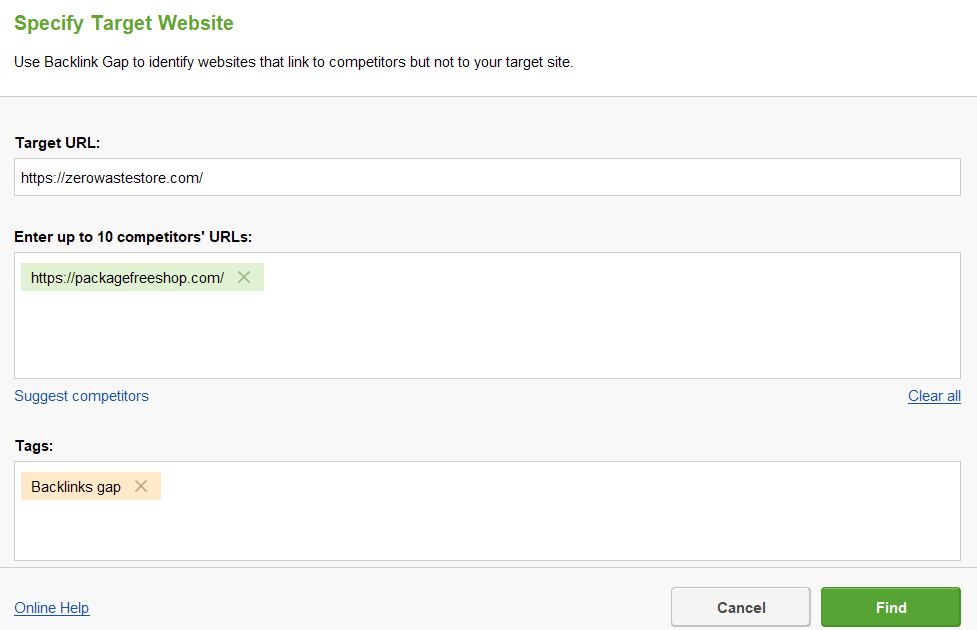
Then enter your up to 10 competitors’ domains and click Find.

You can also search for new prospects globally:
1) Choose the type of prospect you want to find.

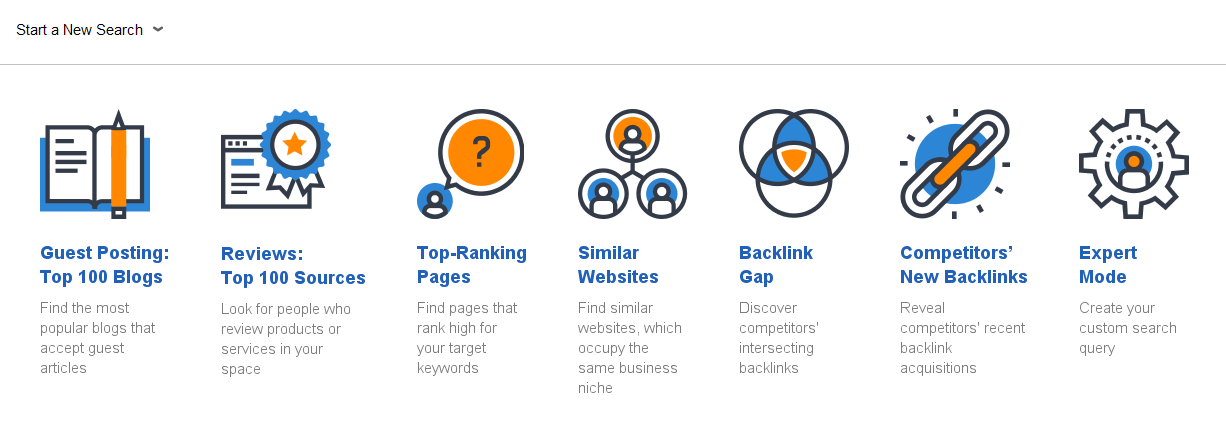
2) Enter your keywords and specify the target search engine:
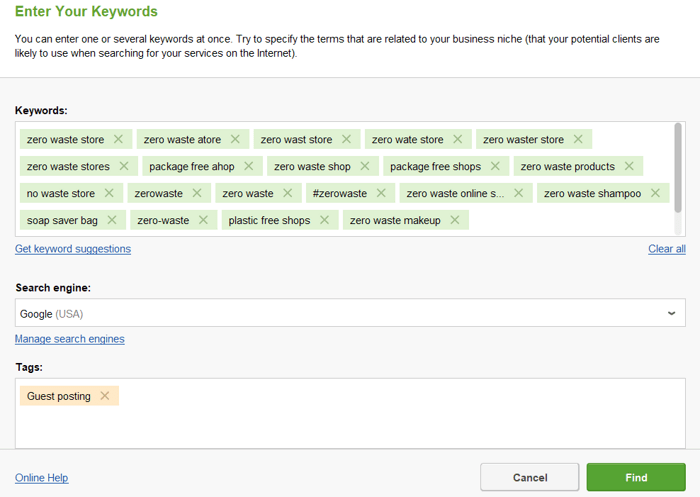
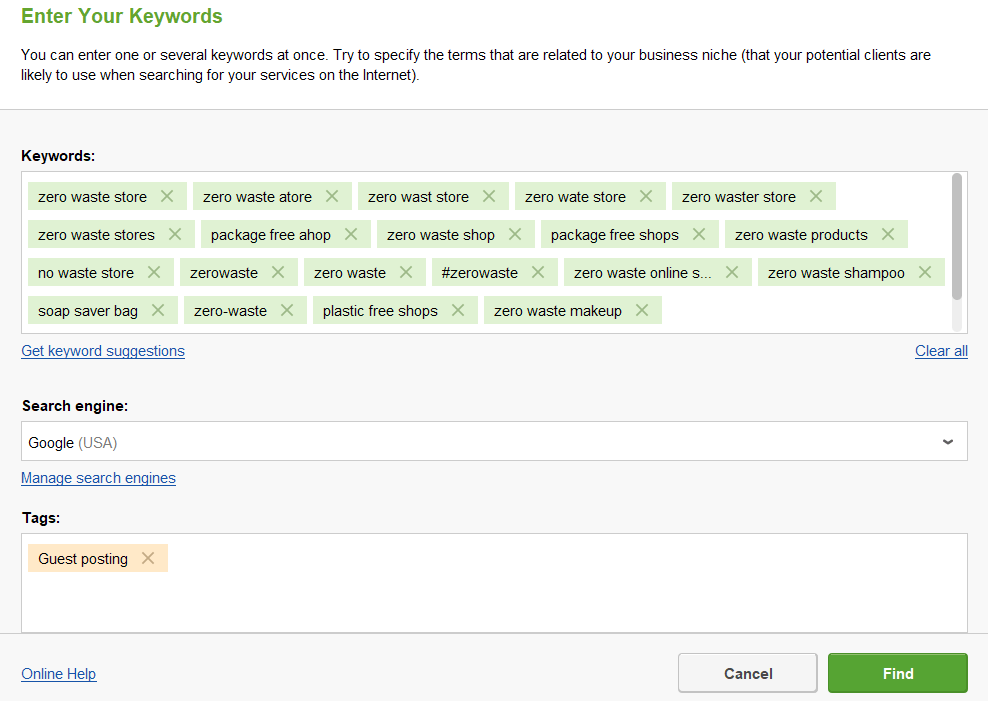
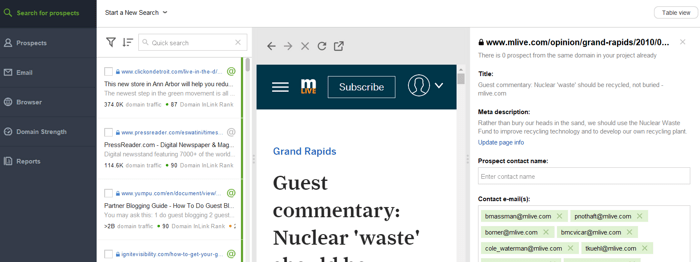
3) Choose the most suitable prospects from the list and start outreaching them (by the way, the tool also collects contact emails of newly-found prospects, so you may not need to search through their website manually).

As you can see, Wix of today is much more SEO-friendly than it was a year ago. The only thing that may kind of make you upset is the speed of the Wix editors, especially if you have already designed something tangible. But in general, Wix is a nice on-budget solution for a small website.
If you feel like this guide is missing something, feel free to visit the Wix SEO learning hub for additional information.
Have you actually worked with Wix? Share your experience in our Facebook community.