How to migrate your data to SEO PowerSuite
How to migrate your data to SEO PowerSuite

This guide will help you migrate your project data from any tools you're currently using to your new SEO PowerSuite's toolkit.
Import your ranking history
You've been probably monitoring some of your keywords for a while now and there's absolutely no need to bid farewell to all this collected information.
Let's check how you can import your keyword ranking history to Rank Tracker from Ahrefs, SEMrush or any other tools, which have a CSV export support.
Before we start with import...
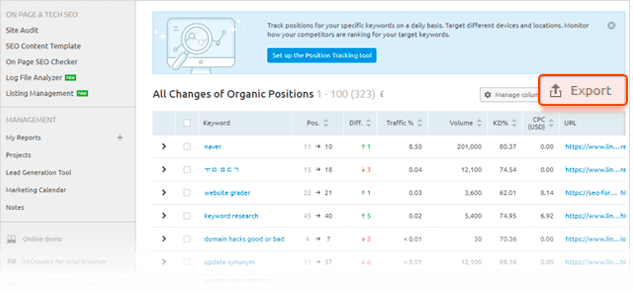
Step 1: First, you will need to export your ranking history from the tool you're using at the moment. As a rule, you can easily locate the export button in any of the tools, just make sure you're exporting in a CSV format.
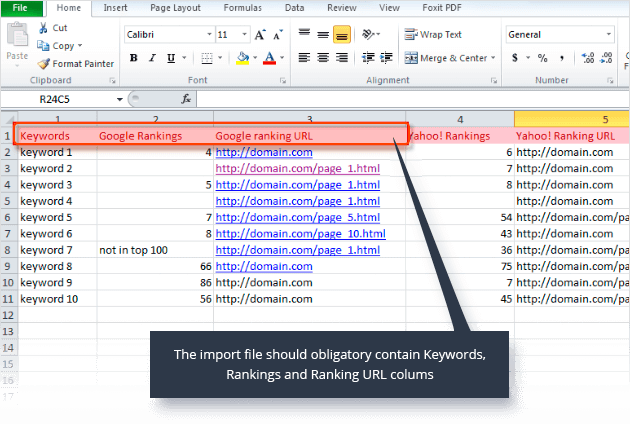
Step 2: Your CSV file should be slightly adjusted before you can import it to Rank Tracker.
Rank Tracker allows importing only one ranking date at a time. This means that if you need to import 10 ranking dates for a keyword (or list of keywords) you need to create 10 separate CSV import files: each file should contain the same list of keywords but with the ranking results only for the date you are going to import.
The CSV file should obligatory contain the following columns: Keywords, Search Engine Rank, Ranking URL.
Let's jump to import…
Your CSV file is ready for import to SEO PowerSuite's Rank Tracker and here's what you have to do.
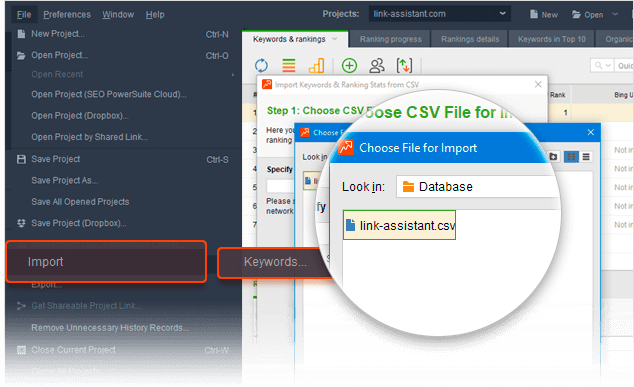
Step 1: In Rank Tracker, Click File-> Import-> Keywords. In the opened window select the CSV file.
Step 2: In the next window, select the row you want to start your import at. As a rule, the first row is generally occupied by headers so you do not need to import this one.
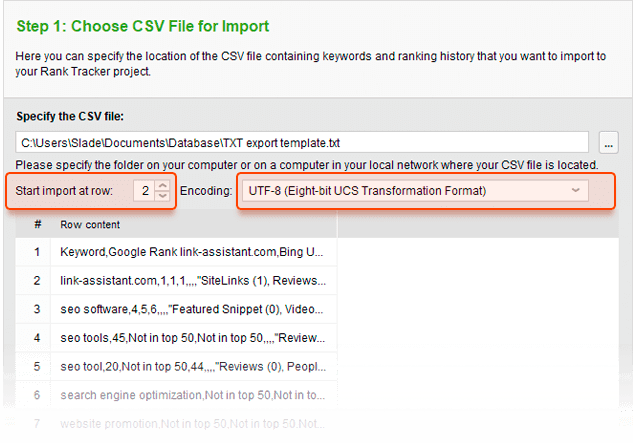
The set encoding is UTF-8 by default. In case your CSV file has another encoding, select the one you need and hit Next.
Step 3: Now, let's start with selecting the corresponding delimiter (comma by default). If the delimiter is chosen correctly, you'll see each piece of your data assigned to the separate column.
Next, assign its own name to each column so that Rank Tracker could understand what information this or that column contains. Use drop-down menus marked "do not use" (by default) to do that.

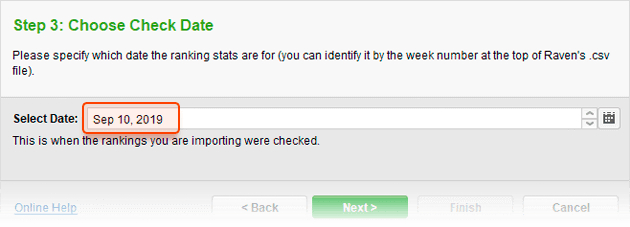
Step 4: Select the date of your rankings check.
Step 5: Choose the keywords you want to include in the project. Uncheck any of the keywords you do not want to be imported. This is very useful if you do not need to export the entire file but some of the keywords from it.
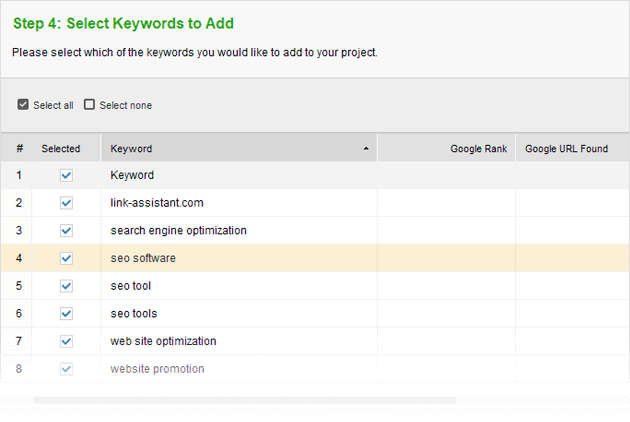
After you've done that, the selected keywords and their rankings will be added to the project.
Import your backlinks
You can easily import your collected backlinks' data to SEO SpyGlass, or if you have a database of link building prospects, you can import this to LinkAssistant.
Just as we've done it with keywords ranking history, you will first need to export this data from your current tools.
Luckily, there's no need here for preliminary adjustments to your CSV file so you can just jump straight to import.
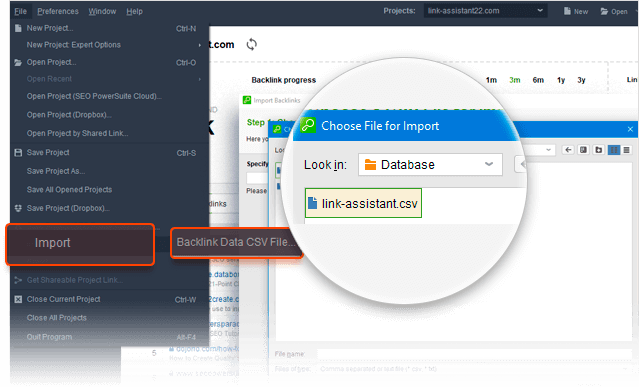
Import process in SEO SpyGlass and LinkAssistant is the same as Rank Tracker's — simply follow the wizard's steps.
After you've done that — the selected backlinks and their details will be added to the project.
Integrate with third-party apps
When you use SEO PowerSuite, you can easily integrate with third-party apps and obtain data from Google Analytics, Search Console or MOZ.
MOZ
Integrating your SEO PowerSuite with MOZ will allow you to get such metrics as Domain and Page Authority.
To enable MOZ integration, you need to have a free community or paid MOZ account. If you do not have a MOZ account yet, you may create a free community account.
Let's check how to enable MOZ API integration.
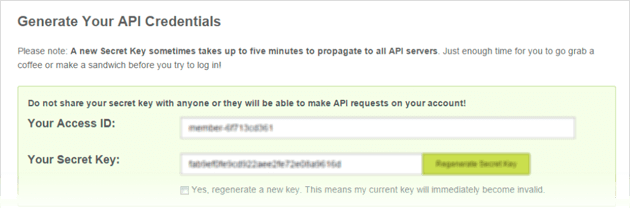
Step 1: In your MOZ account, go to generate your Mozscape API key.
Step 2: Then switch to any of SEO PowerSuite tools and go to Preferences > Moz API Settings > Add Key.
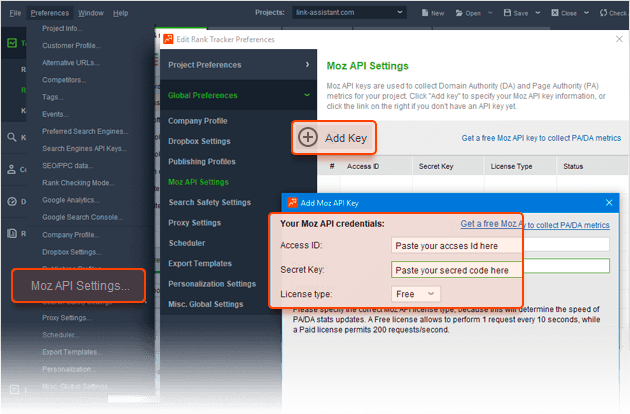
Step 3: Paste your credentials in the popped up window and choose your license type (free or paid).
Voila! MOZ API is now connected to your SEO PowerSuite's toolkit.
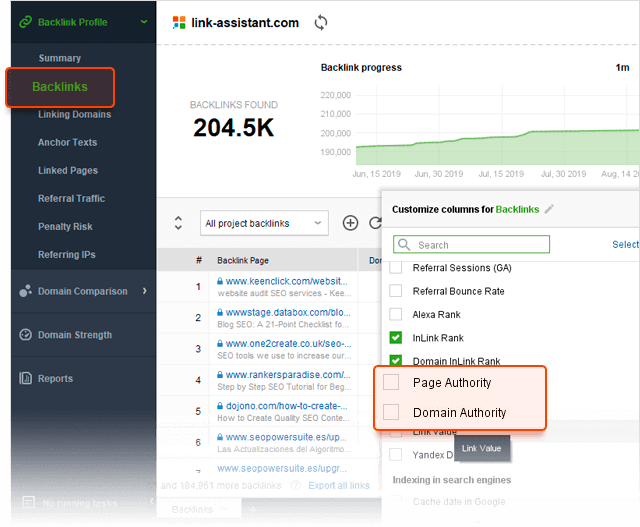
- Open SEO SpyGlass
- Go to the Backlinks section of the Backlink Profile module
- Right-click on any of the column headers
- Check Domain and Page Authority boxes in the list
Google Analytics and Search Console
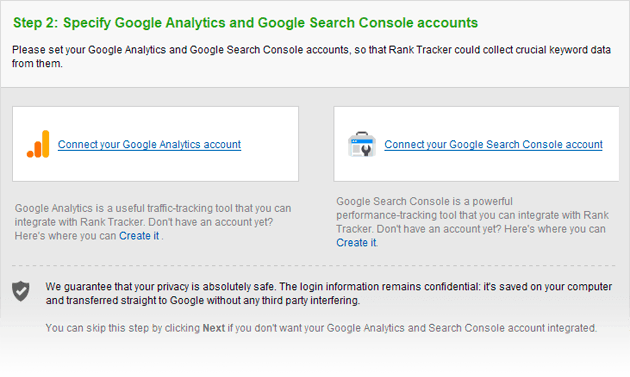
It pays to connect your Google Analytics and Search Console accounts right from the start. This will help you get the traffic stats for your site's pages, analyze the performance of your website, and conduct comprehensive keyword research.
When creating a new project in Rank Tracker, the wizard will ask you to connect your Google Analytics and Search Console accounts. We'd recommend that you do not skip this step and set up integration from the start.
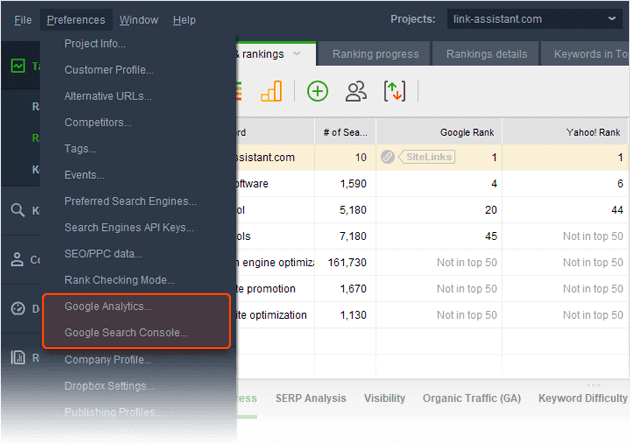
Once your Google Analytics and Search Console accounts are enabled in Rank Tracker, don't forget to switch the synchronization on in all the remaining three apps. Your accounts' data will be automatically synced between the apps of SEO PowerSuite.
If you decide to skip the wizard's step or you want to integrate with your Google Analytics / Search Console in SEO SpyGlass, WebSite Auditor or LinkAssistant, jump to Preferences > Google Analytics / Google Search Console.
Create a winning SEO campaign with SEO PowerSuite:
- Find your target keywords
- Check current visibility in search engines
- Detect on-site issues and fix them
- Optimize your pages' content
- Get rid of harmful links
- Build new quality backlinks