Getting started with your site's SEO with SEO PowerSuite
Getting started with your site's SEO with SEO PowerSuite

Thank you for downloading SEO PowerSuite! We're so thrilled to have you on board.
Now that the toolkit is downloaded and installed, it's time to learn what's in there and how to set up and launch your first SEO campaign in SEO PowerSuite.
If you feel that you have a good grasp of SEO, keep on reading this article. If you're just beginning your SEO journey, we'd recommend that you jump to this 30-minute daily SEO course.
This guide is stuffed with links to helpful materials so if you need to dive into more details, just click on any link you'll see during the read.
1. What's inside the toolkit?
SEO PowerSuite is a bundle of four tools — Rank Tracker, WebSite Auditor, SEO SpyGlass and LinkAssistant.

It's easy to guess that each separate tool is designed to cover a specific part of SEO.
Let's check what the four tools are and what they do.
Rank Tracker
Rank Tracker is the tool that will help you find profitable keywords, check your rankings (and your competitors' too), and conduct comprehensive competitive analysis.
WebSite Auditor
WebSite Auditor will take care of the on-page optimization and check if your website works properly from the technical and content optimization standpoint.
SEO SpyGlass
SEO SpyGlass is a powerful backlink research tool that lets you collect and analyze all your and your competitors' backlinks.
LinkAssistant
LinkAssistant eases your future link building efforts. It helps you find hundreds of link building prospects, handle the outreach, and manage your link building campaign right from the app.
2. How do I use SEO PowerSuite for my site's SEO?
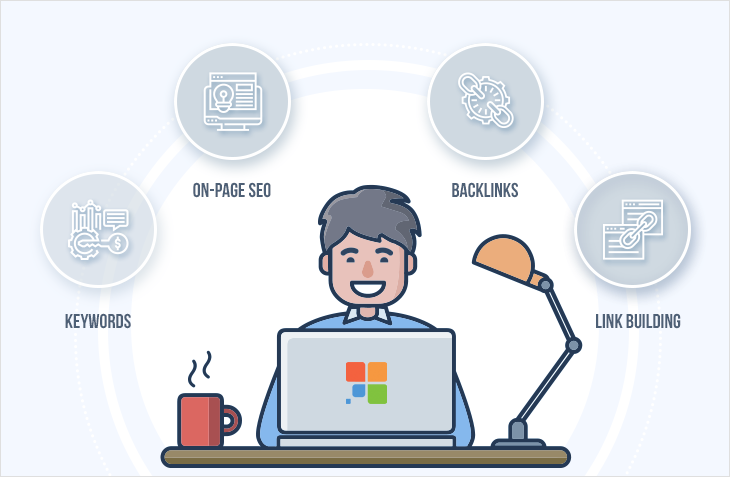
To make your future workflow more organized, let's first segment it into four pillars. Those will be keywords, on-page SEO, backlinks, and link building. Such segmentation will help make your SEO campaign more consistent.
Based on the above, here's how your step-by-step plan will look like:
- Keywords
It's worth to start with the keywords, and there are good reasons for that.
Keywords on your site work as hundreds of beacons for search engines and help them match user queries to the content on your site.
It's uber-important that the keywords you use align with what your site is about. Because if they're not, the traffic your site gets will likely be irrelevant and bring few conversions.
To find the right keywords, you'll have to conduct proper keyword research and analysis in Rank Tracker.
Here's your plan:
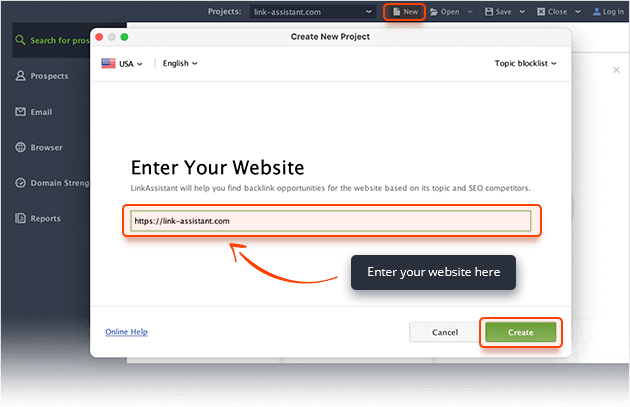
Step 1: Create a new project and check your current rankings
Start small — create a new project in Rank Tracker.
You'll be asked to fill in several seed keywords to check rankings for. Here, just think about some keywords that best describe your business or proceed with the keywords suggested by the wizard.
Once it's done, you'll see your current rankings for the keywords you've indicated. This will give you a general sense of your rankings' status quo.
Step 2: Analyze your competitors to get keyword ideas
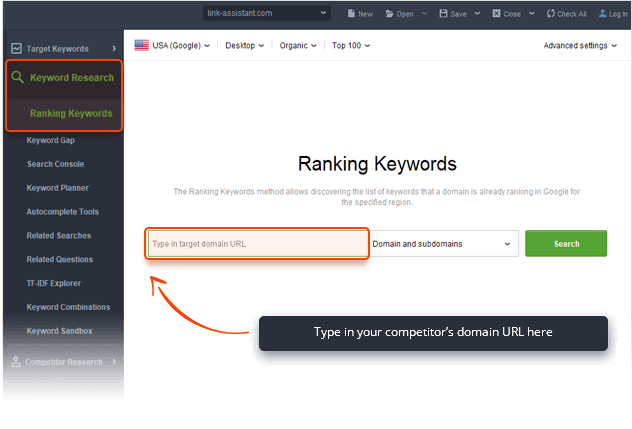
Next, let's go ahead and check what keywords your competitors rank for and how well they perform.
You can take a peek at any competitor you choose or let Rank Tracker suggest the most relevant ones in your niche.
Step 3: Get more keyword ideas with 20+ keyword research methods
Once you've analyzed your competitors, stay in the same Keyword Research module and use more than 20 keyword research methods to enrich your keyword list.
Step 4: Filter your keywords
For your convenience, all the keywords you discover during your research are automatically added to the Keyword Sandbox in Rank Tracker.
Let's open the sandbox and assess the collected keywords.
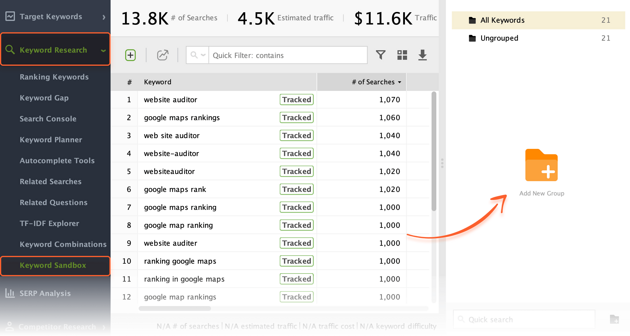
Based on the metrics you'll see in the module, you can filter out potentially profitable keywords, and get rid of those that are unlikely to bring you relevant traffic. Such metrics as search volume, keyword difficulty, and competition can help you choose the target keywords for your website. To further group your keywords, create a new keyword group and simply drag your keywords to the group of your choice.
That's pretty much it for the keywords part in Rank Tracker. If you feel that you need a more detailed walkthrough of the app, check out this video.
- On-Page
When all keywords are collected, filtered and grouped, let's start with the on-page optimization.
To rank high in search engines, your site has to be properly optimized tech- and content-wise. For this task, we'll be using WebSite Auditor.
Here's what you'll have to do:
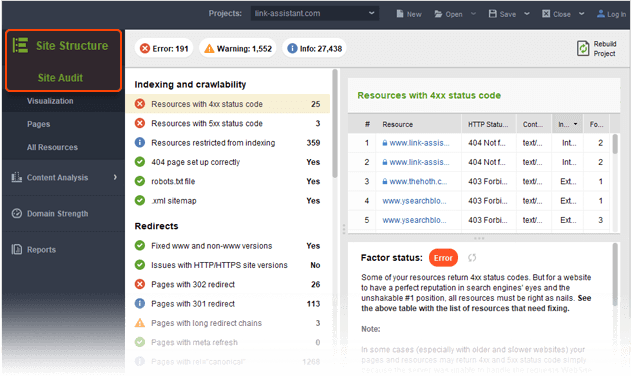
Step 1: Audit your site for tech errors
To spot and eliminate all potential obstacles that may stop web crawlers from correctly scanning your site, you'll have to conduct your site's audit.
First, create a new project in WebSite Auditor and wait till the tool crawls and collects all the pages of your website.
When the process is completed, jump to the Site Audit module and get rid of all the technical discrepancies step-by-step based on the recommendations of the tool.
Step 2: Spot troubles in your site's structure
A consistent site structure lets you kill two birds with one stone. First, it adds to a better crawlability. Second, those who visit your site can easily navigate it, which converts in A+ user experience.
To ensure that your site is well structured, you'll have to jump to the Site Visualization module in WebSite Auditor.
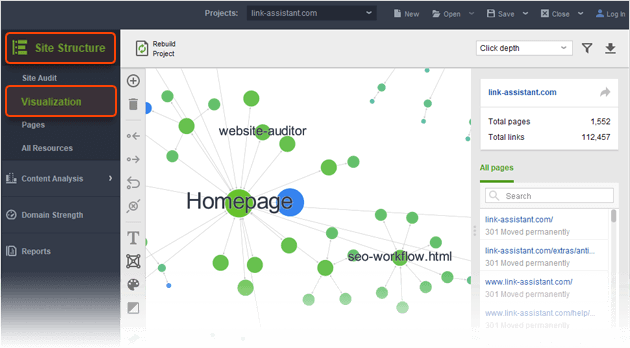
The tool will render your site into an easy-to-digest visual map. After it's generated, you'll easily identify and fix orphan pages, isolated parts of your site, redirects, broken links, and other problems in your site's architecture.
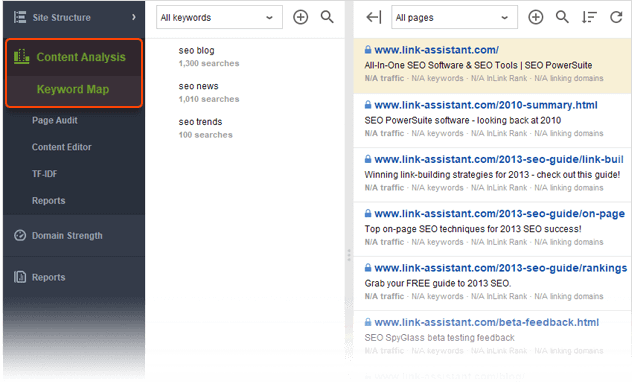
Step 3: Map keywords to your site's pages
Now that you've checked your site's on-page optimization and fixed all spotted issues, let's get back to the keywords you've previously collected in Rank Tracker and map them using WebSite Auditor.
Jump to the Keyword Map module in WebSite Auditor and the tool will automatically pick up the pages that are most relevant to this or that keyword group or any specific keyword alone.
If you're hungry for more info on the module, make sure to check this short video to learn the quickest way to do keyword mapping.
Step 4: Optimize your landing pages
With the ready keyword map at hand, there're a few steps left before your site's content sees any updates.
First, ensure that your landing page is properly optimized for the target keywords you've collected.
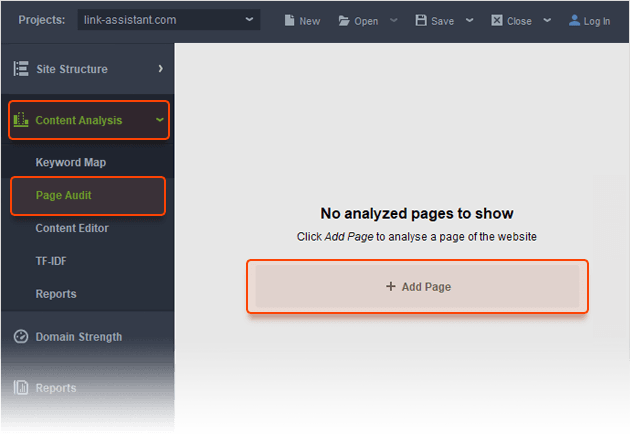
Then, when everything that needs fixing is fixed, jump to the Content Analysis > Content Editor, select the page, and start updating its content right in the app.
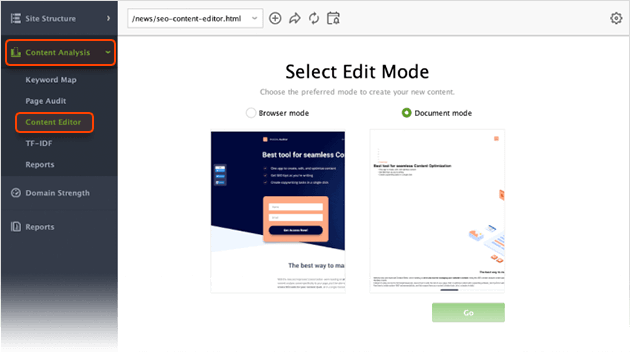
Once finished, save the page and upload it to your website.
Step 5: Bonus feature: Get personal keyword analysis with TF-IDF
After you've filled your landing page with new keywords, make sure you're not missing out on any additional topical keywords your competitors use.
To do that, conduct a TF-IDF analysis.
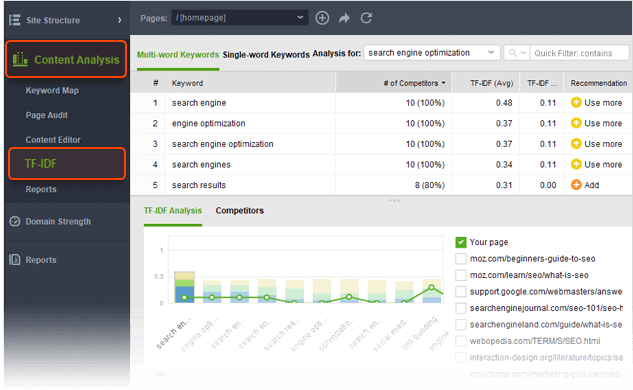
WebSite Auditor will analyze your top competitors' content and give you personal recommendations on keyword usage.
If you're more of a visual learner, we've got a quick video on TF-IDF for you.
- Backlinks
Backlinks are one of the most valuable additions to your site's SEO.
Search engines give a lot of weight to sites with backlinks coming from highly reputable domains. High volumes of backlinks coming from spammy sites, in contradiction, may spoil your domain reputation.
With this in mind, before you start building your backlink profile, it pays to check the current state of things, i.e. find and check all the backlinks already pointing to your site.
Here's your shortlist of steps to perform in SEO SpyGlass:
Step 1: Find pages already linking to your site
To collect all the backlinks that point to your site at the moment, you'll have to create a new project in SEO SpyGlass and jump to Backlink Profile > Backlinks.
The tool will check its index and find all the backlinks with a multitude of useful metrics you may need for further analysis.
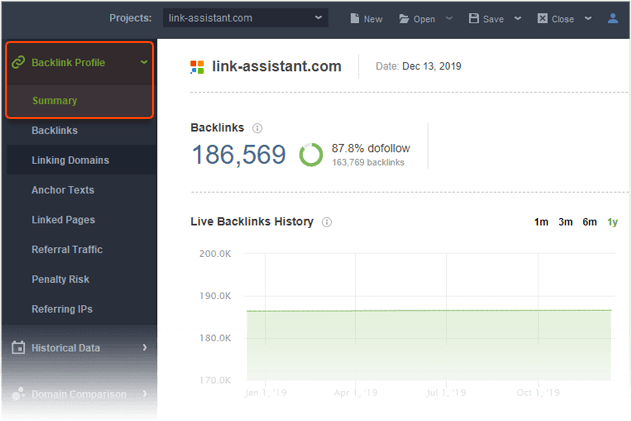
Step 2: Assess your backlink profile
Once you've collected all the backlinks, it's worth checking how your backlink profile looks like as a whole.
To do that, jump back to Backlink Profile > Summary. In this module, check an overview of your backlink profile along with the key metrics to spot your site's strengths and weaknesses.
Step 3: Peek at your competitors' backlink profile
Now it's time to compare your backlink profile to your competitors'. After all, you'll have to be better than your competitors SEO-wise, to rank higher than they do.
To do this kind of check, go to Domain Comparison > Summary.
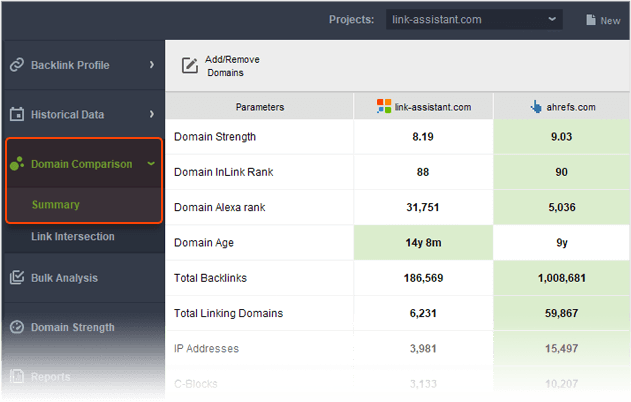
Once the process is finished, you'll see a complete comparison of your and your competitors' domains. And with a myriad of useful metrics provided in the module, you can conduct a brief analysis to see where you have to catch up backlink-wise with the competitors in your niche.
Step 4: Discover link building opportunities
Don't leave the module just yet. Now that you've checked an overall comparison of your and your competitors' domains, jump to Domain Comparison > Link Intersection.
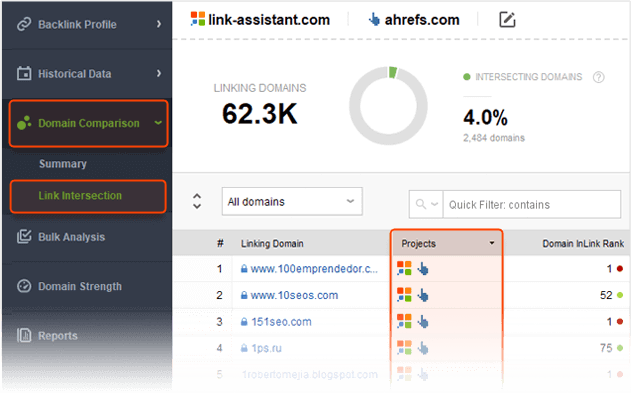
Checking on intersecting links gives you a better understanding of your competitors' link building strategies and lets you find loads of link building opportunities for your site.
Step 5: Spot dangerous backlinks and get rid of them
Before moving on to actual link building, there's one last crucial thing you'll have to do.
Let's spot and eliminate potentially harmful backlinks coming from low-reputation spammy websites.
To do that, go to Backlink Profile > Penalty Risk.
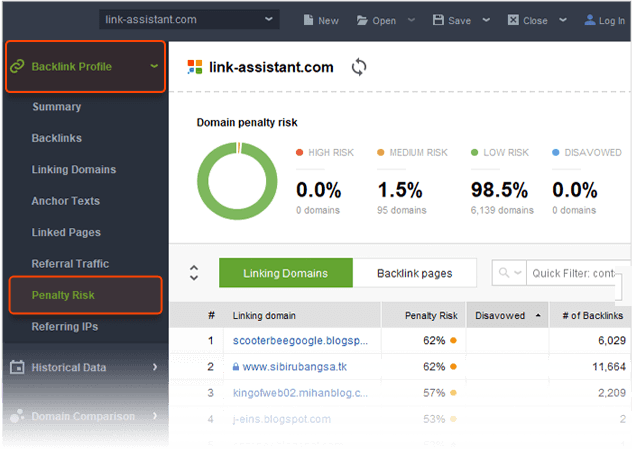
SEO SpyGlass will analyze all your backlinks and assess Penalty Risk for each of them. All you have to do is to collect those harmful links and get rid of them.
- Link Building
If you've completed all the previous steps, your backlink profile should be clean by now. This means that you're fully set to start building backlinks.
A successful link building campaign is made of a nonstop search for link building prospects in the first place, a well-thought strategy, and a proper outreach.
These activities can become extremely time-consuming, but not when you have the right tool at hand. LinkAssistant makes the most part of your future campaigns' routine automated and saves you tons of time.
Here's how you can automate your link building:
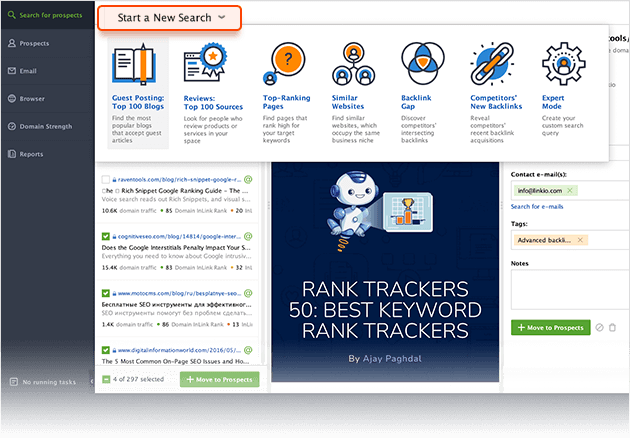
Step 1: Look for prospects
Just before you start building links, let's define what prospecting method better suits your niche.
After you create your first project in LinkAssistant and click Look for Prospects, you'll be asked to choose the preferred prospecting method and specify a few keywords that best describe your business.
Don't worry if you haven't decided which method to choose yet. Under each tab, you'll find a description of a method and in case you don't want to enter keywords yourself, the tool will suggest them.
Once everything is specified, LinkAssistant will search the web and provide you with a list of prospective domains based on your preferences. You'll use this list further in the next step.
Step 2: Analyze prospects and get contact details
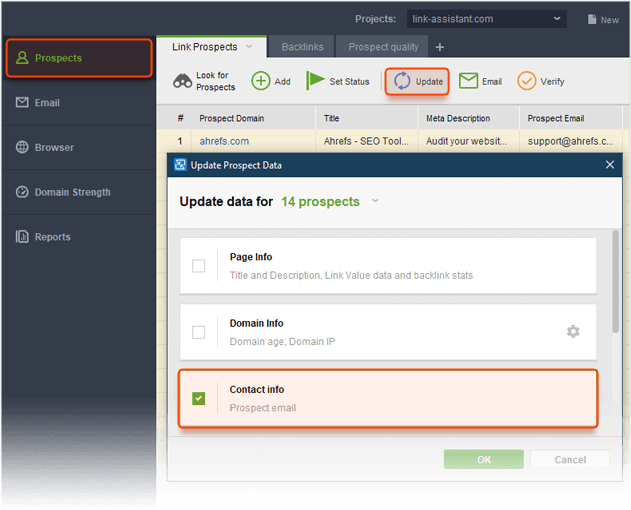
All prospective domains are collected. Now let's analyze what we have.
Based on the metrics you'll see in the tool, filter out the most authoritative domains. Those will be your priority when doing outreach.
But before you do any outreach, you have to collect the contact details of your prospects.
Step 3: Reach out to prospects
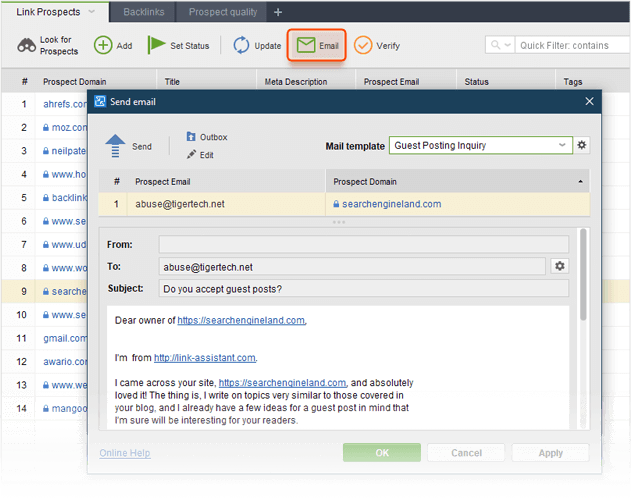
By now, you are supposed to have a full list of prospective domains, from which you'll be trying to acquire backlinks.
Since you already have all contact details, start the outreach right from the app. Just connect your email account to LinkAsssitant and your campaign's correspondence will be stored in one place.
Step 4: Keep your link building organized
So you've contacted a prospect and eventually managed to acquire the coveted backlink. Then the same thing happened with another prospect.
Your backlink profile is growing and you might be thinking of ways to monitor the links pointing to your site and make the whole process more organized.
Among other features, LinkAssistant helps you keep your link building campaigns tidy.
Since all your acquired backlinks are stored in one place, you can easily monitor all of them and timely react to any changes, and if necessary, contact the web owner right from the app.
That's it for the link building part. If you want to take a look at how the above is put to practice check this short video guide.
3. Where do I find help and guidance?
We did our best to walk you through some major SEO PowerSuite features in a short format. Clearly, everything that we want to share with you will never fit into one article.
But no worries — we've got you covered.
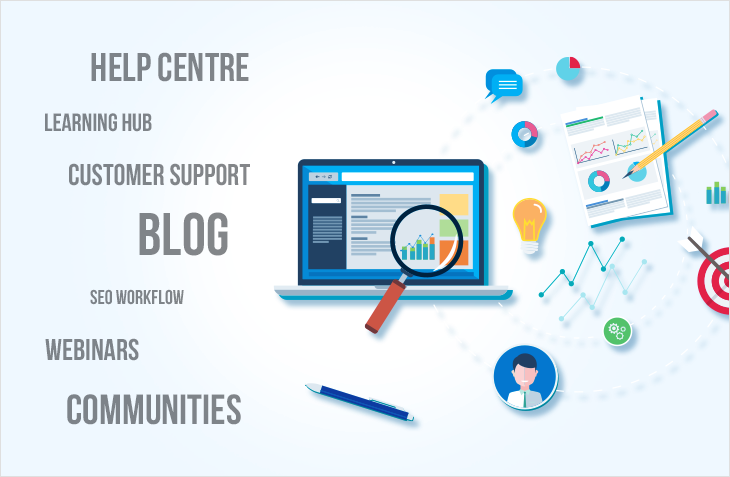
Here's the list of our site's sections where you'll find help if necessary:
1. Learning Hub
Learning Hub is the central spot from where you can navigate to all training materials of the website. Bookmark this page and you'll always have it at hand in case you need additional help on the software.
2. Webinars
Every week, we run live webinars where you can take a guided live tour through SEO PowerSuite. This is a great opportunity to quickly learn the product and address any of your questions directly to the Head of our Customer Support department.
3. Help Centre
When you're looking for instructions about the tools and their features, make sure to visit our Help section. There, you'll find everything you may need in a short and digestible format.
4. Customer Support
We can proudly call our customer support agents the masters of replying to any How-to and Why-is queries. Whenever you feel you're lost in guides and FAQs, or you just feel too lazy to search for the info yourself, feel free to reach our customer support team. Both Live Chat and Tickets are available.
5. SEO Workflow
In a nutshell, SEO Workflow is the extended version of this short guide. If you're ready to plunge into more details and make your SEO campaign lit, jump to the workflow guide without any further ado and use it as your personal handbook for your site's SEO.
6. Blog
SEO PowerSuite's regularly updated blog is home to hundreds of in-depth, actionable articles, SEO guides, and industry news. It's a very good source for educating yourself and honing your SEO knowledge.
7. Communities
We are where your business is. Join hundreds of SEO discussions, explore new SEO strategies and communicate with SEO experts in our private Facebook group.
4. What's next?
That's all for today. We hope this material helped you get to know SEO PowerSuite better.
During this week, you'll be receiving more guidance and helpful materials from us via email, so make sure to whitelist us by adding us to your address book in your email client. Since some of the email providers are extremely harsh in filtering newsletters, this will ensure we always hit your inbox.
Till tomorrow and let it be a rocking SEO.
Create a winning SEO campaign with SEO PowerSuite:
- Find your target keywords
- Check current visibility in search engines
- Detect on-site issues and fix them
- Optimize your pages' content
- Get rid of harmful links
- Build new quality backlinks